Showing posts with label Wayward Girls Crafts. Show all posts

Wednesday, December 18, 2013

Faux tin ornaments

Diana, Mom to the Wayward Girls, here! When the girls were young, we wanted to make December a magical and fun month for them. I collected children's Christmas stories, activities, recipes, and crafts all year long. I made a notebook for all my ideas and consulted it often. Each year, I got a big calendar on which we tracked and planned our activities. I tried to have a craft or activity plus a Christmas story each night. We kept some of our treats and crafts we made; others we gave away as service to others.

Here's one of our favorites: Faux Tin Ornaments.

Supplies-
  • Aluminum trays or pans.
  • Note: I bought a very inexpensive one that was really too thin. Try to get one trays that are heavier than heavy duty aluminum foil. Because my tray was so thin, the ornaments bent too easily when handled. This doesn't happen so easily with heavier foil. We still have many of the ornaments the girls made more than 10 years ago.
  • Cookie cutters or Christmas object shaped stencils.
  • Ball point pens, scissors, pen or nail
  • Ribbon

Find a pattern shape. You can use cookie cutters, print out shapes or freehand.


Trace shapes on the tray with a ball point pen. The ink will not show up. You can burnish out creases you may find in the tray, as I'm doing with the scissor handles here.


Cut out the shape. Lay the shape on a magazine, stack of paper, or corrugated cardboard. Use the ball point pen to draw embellishments on the ornament. (This makes the lines softer and broader.) You can draw on both sides to add texture. This will make the ornaments look embossed.

Embellishment ideas: The lines on the angel's wings, and the dots were drawn on one side of the angel, and the heart was drawn on the back.

The star has designs on both sides as well as small holes that will allow light to shine through.

If desired, an adult or older child can carefully punch holes through the ornament for a new look. You could also use permanent markers to add color to the ornament.

Finally, punch a hole for a ribbon or ornament hanger.

Wednesday, November 20, 2013

High chair makeover & tips for sewing with oil cloth

Brave Brooke from Wayward Girls' Crafts here! A friend of ours gave us a high chair. I didn't love the cushion so of course what did I do? I recovered it! I chose orange with white polka dots oil cloth. I used the same techniques that I did on this tutorial. Here are some pictures.

Before


My husband said it looked like a sour patch kid. 

After- it looks a little wonky because of how she slouches when she eats


Also I wanted to add a couple tips for sewing with oil cloth:

  • Use a heavier duty needle. Size 16.
  • If you're having problems with the oilcloth sticking to your presser foot use clear tape on the underside. This can also help with sewing vinyl. 
  • Make sure you're sewing the right thing. When you make mistakes and have to pick it out it leaves holes.
  • If your oilcloth is creased I saw some suggestions to leave it in a warm room. My husband was kind enough to use my blow dryer and to warm up the pieces and convince them to flatten out.
  • Oilcloth cannot be washed so make sure you avoid leaving the backside open to get dirty from little hands. 
Here she is enjoying it (please excuse the quality of the phone picture!).


Wednesday, October 16, 2013

Pumpkin carving ideas

Wayward Girls' Crafts here! The Wayward girls have a strong tradition of carving pumpkins. After lining the dining room table with newspaper, we'd all get to work gutting and carving! We've shared some of our pumpkin designs and thought we'd give you a few ideas since it's that time again!

Jasmine, Brooke and her husband carved these bad boys as an homage to Harry Potter.

 
A dementor and patronus, the three brothers, and a witch.  

Jaime and her husband are also HP fans. Here's what her husband carved. 
Photobucket
Voldy!

Jordan's son (5 at the time) designed and husband cut this cutie!


Brooke's little girl could be found playing around:


Have fun carving!

Wednesday, September 18, 2013

Fall craft ideas!

Wayward Girls' Crafts here! Fall officially begins this weekend. Are you in full fall mode yet? If not, we've got some great autumn decor ideas to help you get that way!

Brooke made this beautiful fall wreath and has tons of great tips for making wreaths.


Jordan has a great harvest printable. We love this quote!


Mom made these table runners for fall. The second one looks great on Jaime's tablescape!


Jasmine made these fun Mod Podge Halloween vases. So cute!


Jaime made this fall leaves canvas. Can you believe it was only $1?!


 Now are we ready to decorate?! Get to it!

Wednesday, August 21, 2013

State Canvas Art

Just Jaime of Wayward Girls' Crafts here! So I've seen a lot of state-loving on Pinterest lately and the bug has bitten me! I love my home state, North Carolina, and am sad I can't live there right now. I thought a North Carolina print would be perfect for my home, but you can make State Canvas Art with any state or country. This is what I created:


First let's start with the materials:


1 Stretched Canvas (I used 11 x 14)
Three different colors of acrylic paint (red paint is not pictured)
Paint Brush
Scissors
Cardstock and Printer (not pictured)


I started by giving my canvas 2 coats of blue acrylic paint (Folk Art 2555 Deep Ocean Blue):


I tried to make sure the paint was even, especially in the middle where the state would be seen. The first coat I went across my canvas. For the second I went up and down. 


 Then this happened....I couldn't have done this if I tried! My scissors just landed this way!


 Next I printed out a map of my state on cardstock. I measured it to make sure it would fit well on my canvas.


I took my scissors and got to cutting. I decided to skip trying to cut out the island chain on the coast of my state (The Outerbanks) and left them on there. I like the shape better.  At this point I started remembering my 4th grade state project, where I used salt dough to make the Ol' North State. Good times. Back to the project!


 I applied removable adhesive to the back of my cardstock and stuck it on my dry canvas (I let it dry overnight just to be sure). 


I used a contrasting paint color (Folk Art 2561 Steel Gray) and started in the middle and painted OUT from my state. I didn't want to try to push the paint against the edges and have the cardstock curl or the paint get underneath. 


I gave the canvas two coats but didn't wait until the second coat fully dried before removing the state.


 I wanted to make sure it would come up easily.  I used tweezers to pull the side up so I wouldn't hurt the paint. It looked AWESOME. So awesome I forgot to take a picture. But I decided to put the final touch, a little heart over my home town.


I cut out a stencil from cardstock of a heart and dabbed a bit of red paint in the heart. Voila! I love the results. This project was really easy, a little messy and pretty cheap.

What colors would you use?

This post was originally featured on She Wears Flowers. 

Wednesday, July 17, 2013

Refreshing Summertime Wreath

Brave Brooke here from Wayward Girls' Crafts! 
Here's me being Wayward and Crafty :)
Today I'm going to do a quick tutorial that I saw here and decided to try and of course tweak! I added a plaque and used happy colors!
The Refreshing Summertime Wreath!
What you need: 12" Styrofoam wreath form Ruler Scissors 18 yards of 7/8" grosgrain ribbon Raffia 1. Cut the ribbon into 14 inch sections. I used a long ruler and put a piece of tape on the 14" mark to make it easy to remember.
2. Tie the ribbon onto the wreath and scoot them close together. 3. Tie the raffia on to wreath to hang it and set aside.
The Welcome Plaque
What you will need: White acrylic paint A wooden plaque paint brush letters decoupage (to seal the plaque)
1. Paint plaque white and let dry. I rubbed mine with a bit of sand paper after to give it a weathered look. 2. Glue letters onto plaque 3. Seal with decoupage. 4. To apply it to the wreath I hot glued it like crazy to make it stay.
Voila!
Check out some of my other recent crafts:
Nursing Cover/Car Seat Canopy
Thanks so much girls for letting us guest post today!!

Wednesday, June 19, 2013

Fourth of July printable word art

Jordan from Wayward Girls' Crafts here! Since the Wayward Girls' Founding Father (aka DAD) shares a name with one of our country's Founding Fathers, the Wayward Girls have been brought up with a love of our homeland.

To celebrate the Fourth of July, I decided to try my hand at word art:


To print this free printable, click on the picture above. (You might want to open the image in a new tab or window.) Make sure that the image is full-size: it should be bigger than your screen. If it isn't full size, click on it to blow it up. Then, from the menu of your browser, select print preview. The image is designed to print at 7"x9.1" (I had it at 8x10 but it was giving my printing program troubles still. Plus you can use a mat this way.) Make sure your page orientation is set to landscape and scale the picture to fit the page.


(Or you can fiddle with the settings to get it to print however you like.)

I think the "of the" might be my favorite part. The font looks like it's from a dollar bill!

How are you planning to celebrate (or decorate for) the Fourth of July? Or what's your favorite patriotic holiday?

Wednesday, May 15, 2013

Dyed rice mosaic

Jasmine from Wayward Girls' Crafts here! I made some dyed rice, but once it was done, I had no idea what to do with it. The first idea didn't really work so I didn't do anything with that. The second idea was a flower. After I drew it on the canvas, I decided to go for it.
I used a jar lid for the center and free handed the petals. I figured the pencil lines wouldn't show since there would be rice covering it.
The first area I decided to cover was the center. I poured some Tacky glue on the circle and spread it out with my finger. I didn't have a paint brush so I used the next best thing ;) I made sure there was a thick enough layer of glue so the rice could settle in it and not fall off easily. Then I poured a handful of rice onto the glue. I tapped the rice down so it stuck to the glue.
After letting it set up for a few seconds, I took the canvas and tipped it so the excess rice would fall off. I poured the excess onto a sheet of paper so I could put the extra rice back in the baggy easily.
Then, I covered the background using the same technique. Instead of filling in the whole petal, I decided to let some white show and give the picture more texture (as if it didn't have any before!) Also, I was just lazy. I only put a thick line of glue on the outline of the petals and added pink. I then added those line thingy things on flowers (technical term, I know.) I used a thicker line of glue and made it slightly more narrow going away from the center. I tapped and tipped again and set it aside to dry.
It didn't take too long to set up and dry. Now it's all ready to find a home somewhere in my apartment!

Wednesday, April 17, 2013

"Heaven Sent" Baby Shower Invitations

Just Jaime from Wayward Girls' Crafts here! I thought I'd give you guys a peek into my creative process today from when I planned a baby shower for my Wayward sister, Brave Brooke.

I made three Pinterest inspiration boards for Brooke to choose from a few months in advance. She chose our "Heaven Sent/Angelic Theme" which I loved too =)

From there I started thinking about how I wanted to do the invites. I found this image on Pinterest:

Isn't it adorable? I can't find a photo credit for it ANYWHERE so I can't give any credit for it, but I wish I could.

I wanted to use baby feet as a "v" in my invite. So I decided to make the invites saying "Heaven Sent" with the "v" being baby feet. I went to Joann and TOTALLY lucked out. They had these stamps there, calling my name:
Photobucket


The cardstock was gorgeous, you can't tell in this picture, but check it out here. I also used some of this because the store ran out of the gemstone.

The hardest part was the computer part--I printed the actual invitation on the opposite side of the cardstock. Making the size right proved difficult for my computer to comprehend. Eventually I tricked it by using skinnier paper but not telling it.

How would you use baby feet?


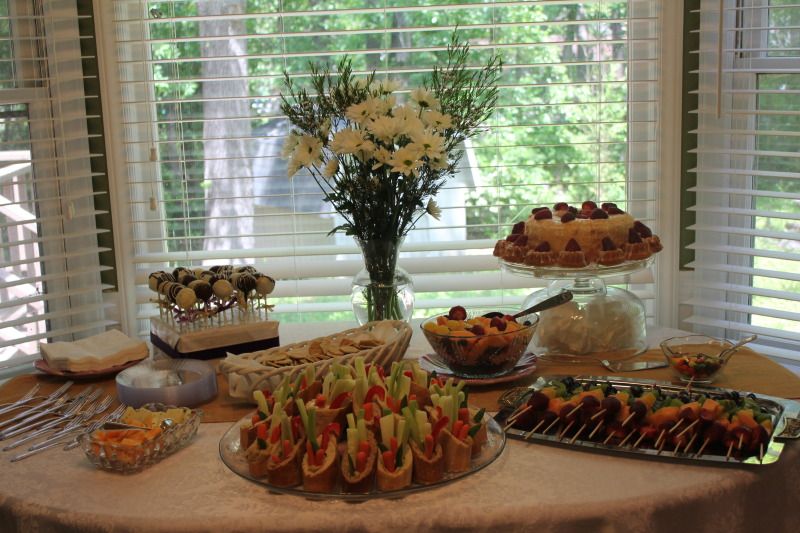
The shower was a huge success! Check out the decor, food and games.