Friday, December 19, 2014

Make a Nativity

Kate here again. I know you are used to me posting recipes, but I wanted to share one of our Christmas traditions with you.
I like each of my children to have their own nativity to keep in their rooms during the Christmas season.
IMG_1695
We've made the people from toilet paper tubes
IMG_1696 and cut up tree branches in years past.
I realized that my youngest children have never made a nativity so on Wednesday I pulled out the fabric scraps and the glue gun.
IMG_1667
 
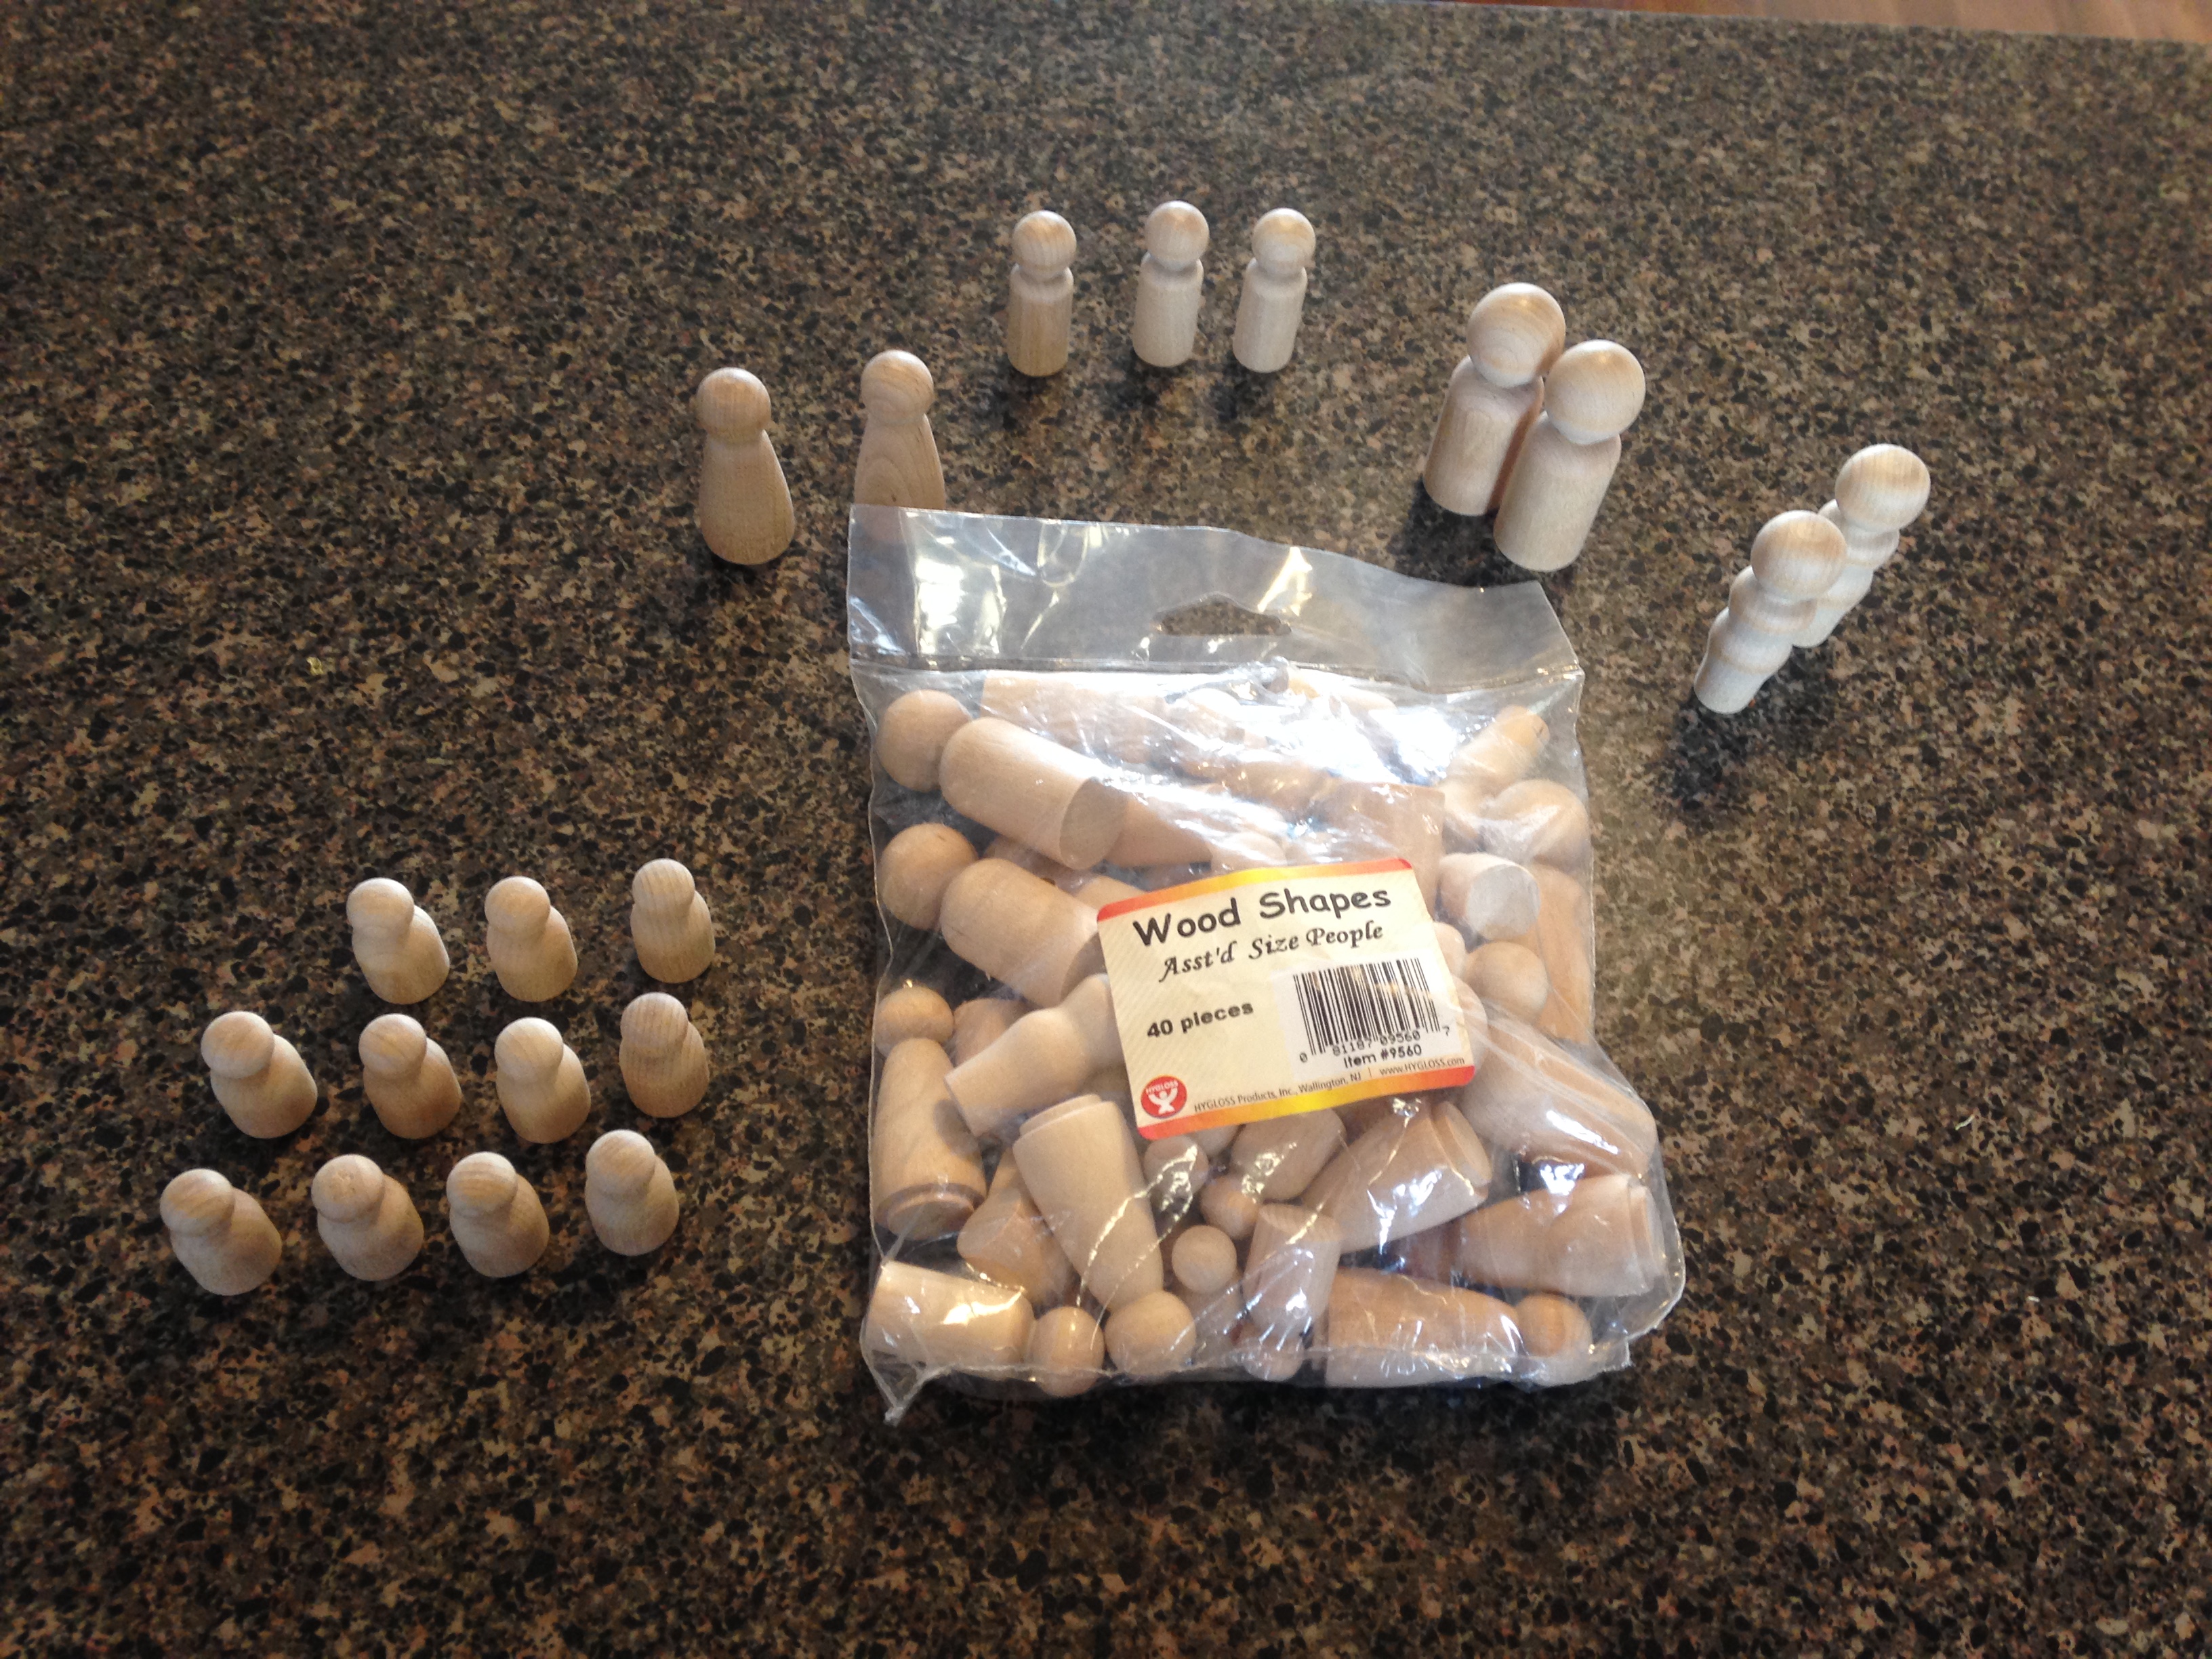
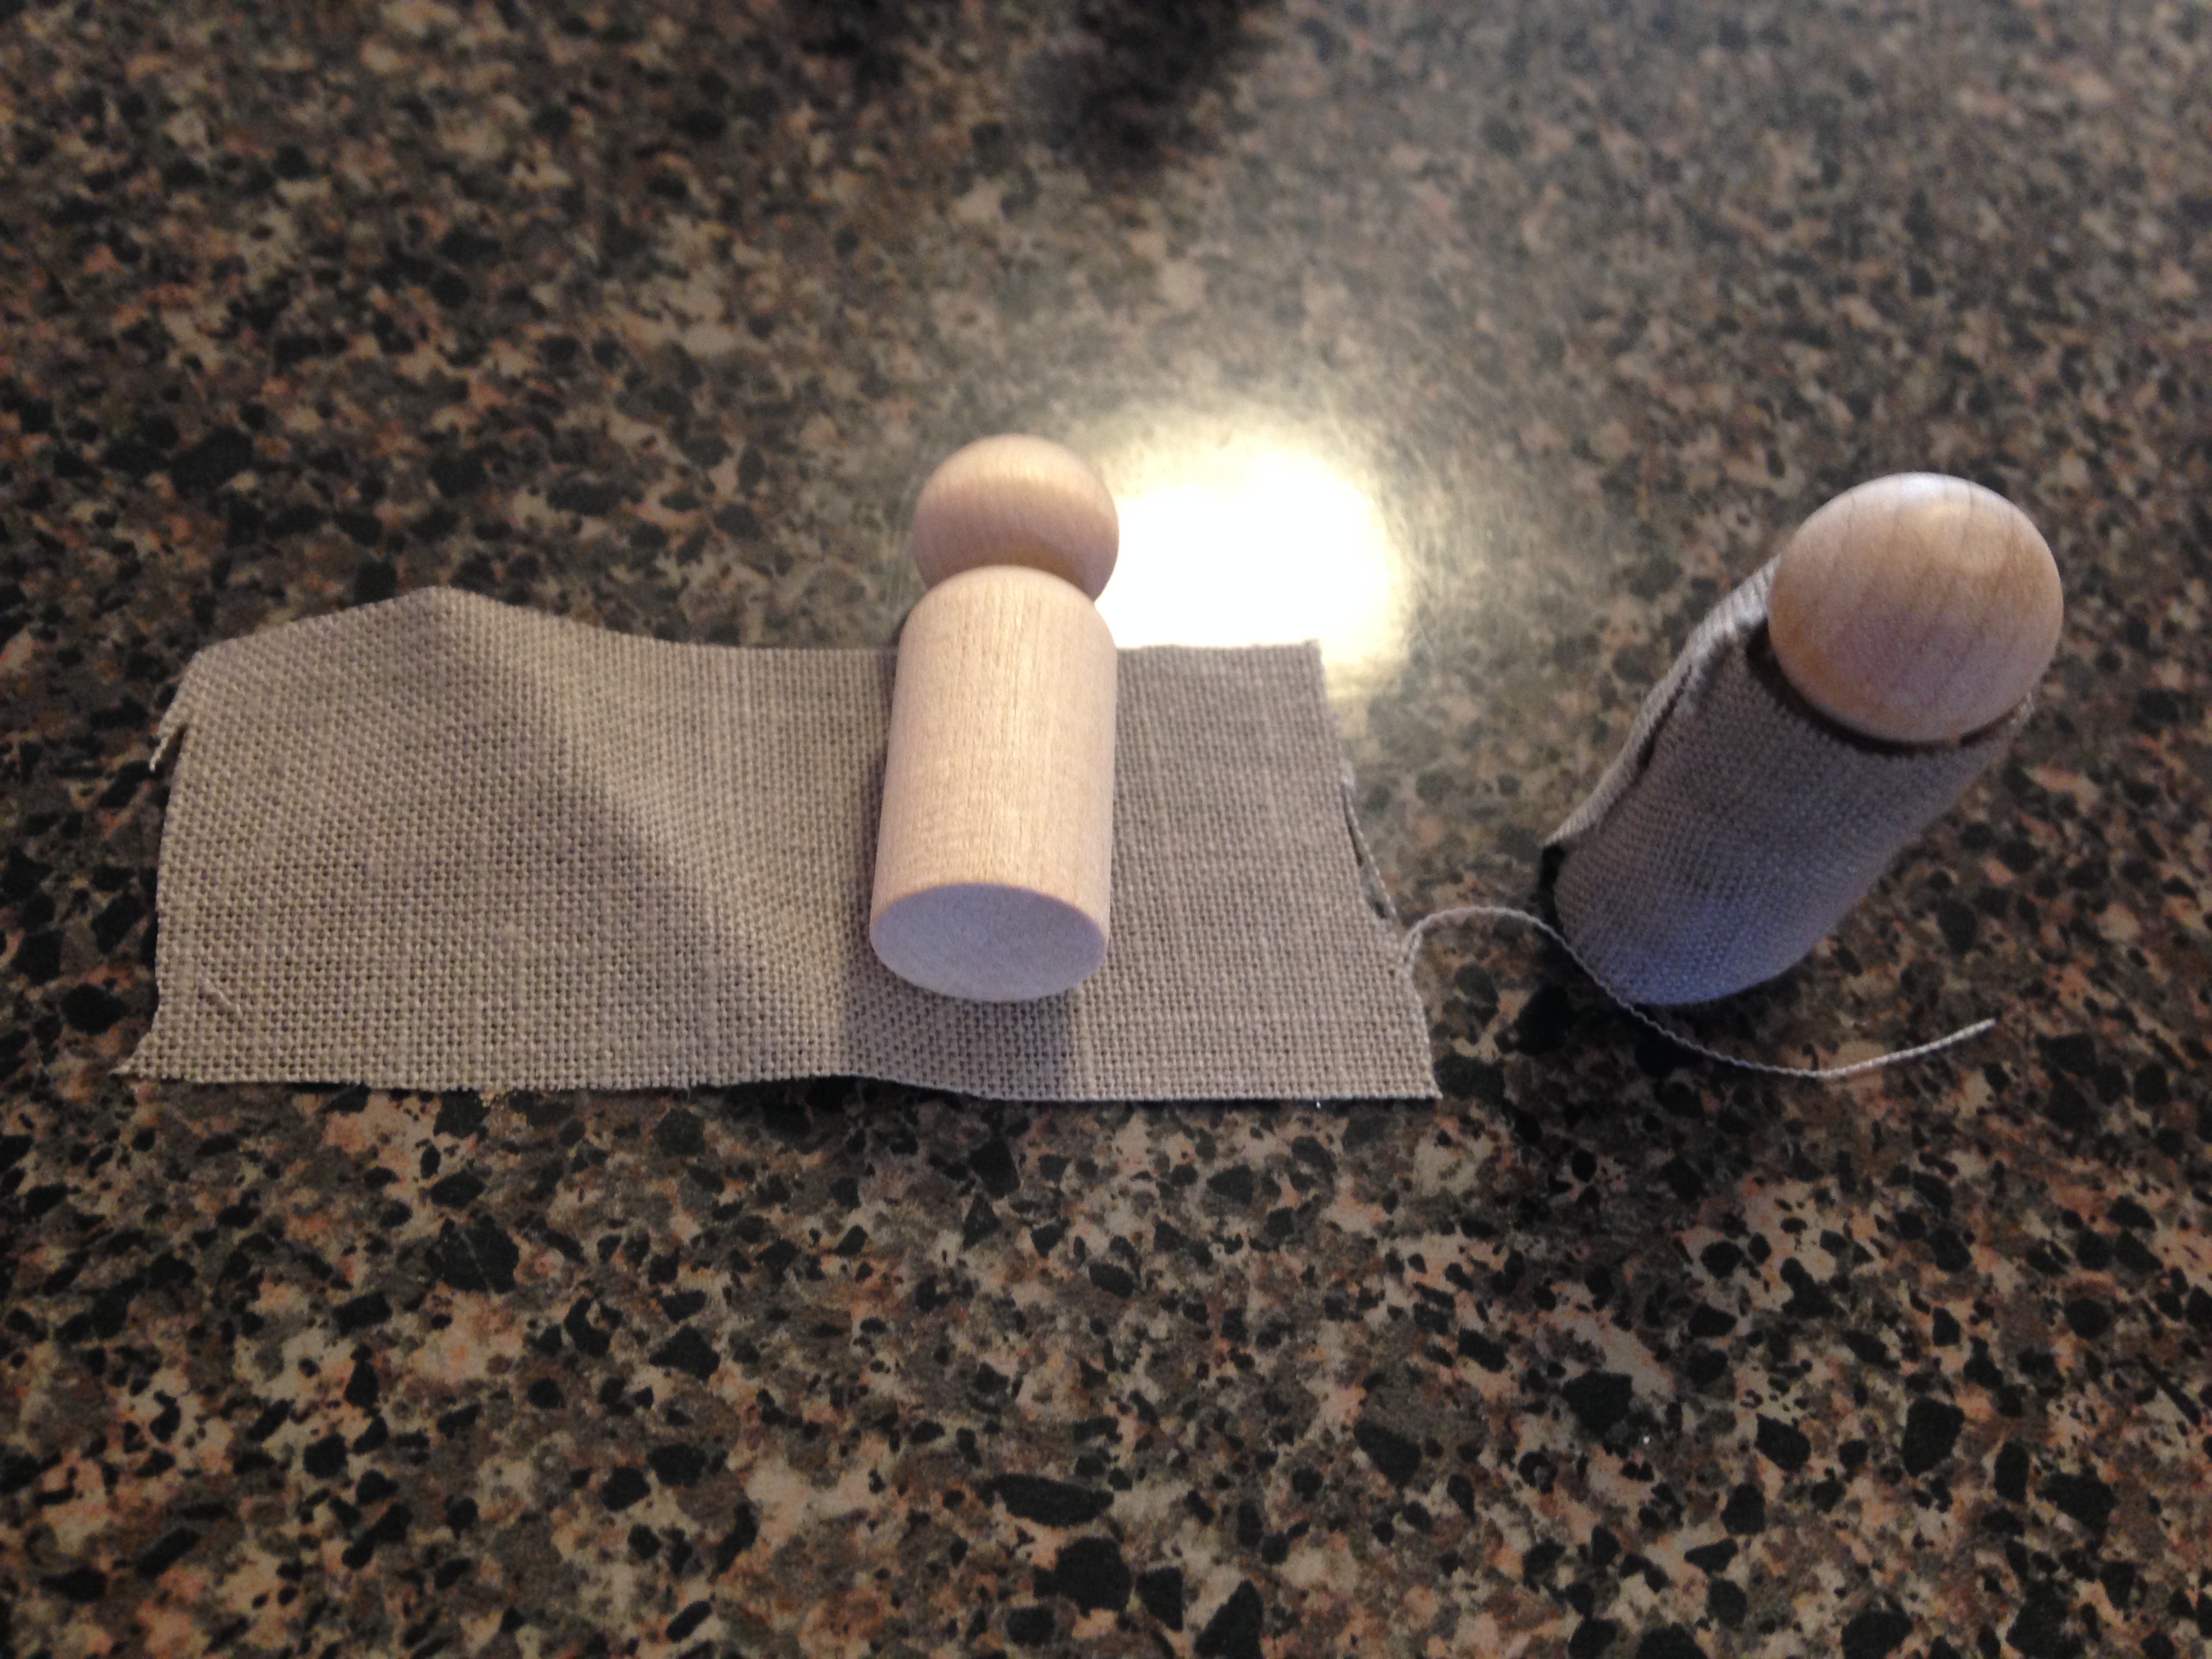
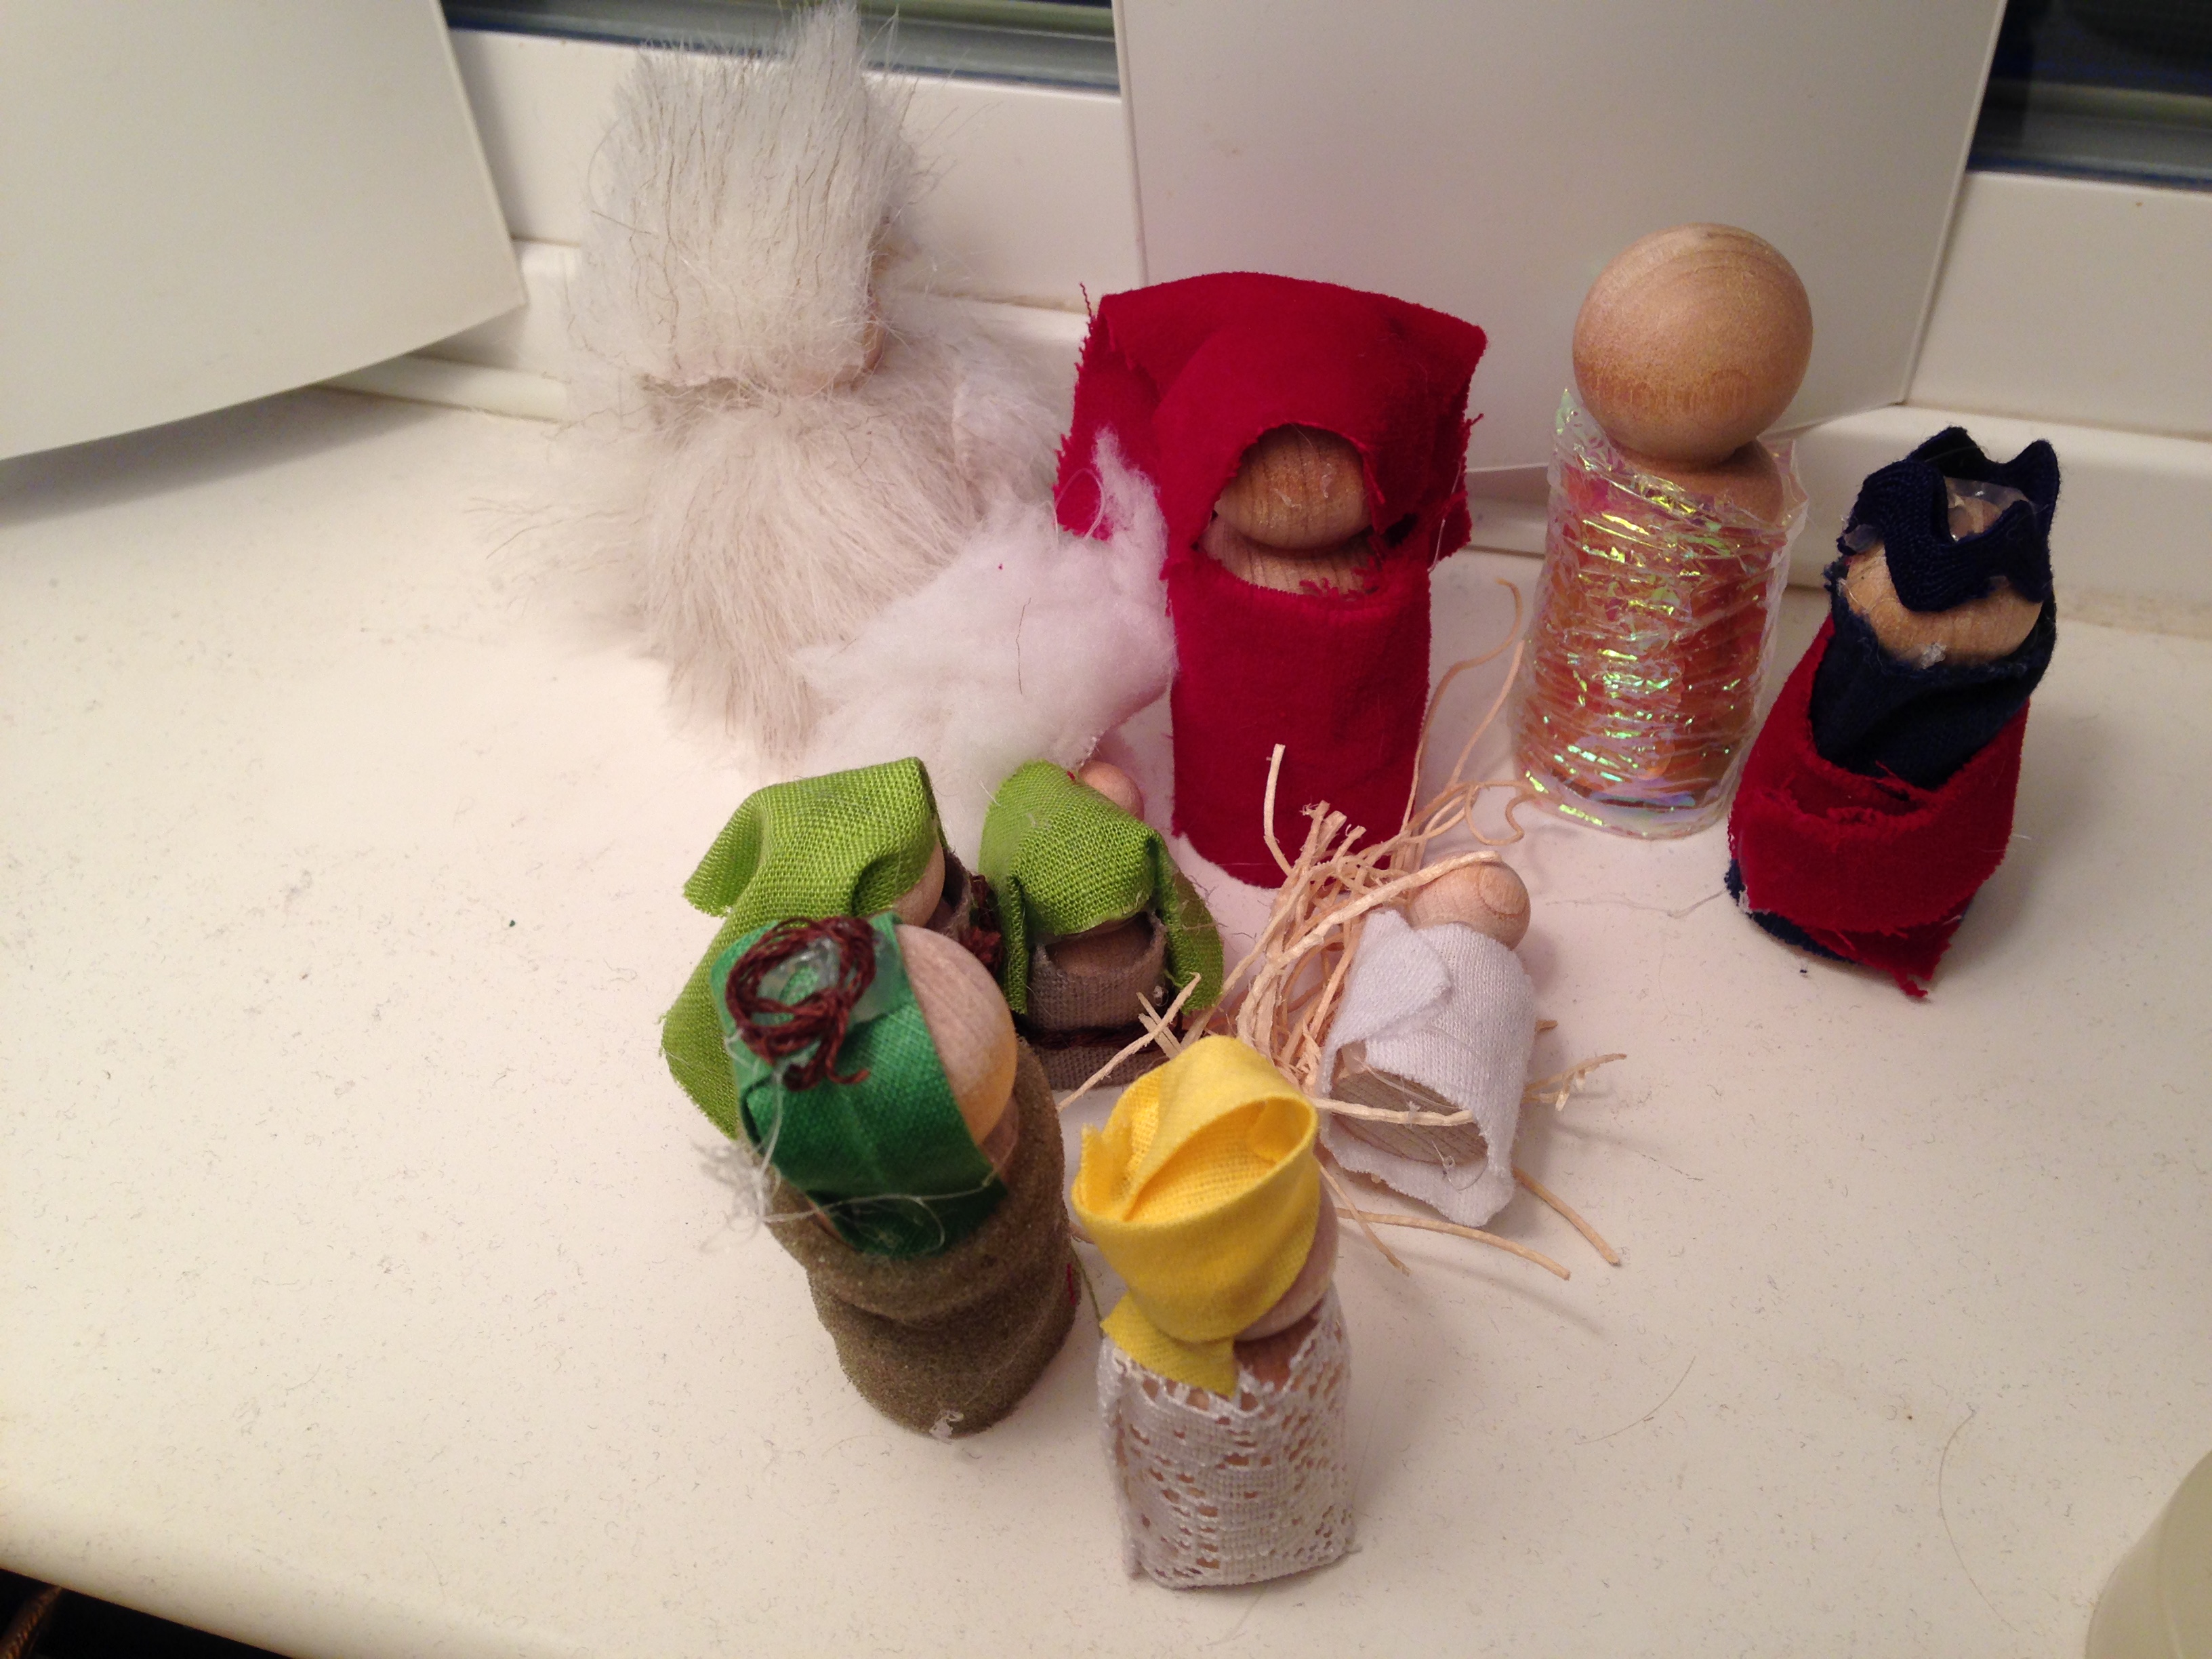
This year I actually purchased some wood doll bodies to use. It came in a package of assorted shapes and sizes.
IMG_1668
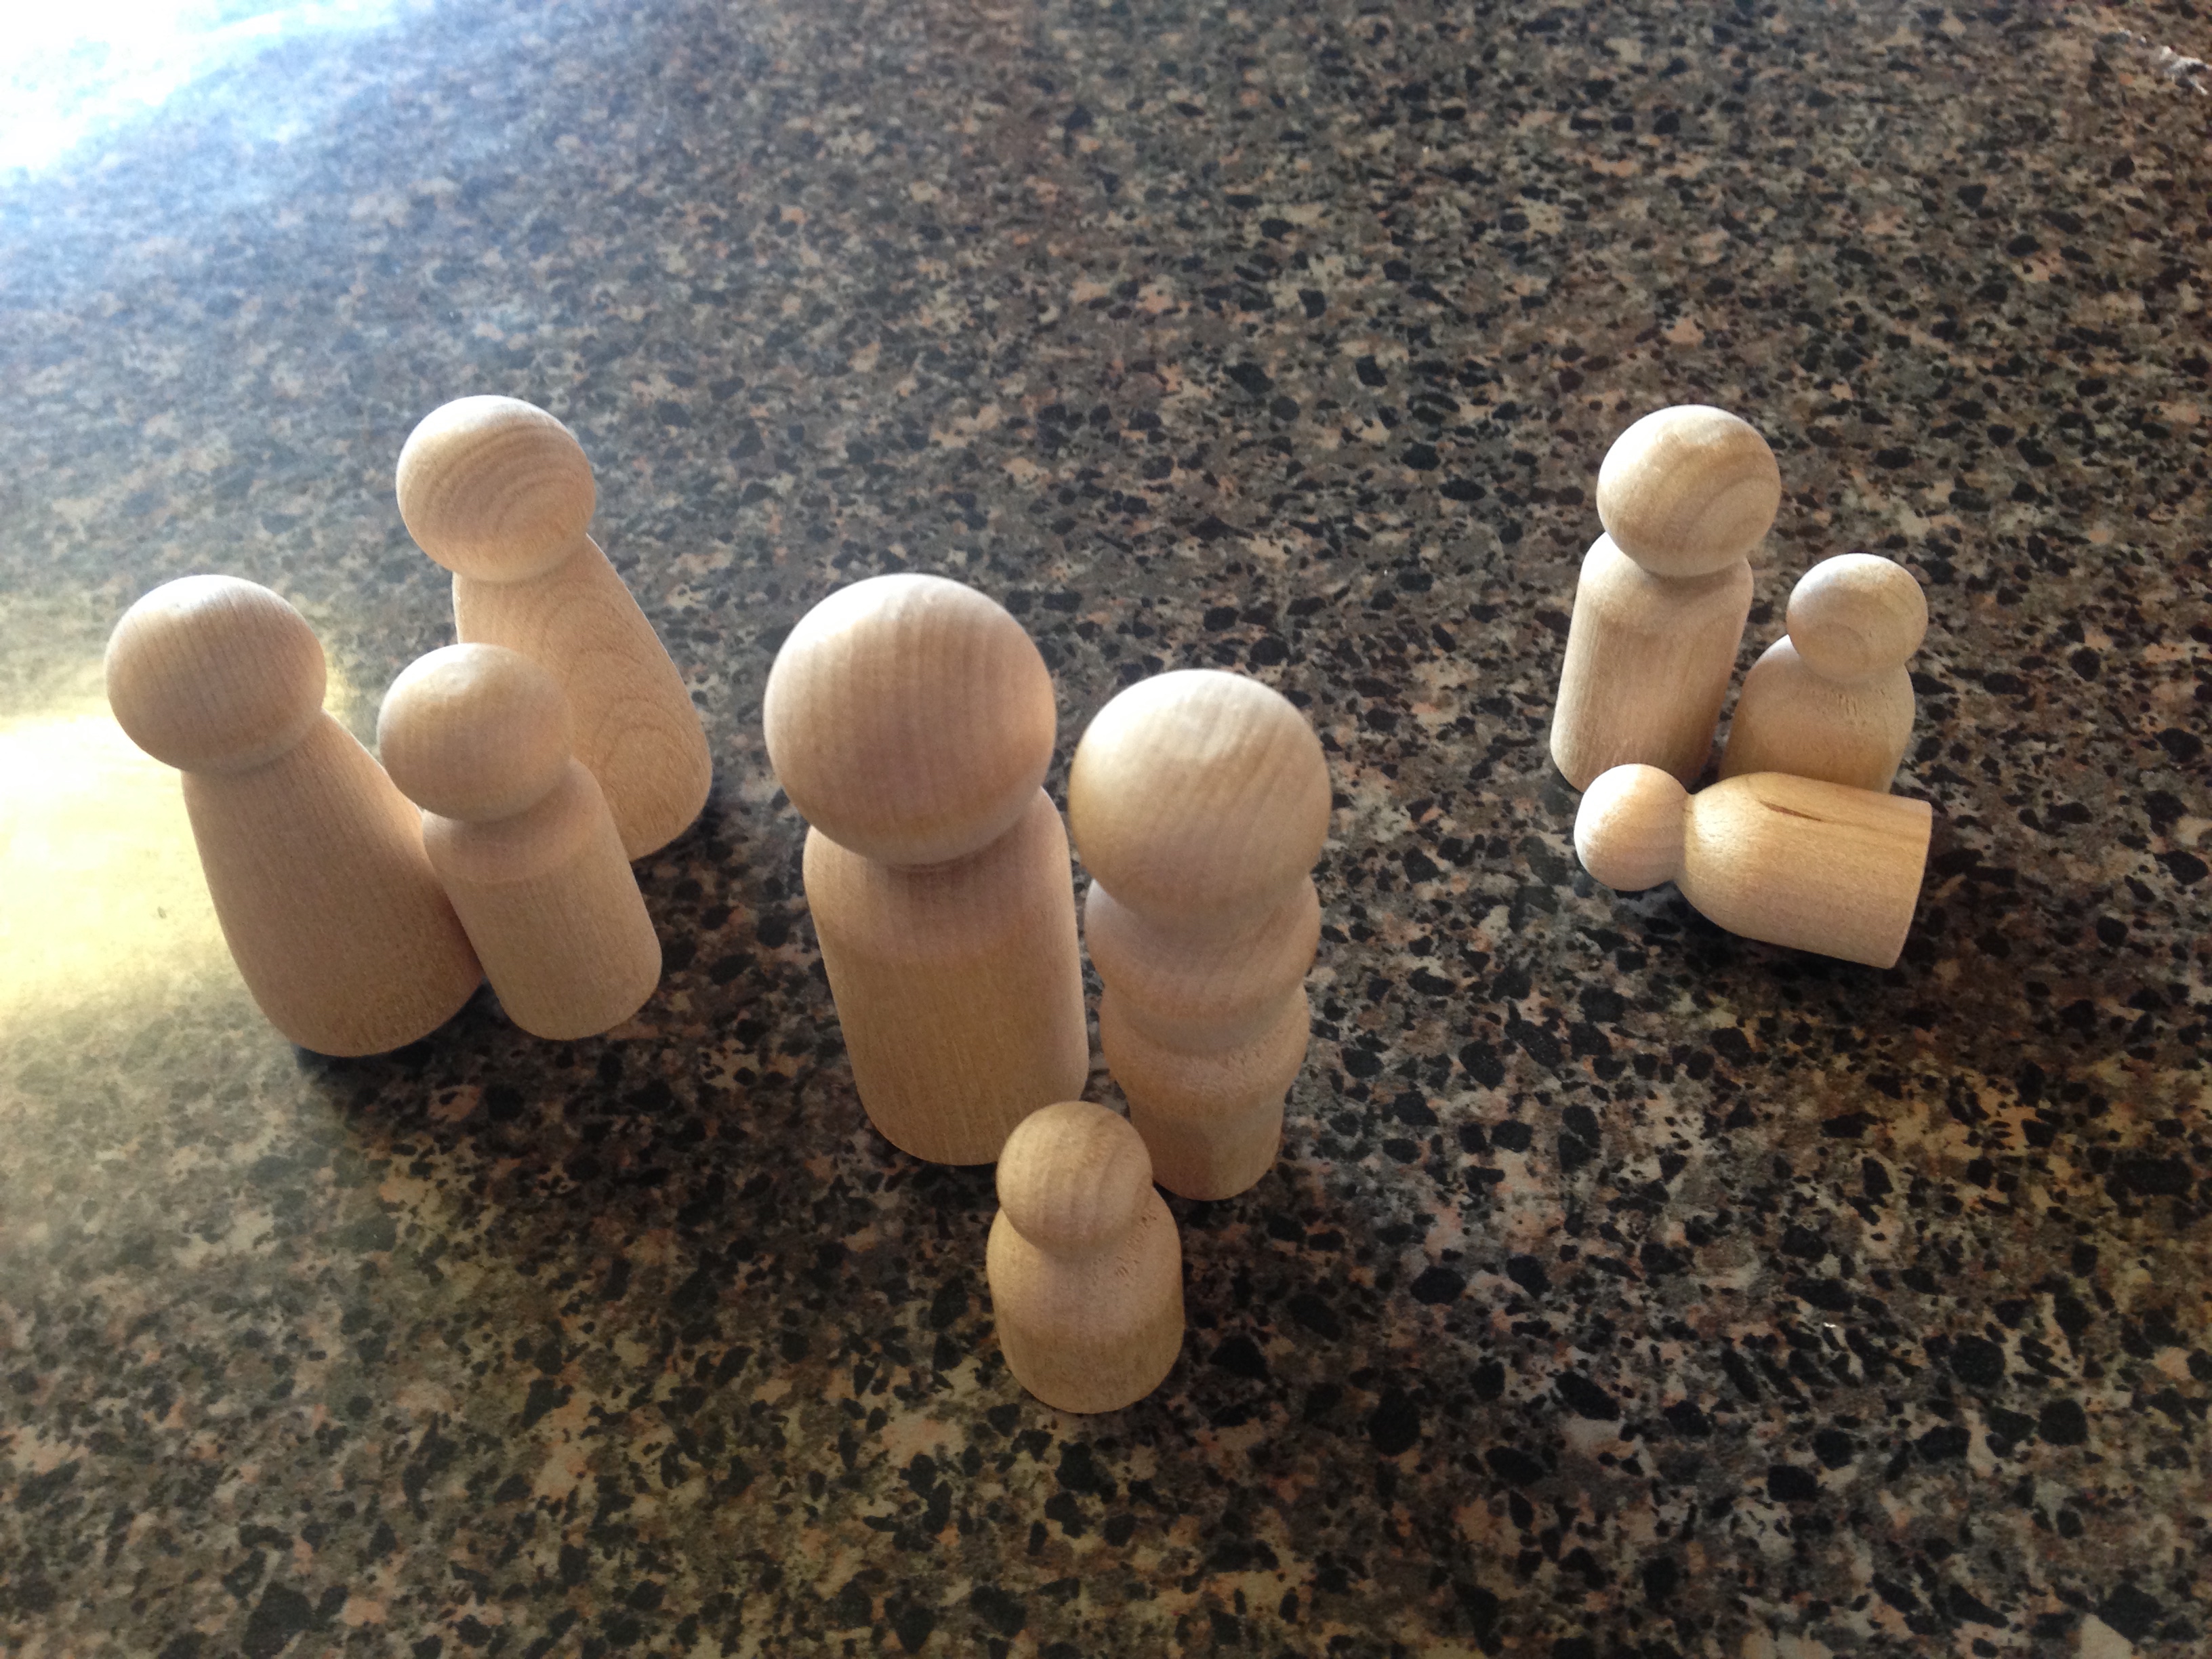
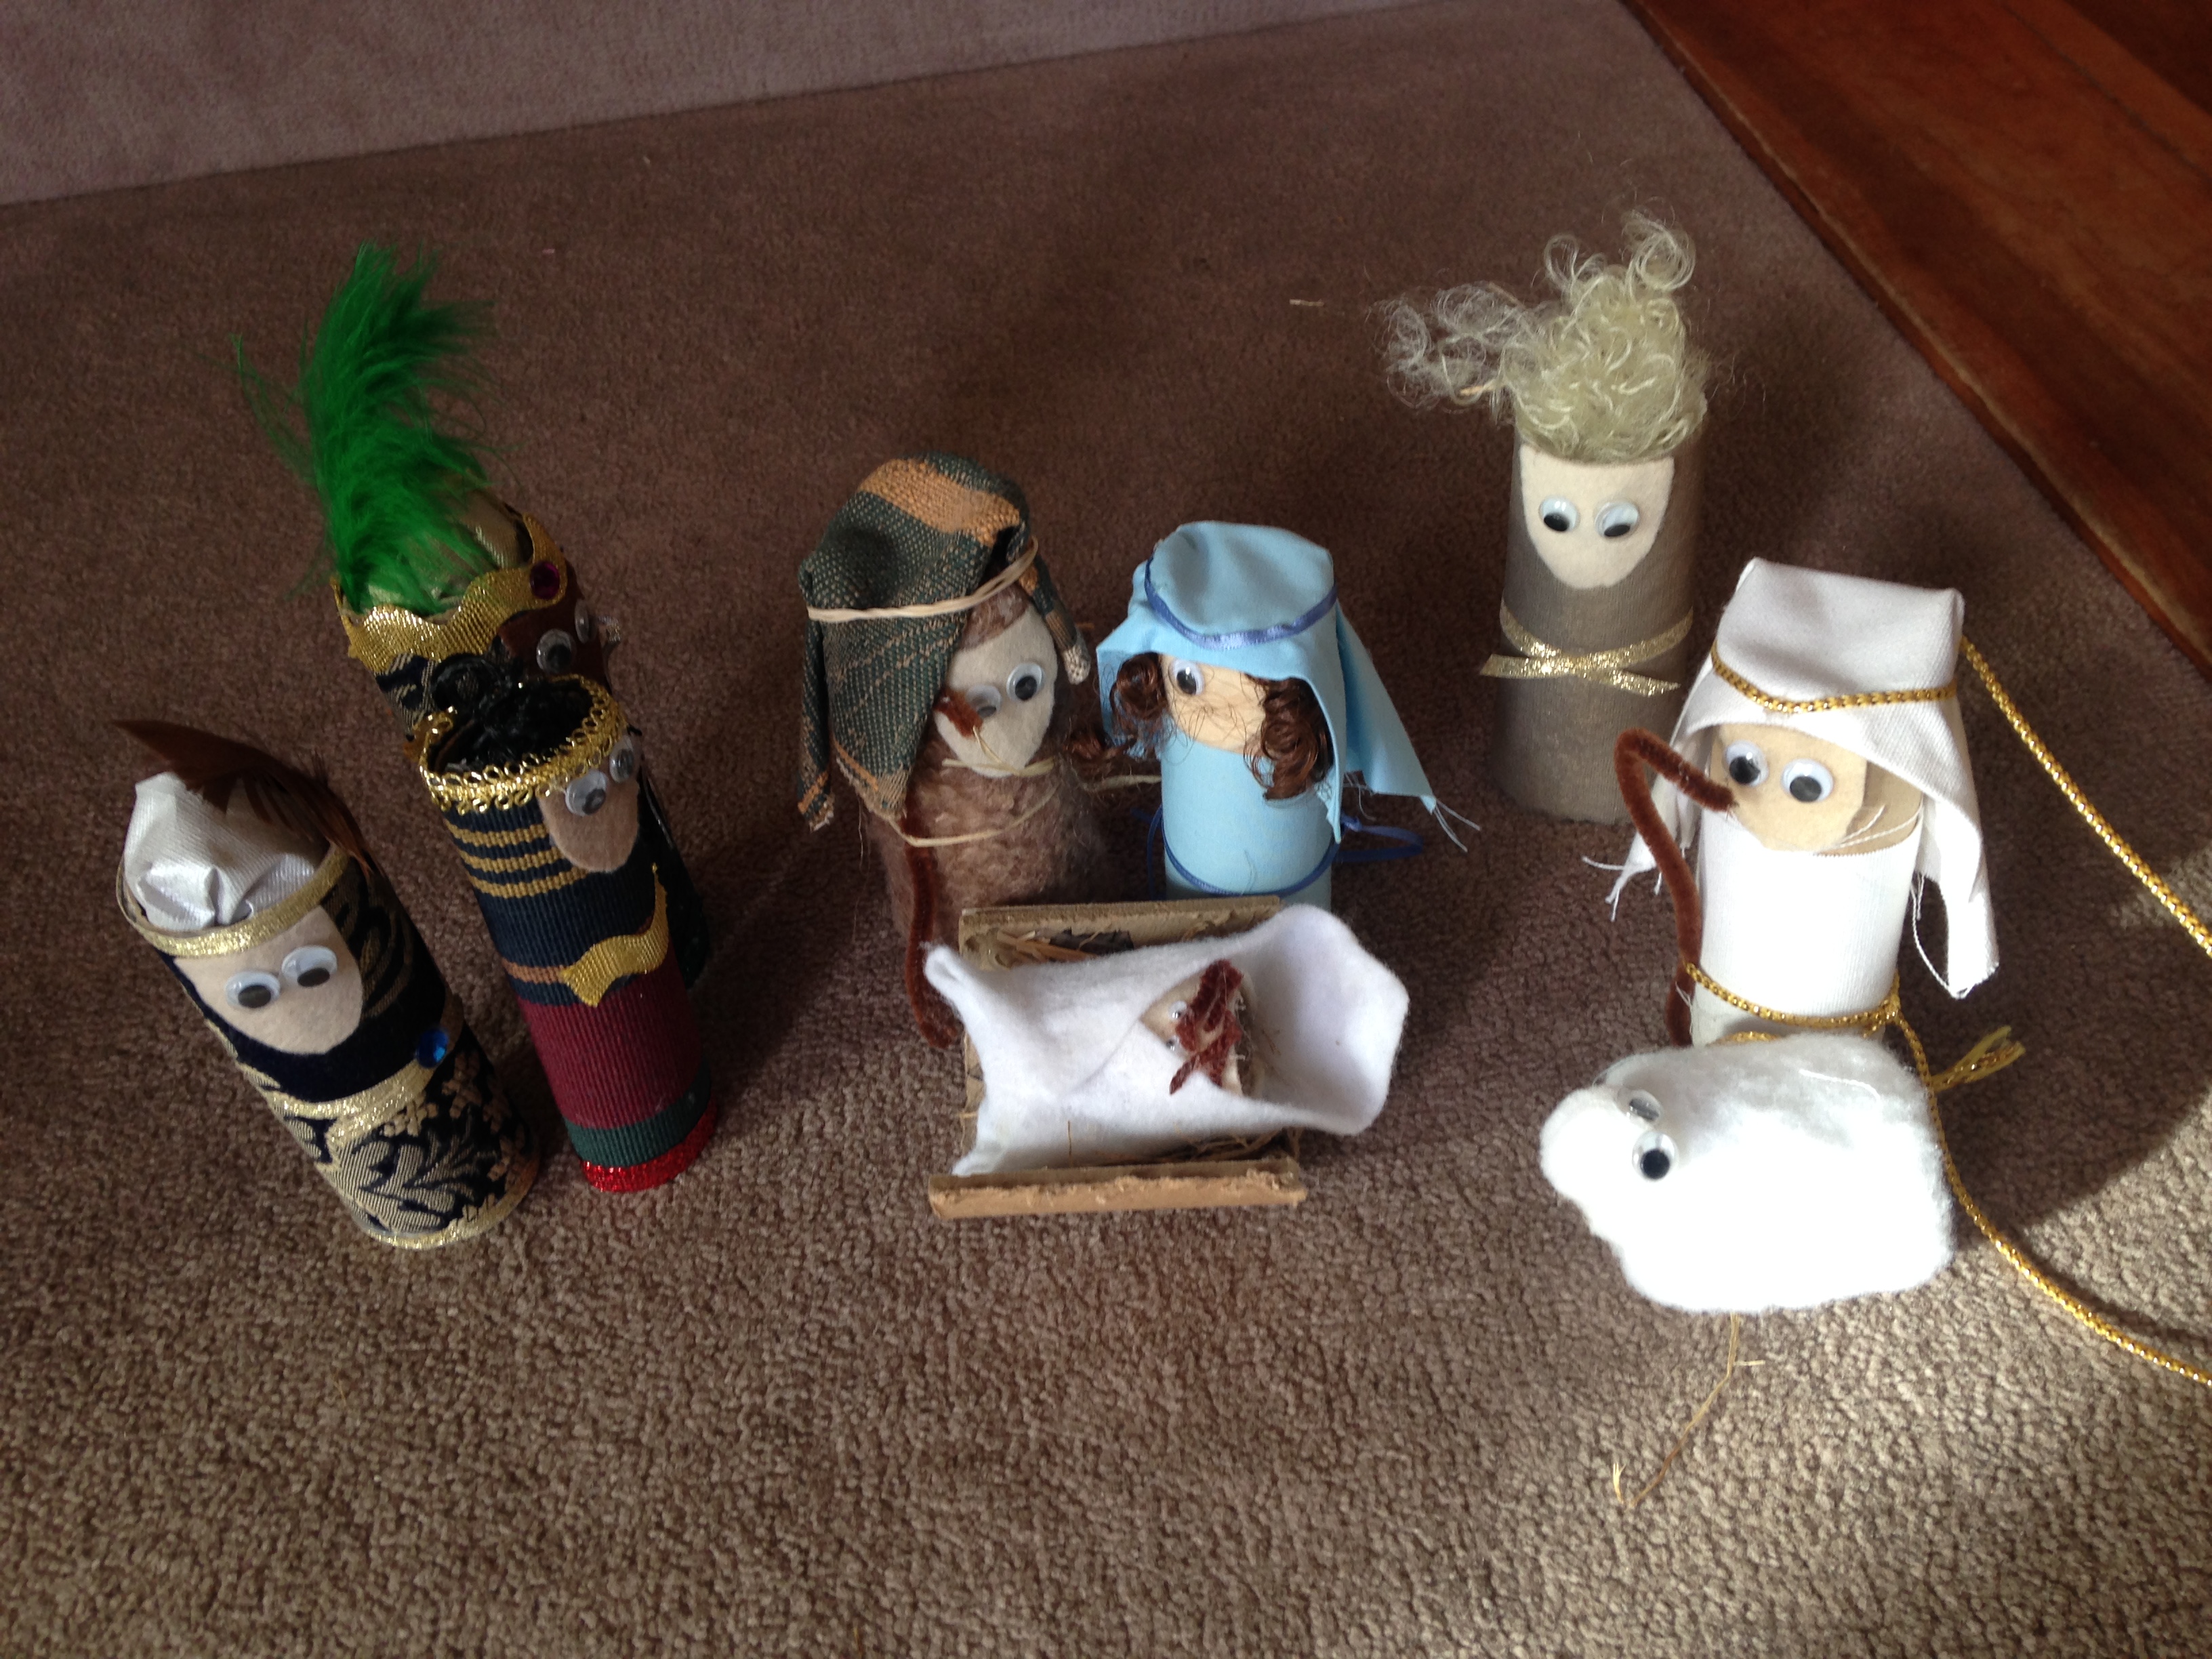
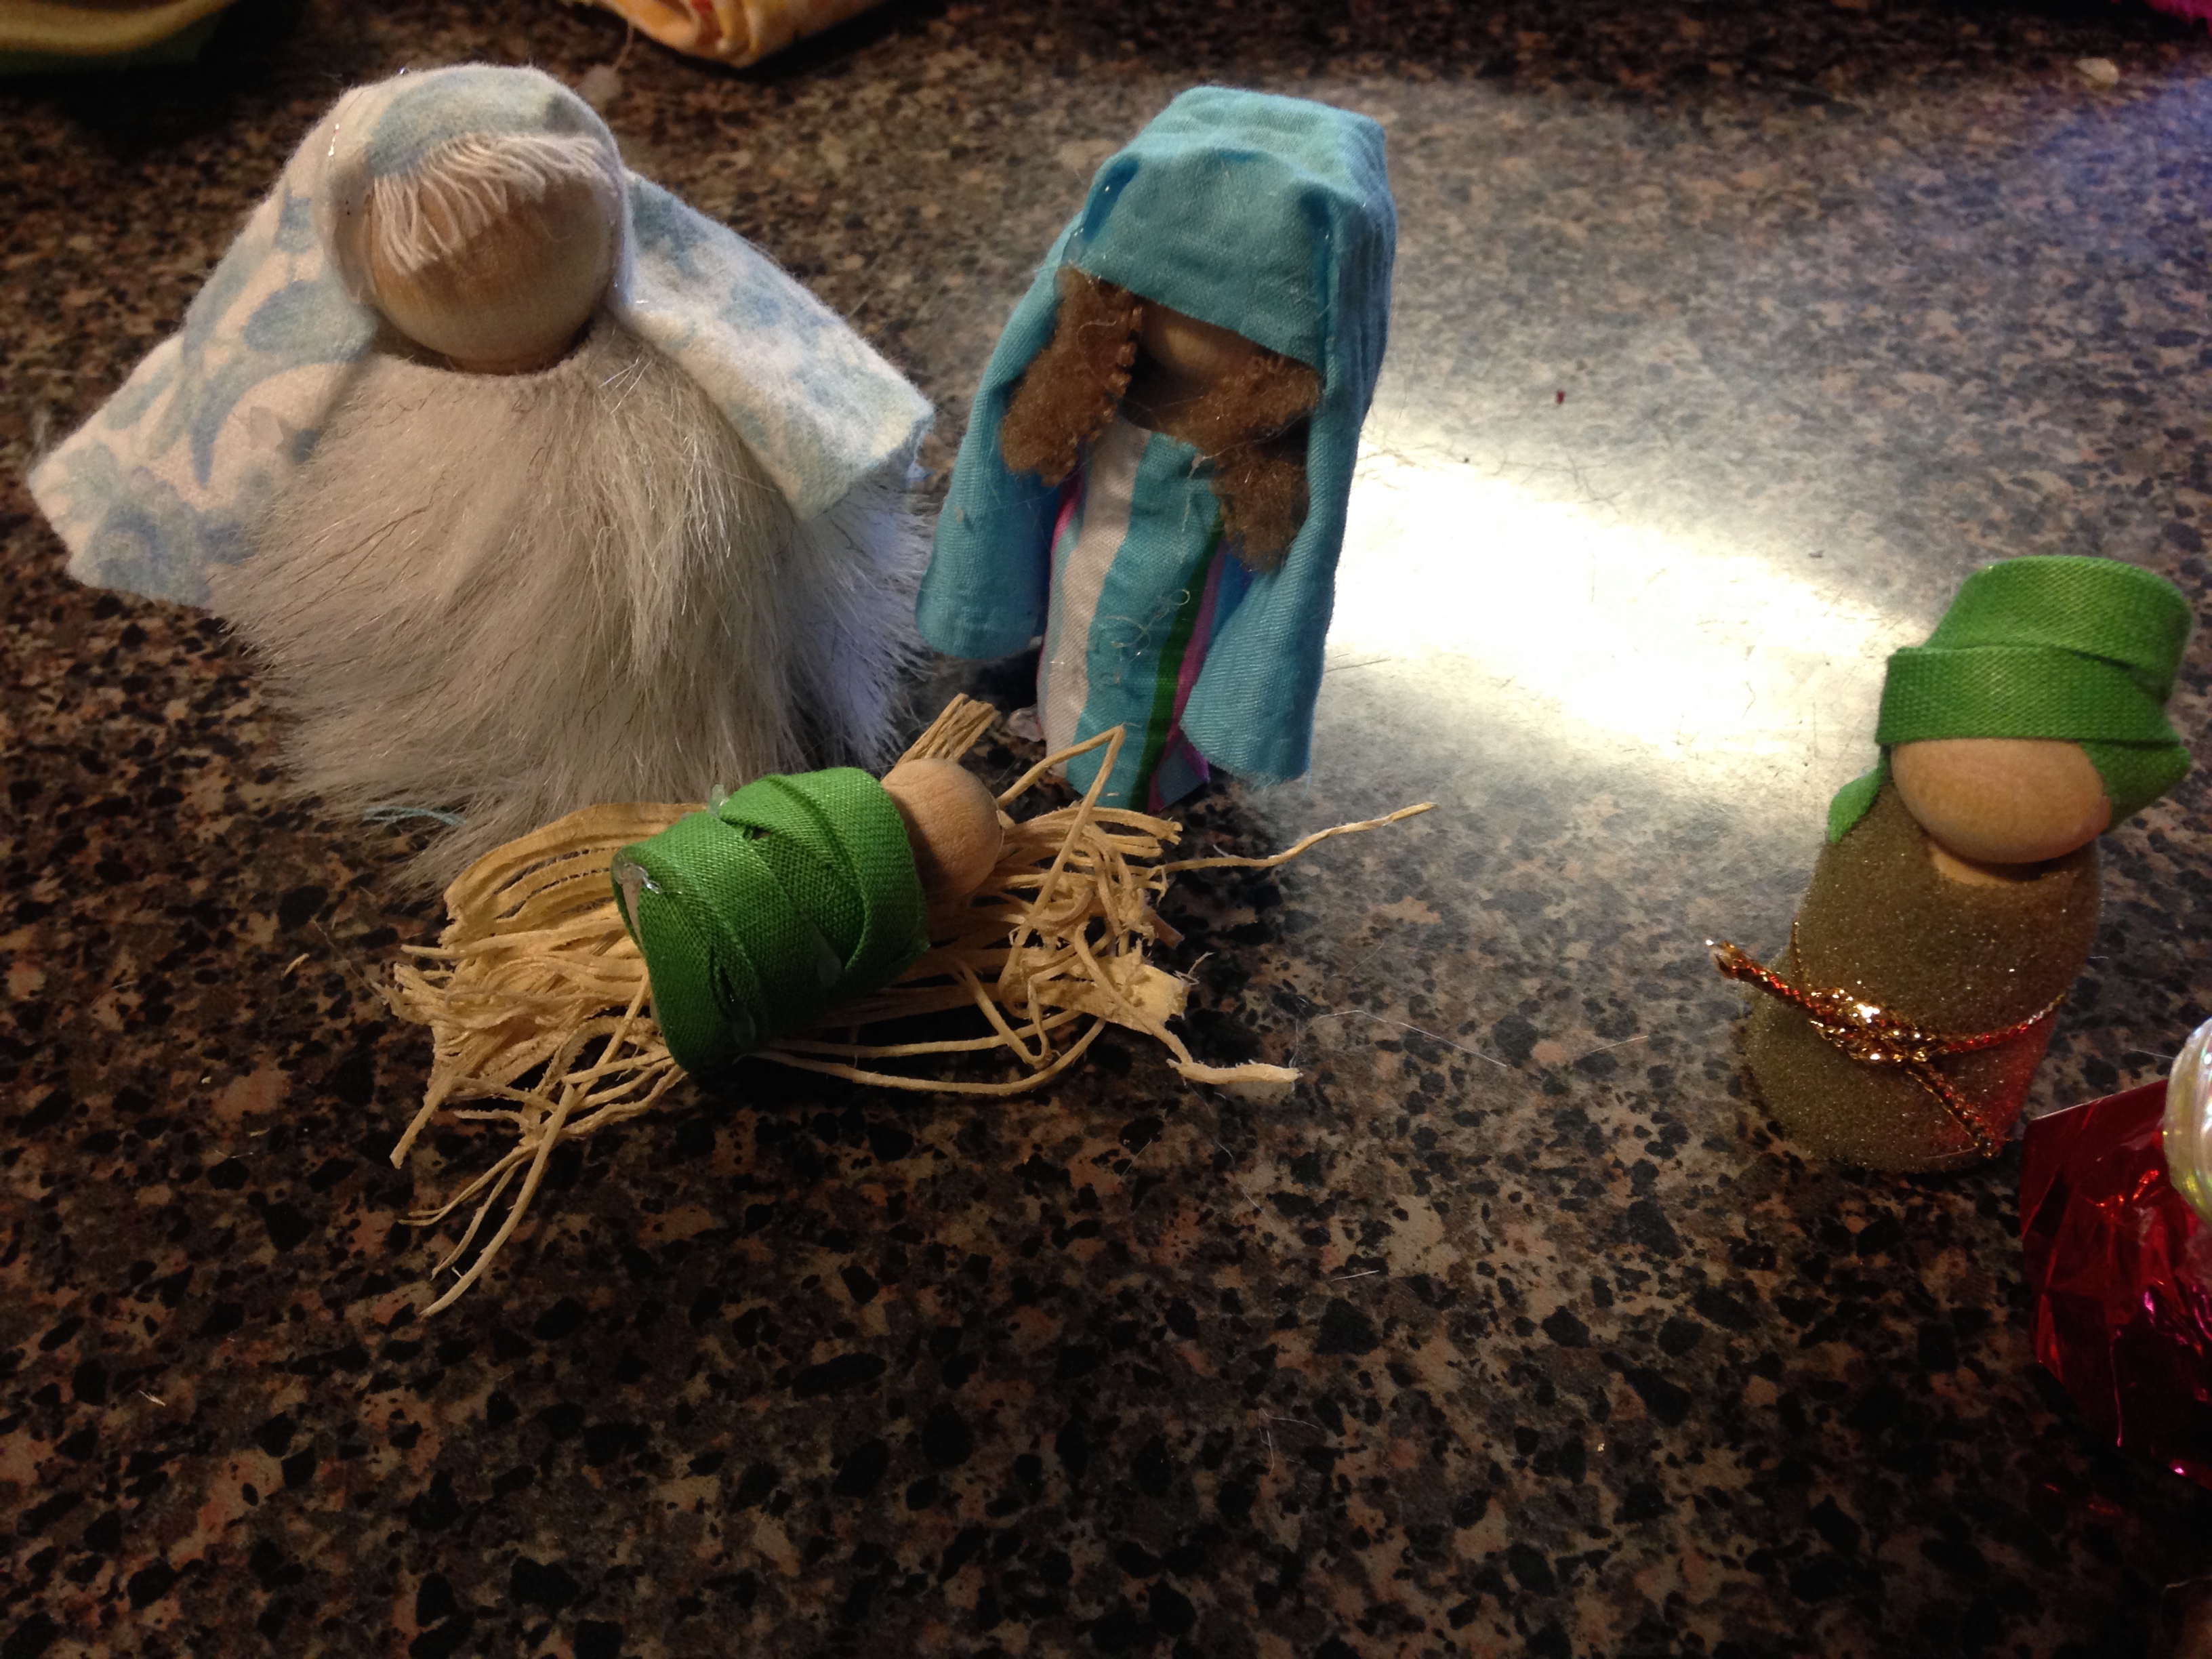
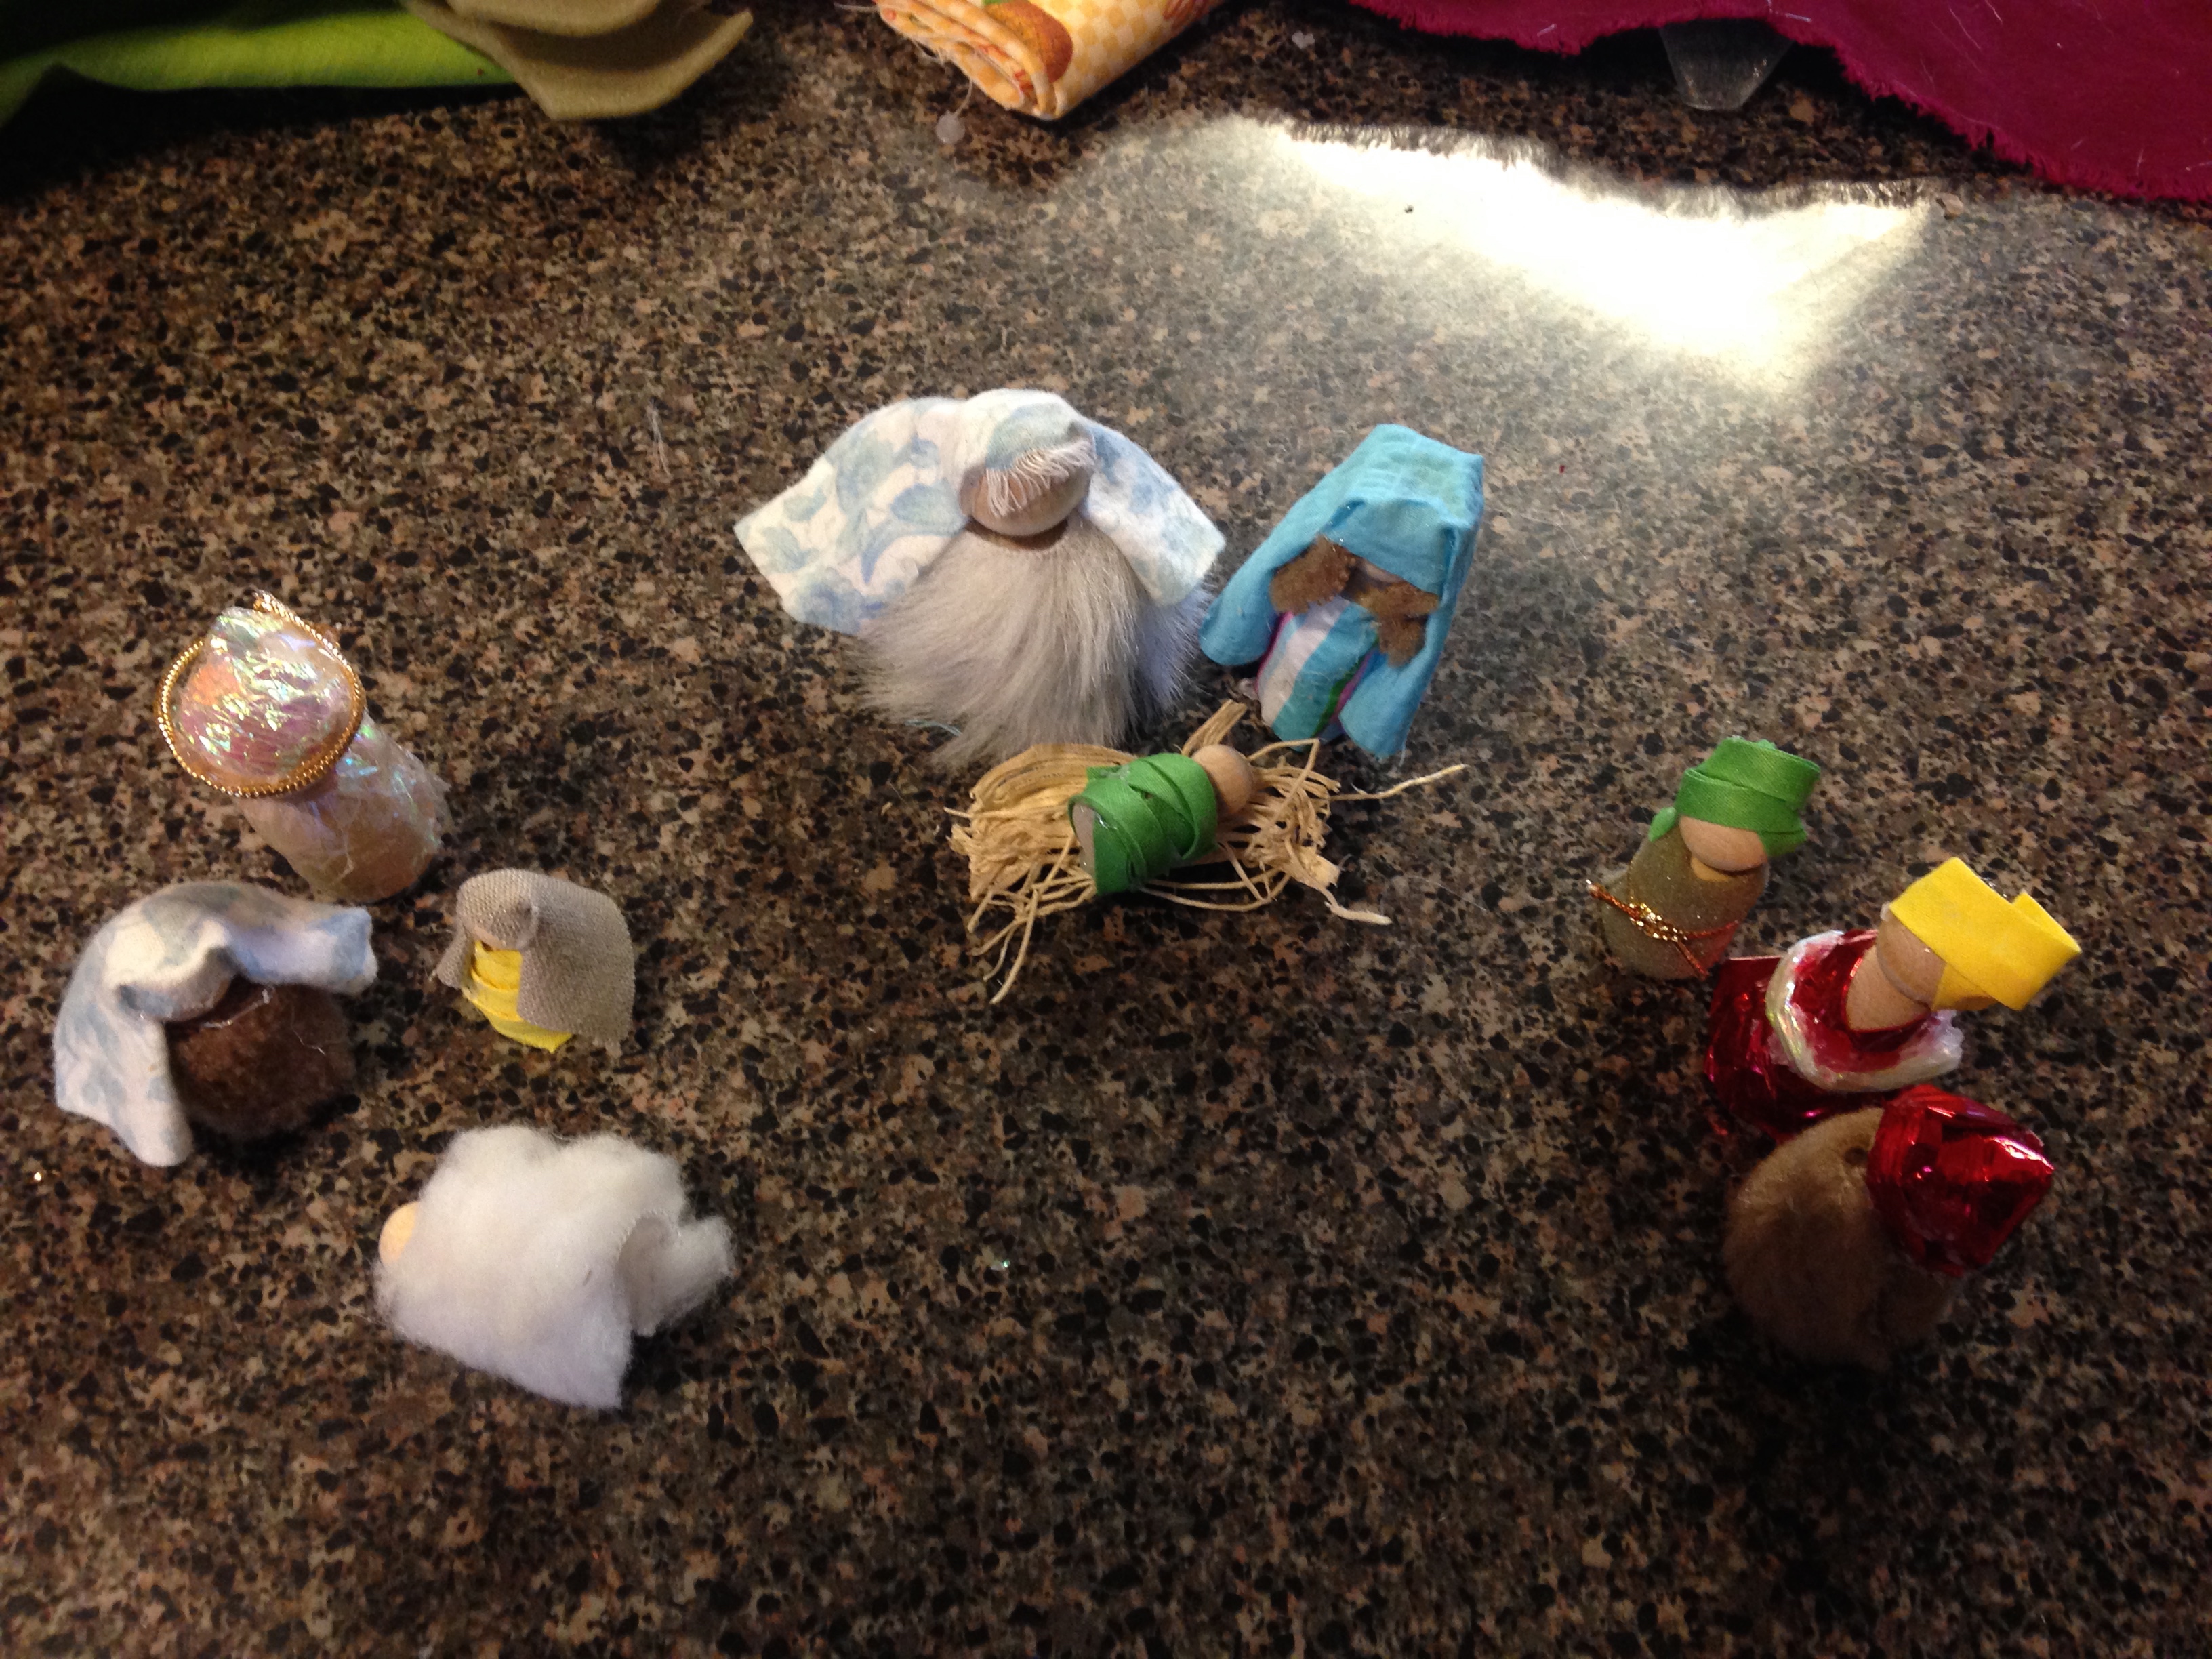
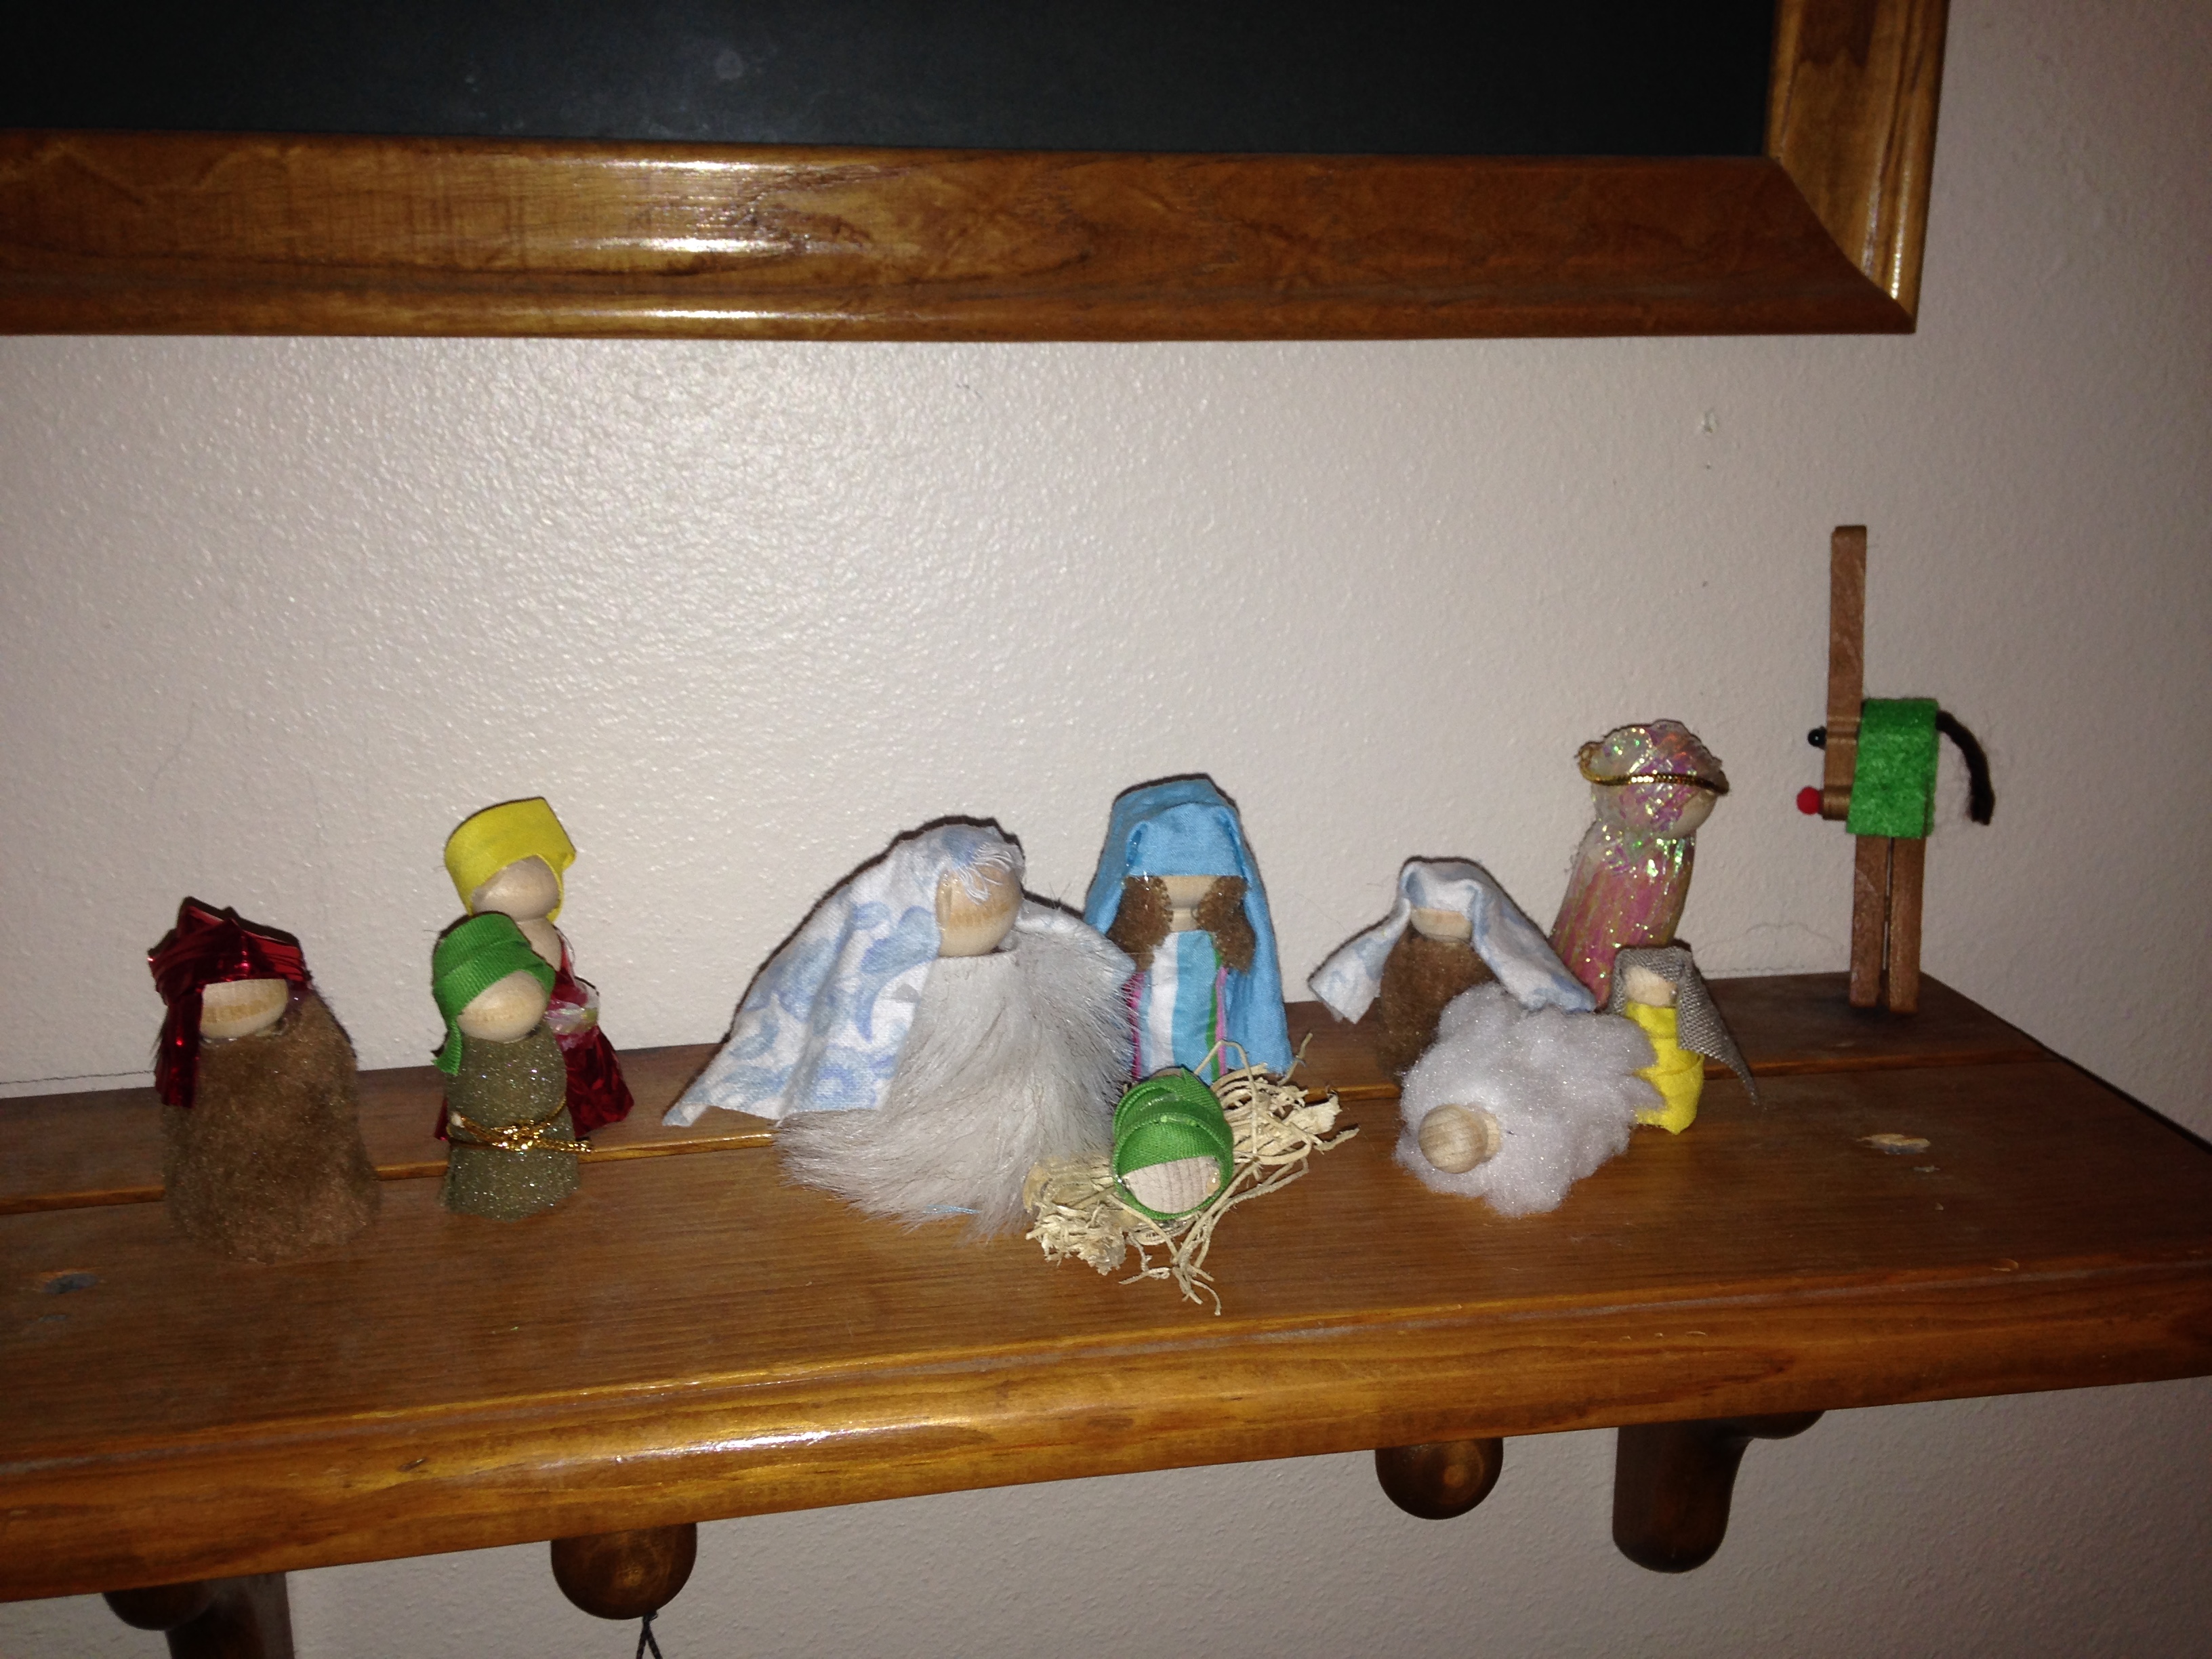
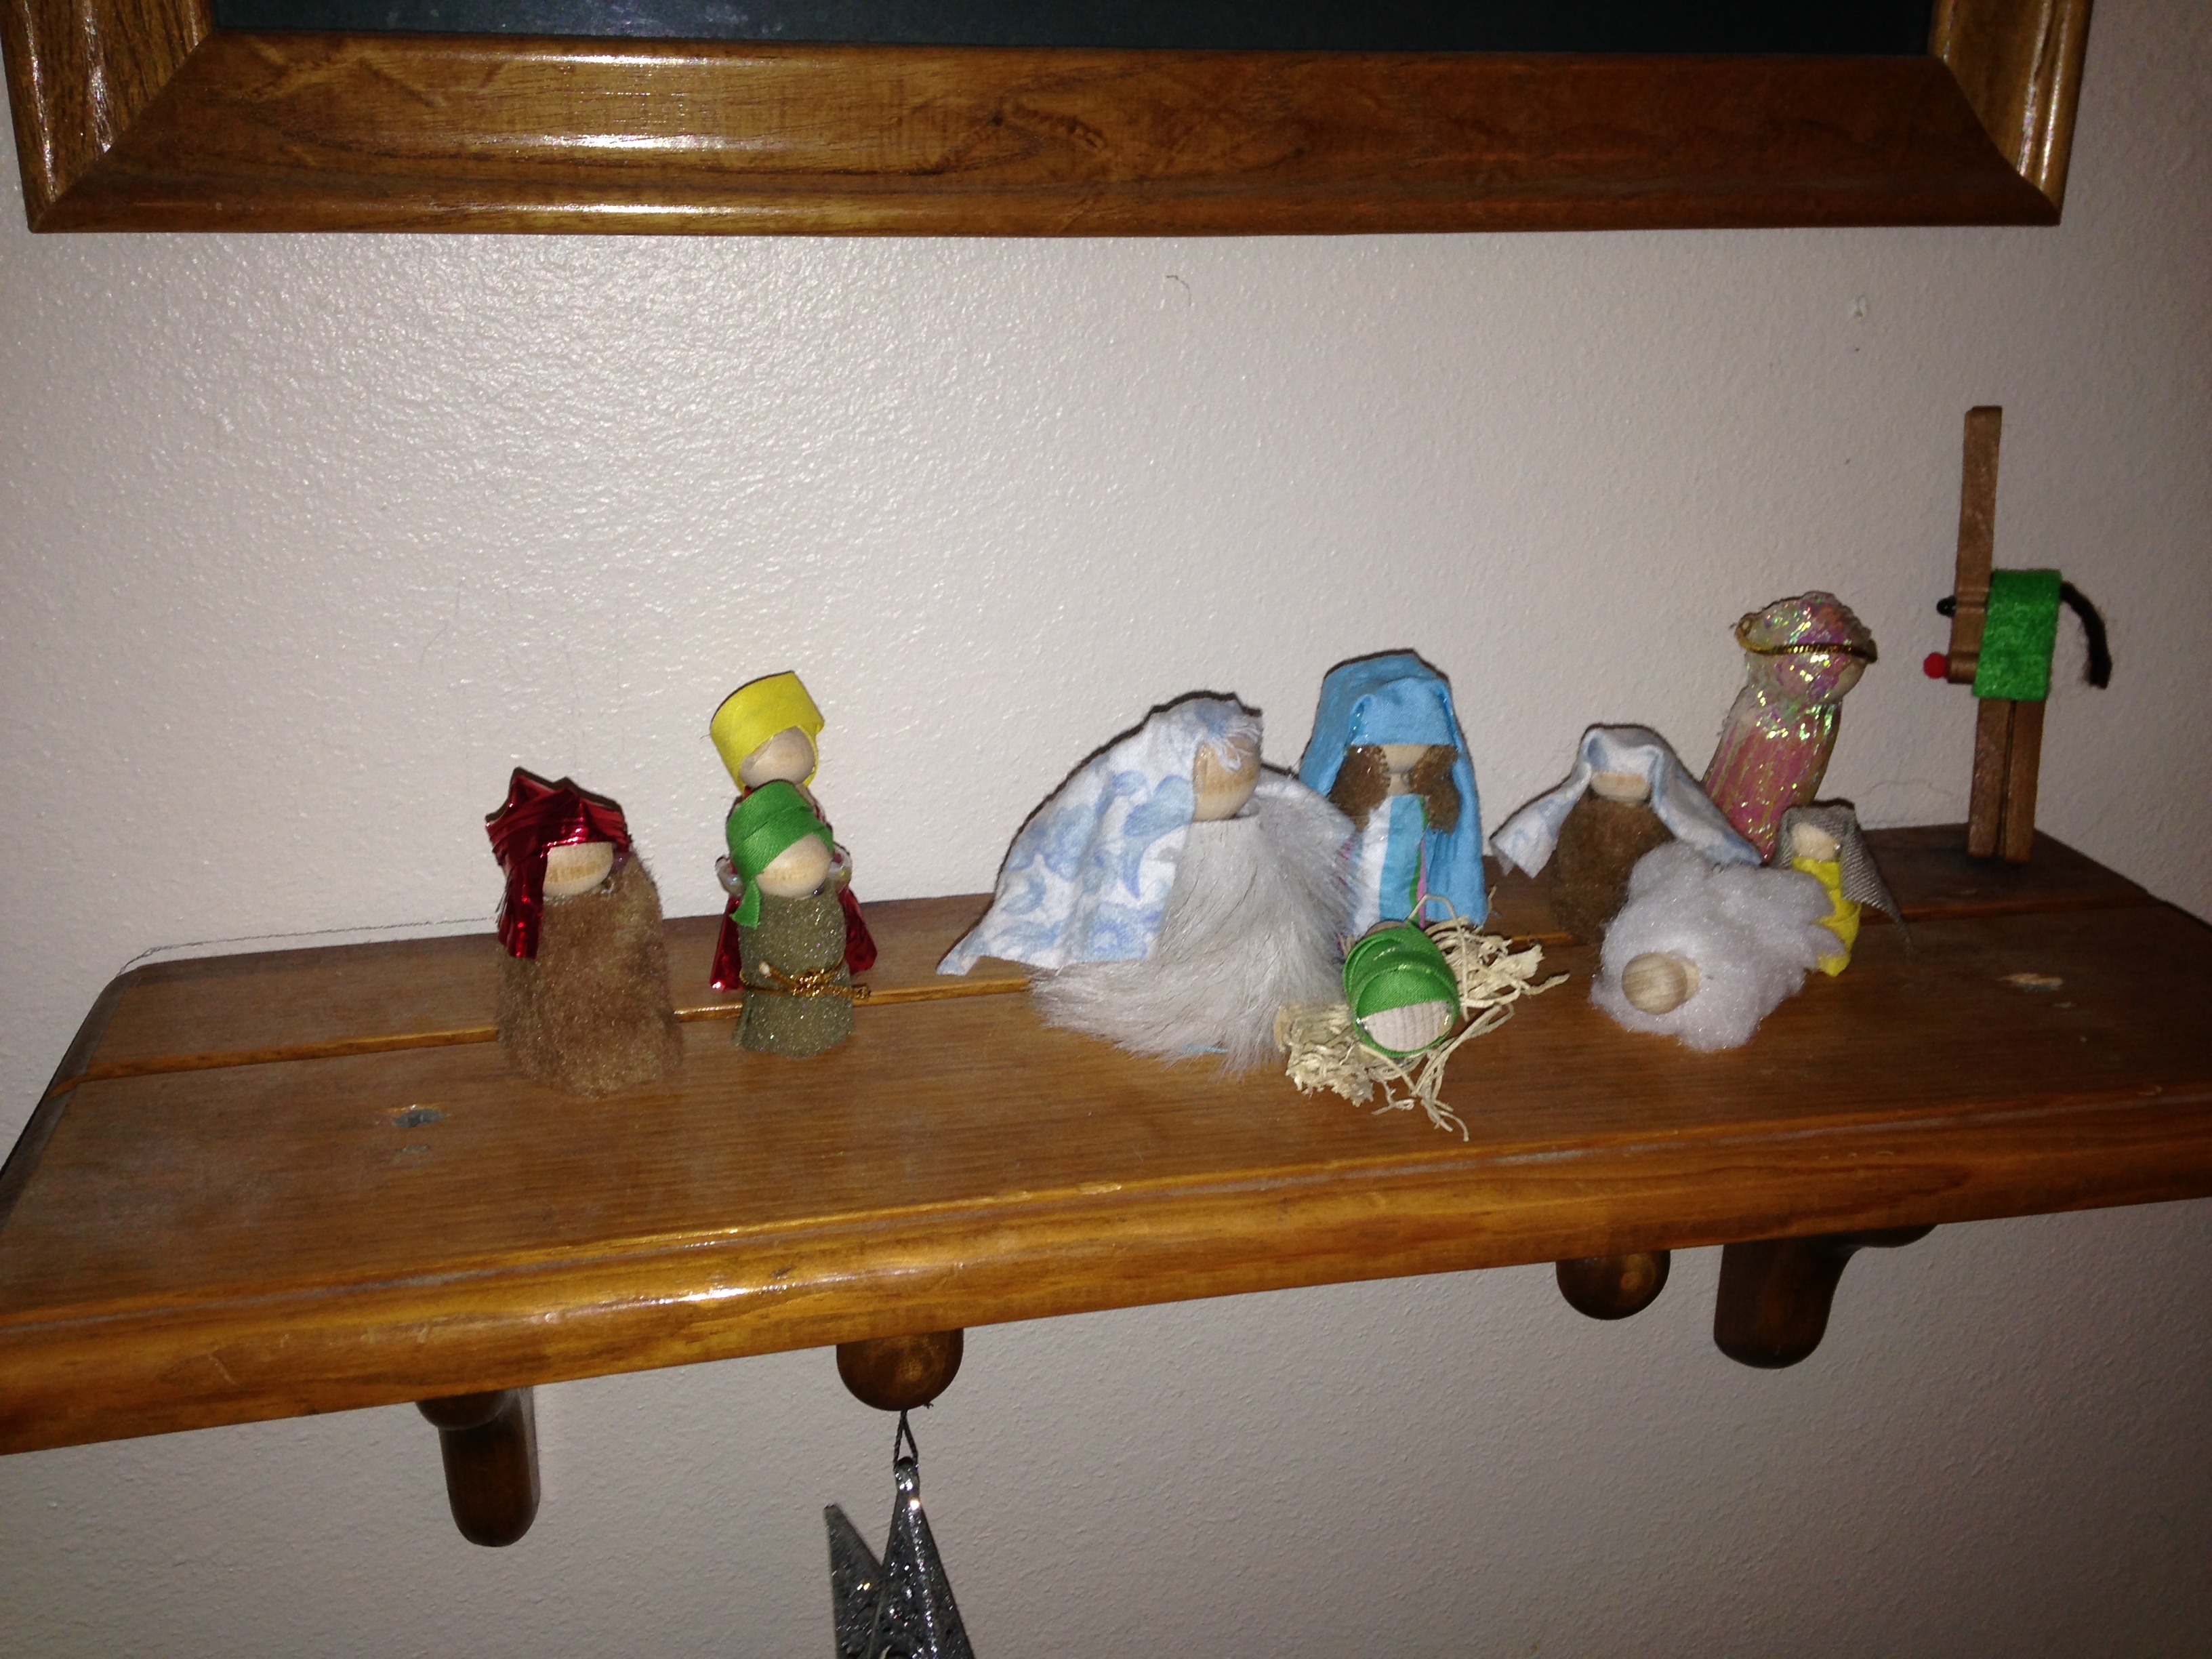
My daughter divided them up into individual nativities for each child. On the left are the three wiseman. The center shows Mary, Joseph and the baby Jesus. The figures on the right are two shepherds and a sheep.
IMG_1669
The rest is all made from scraps we had hanging around from previous projects. If you don't sew or make crafts, you could purchase squares of felt to use for the clothing. IMG_1670
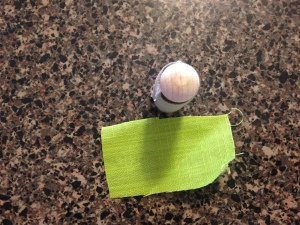
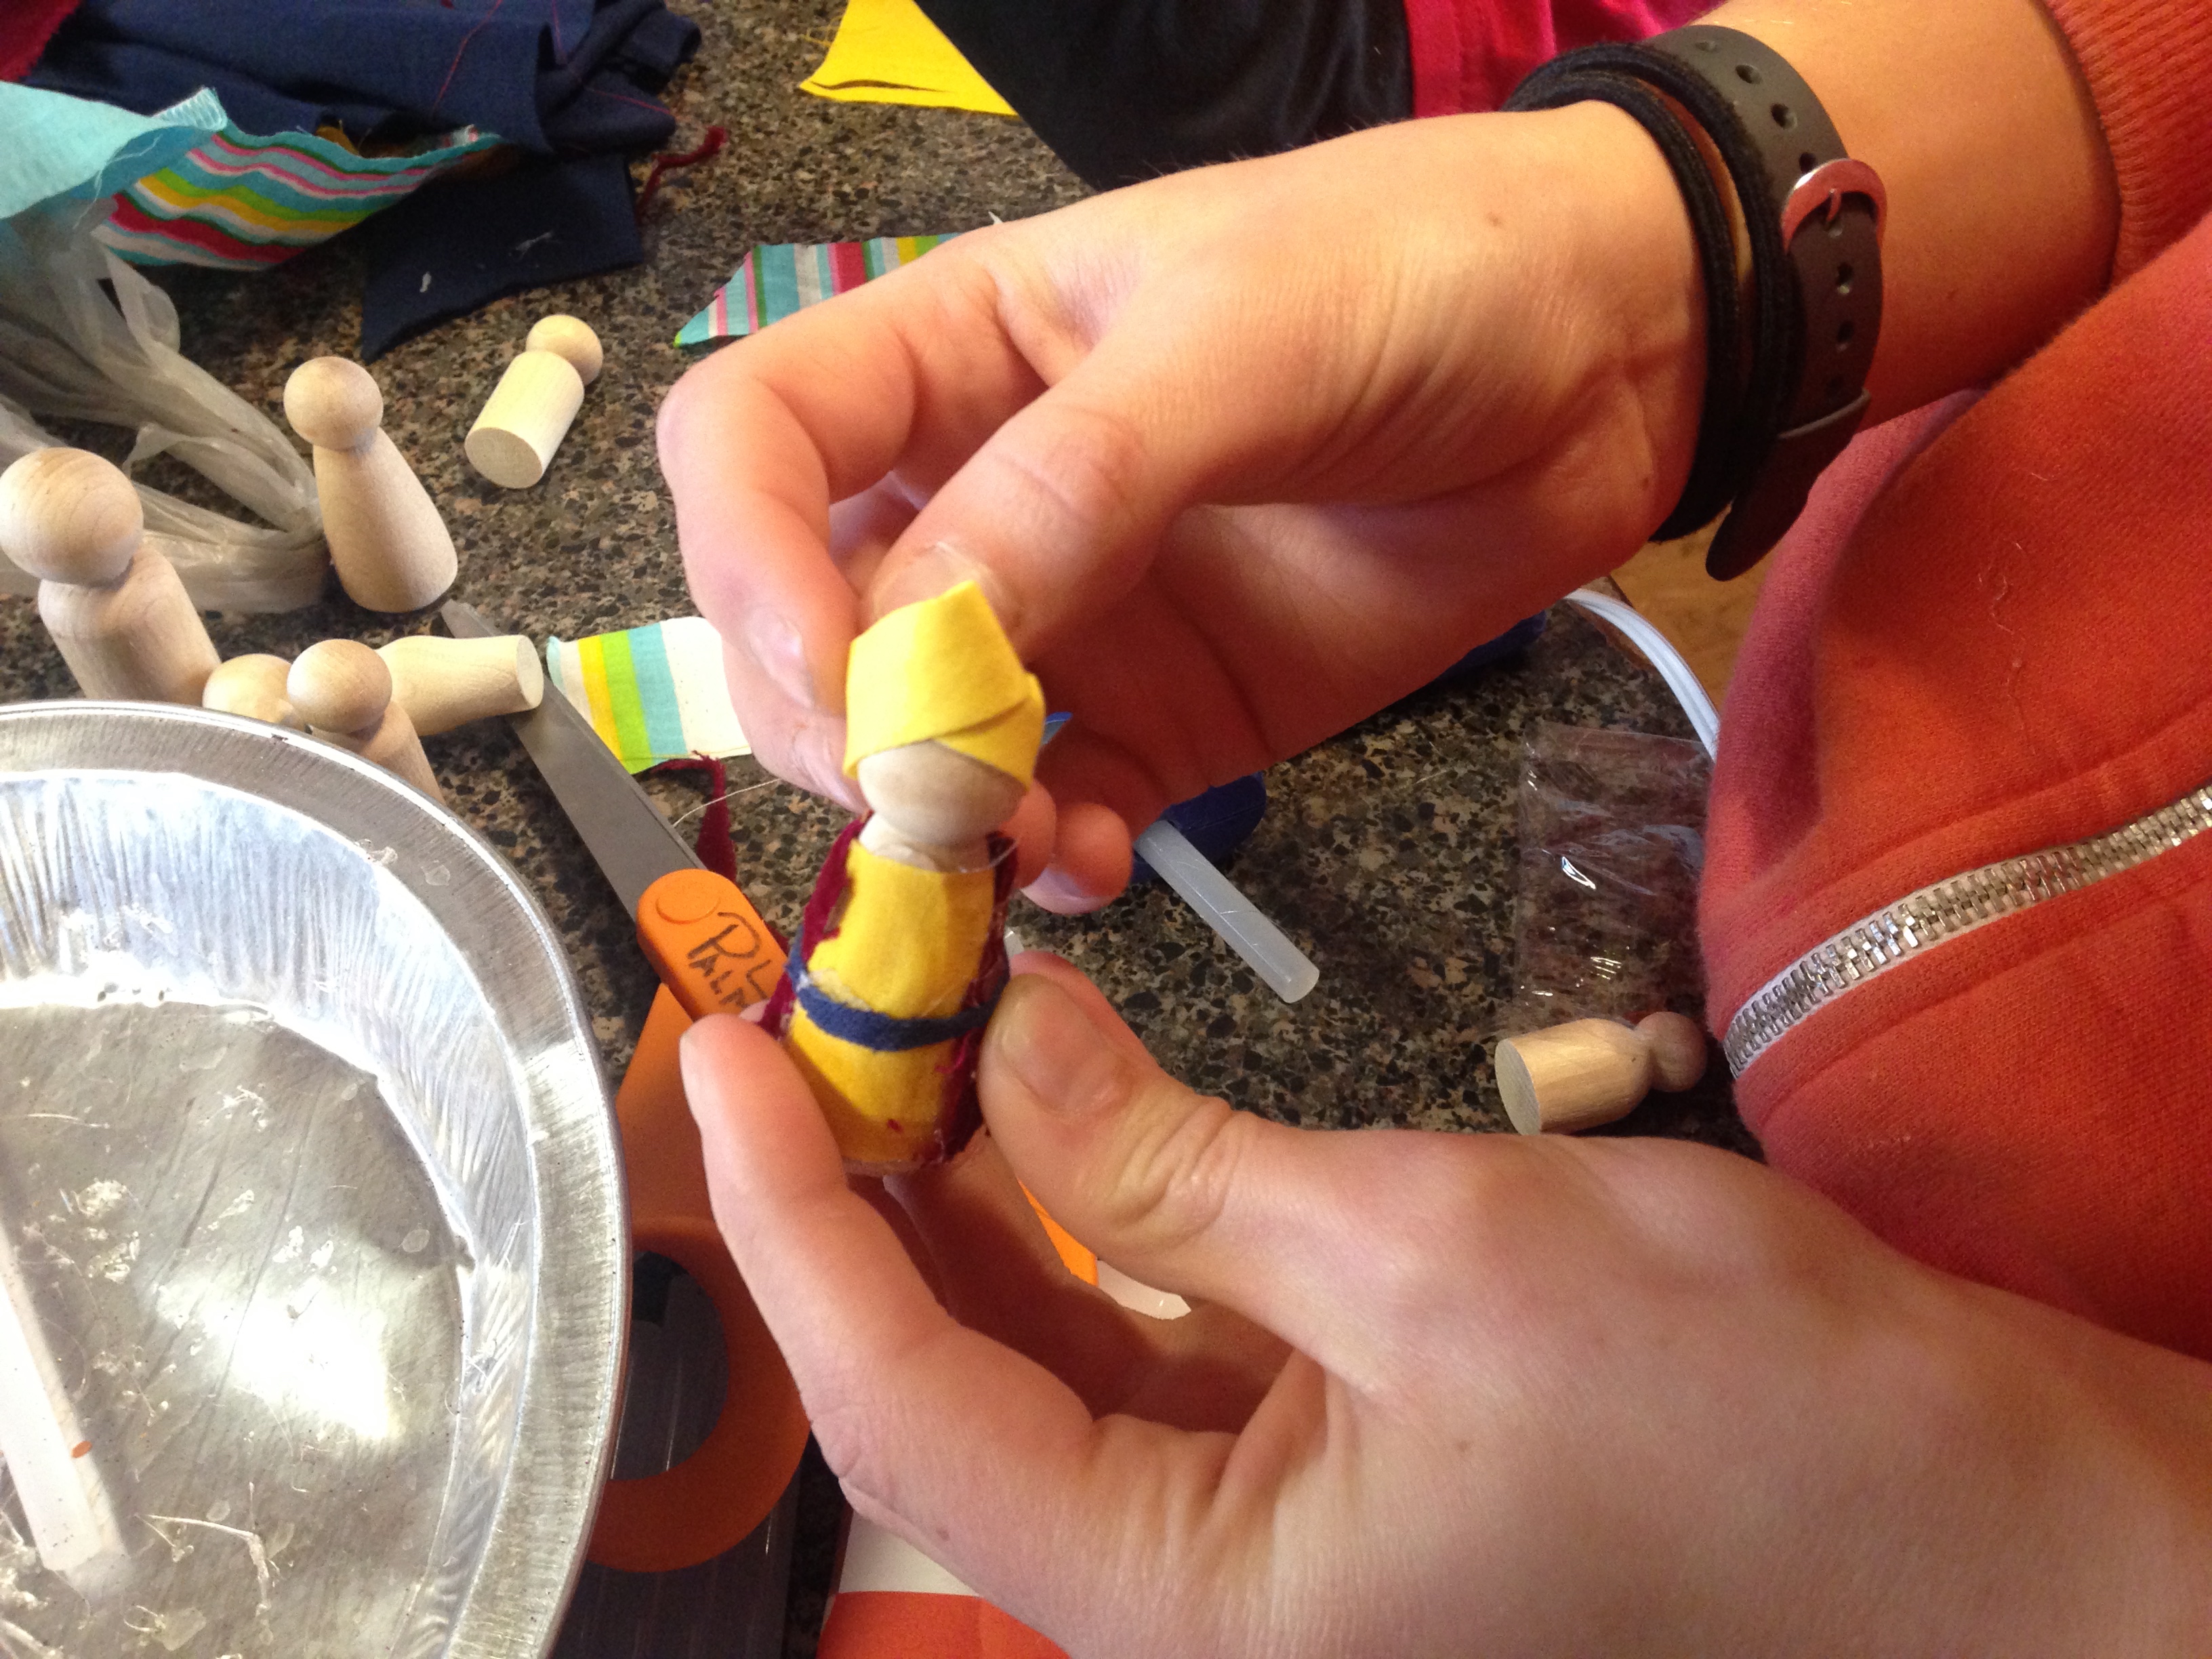
I showed the boys how to cut a piece of fabric and wrap it around the doll bodies
 
IMG_1671
and how to make a head covering. The embroidery floss was used for hair, belts, head ties, and even a shepherd's staff.
IMG_1672
My daughter used bias tape to make a turban for her wiseman.
IMG_1673

IMG_1674
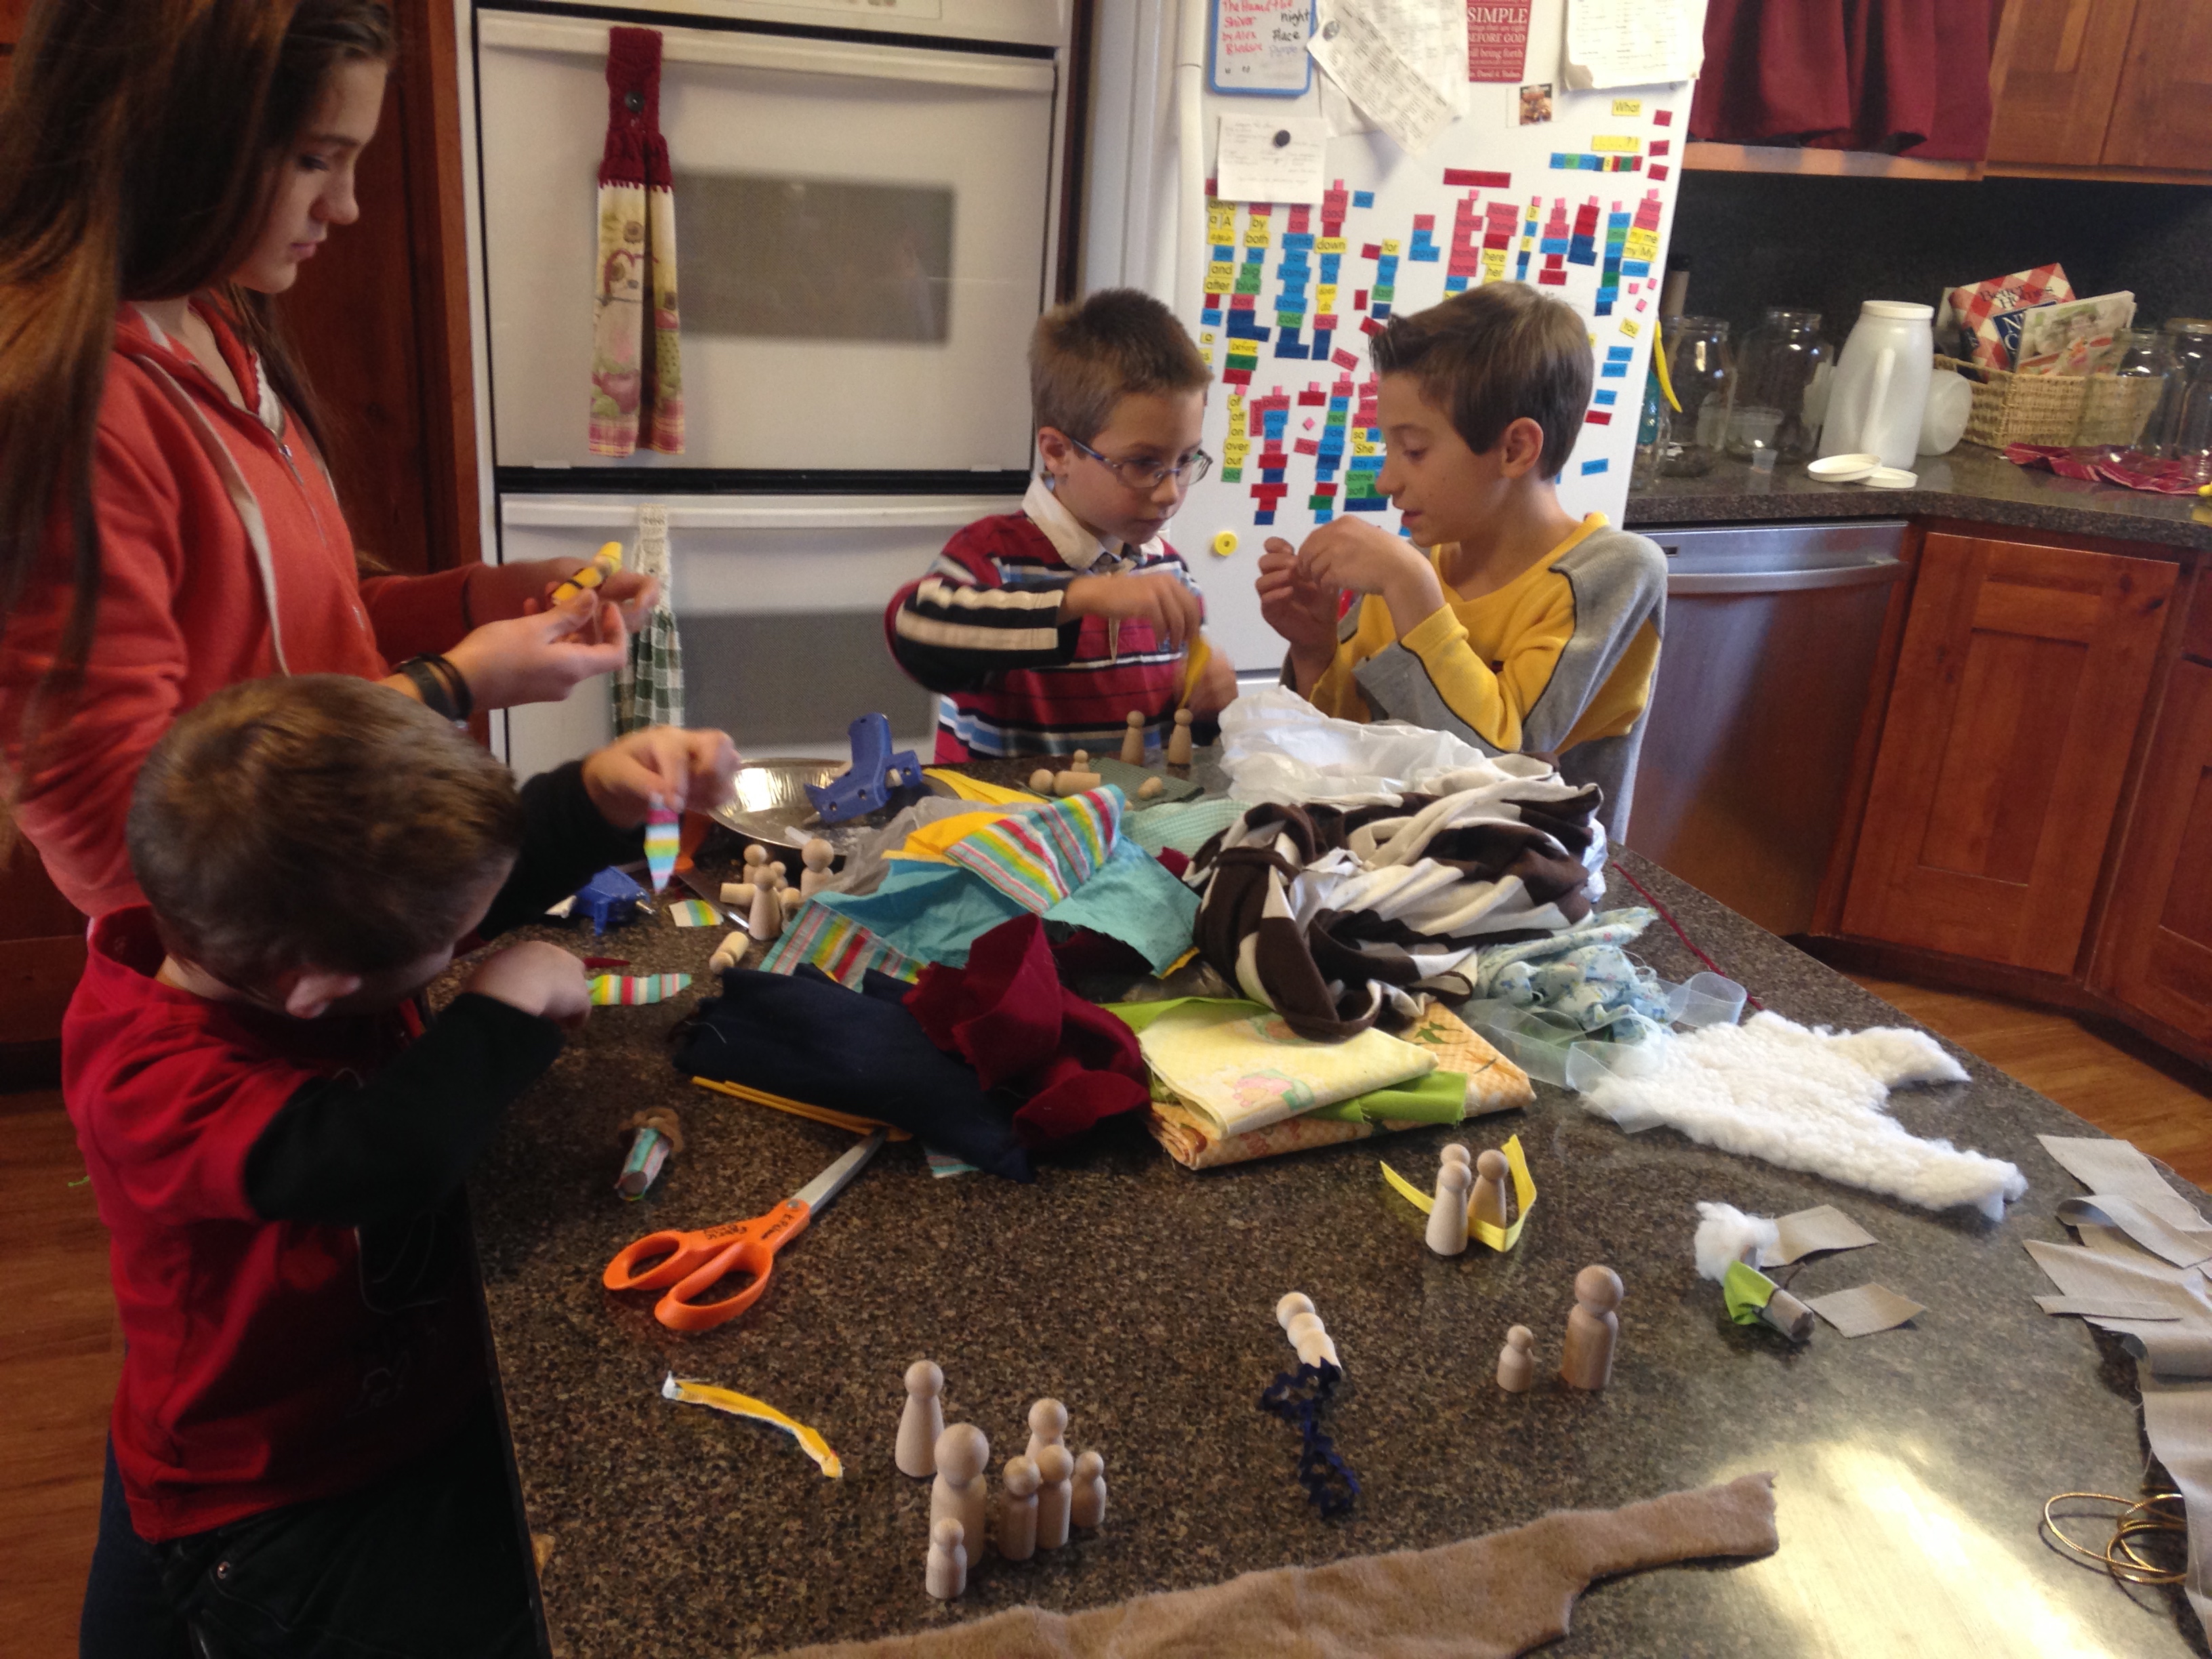
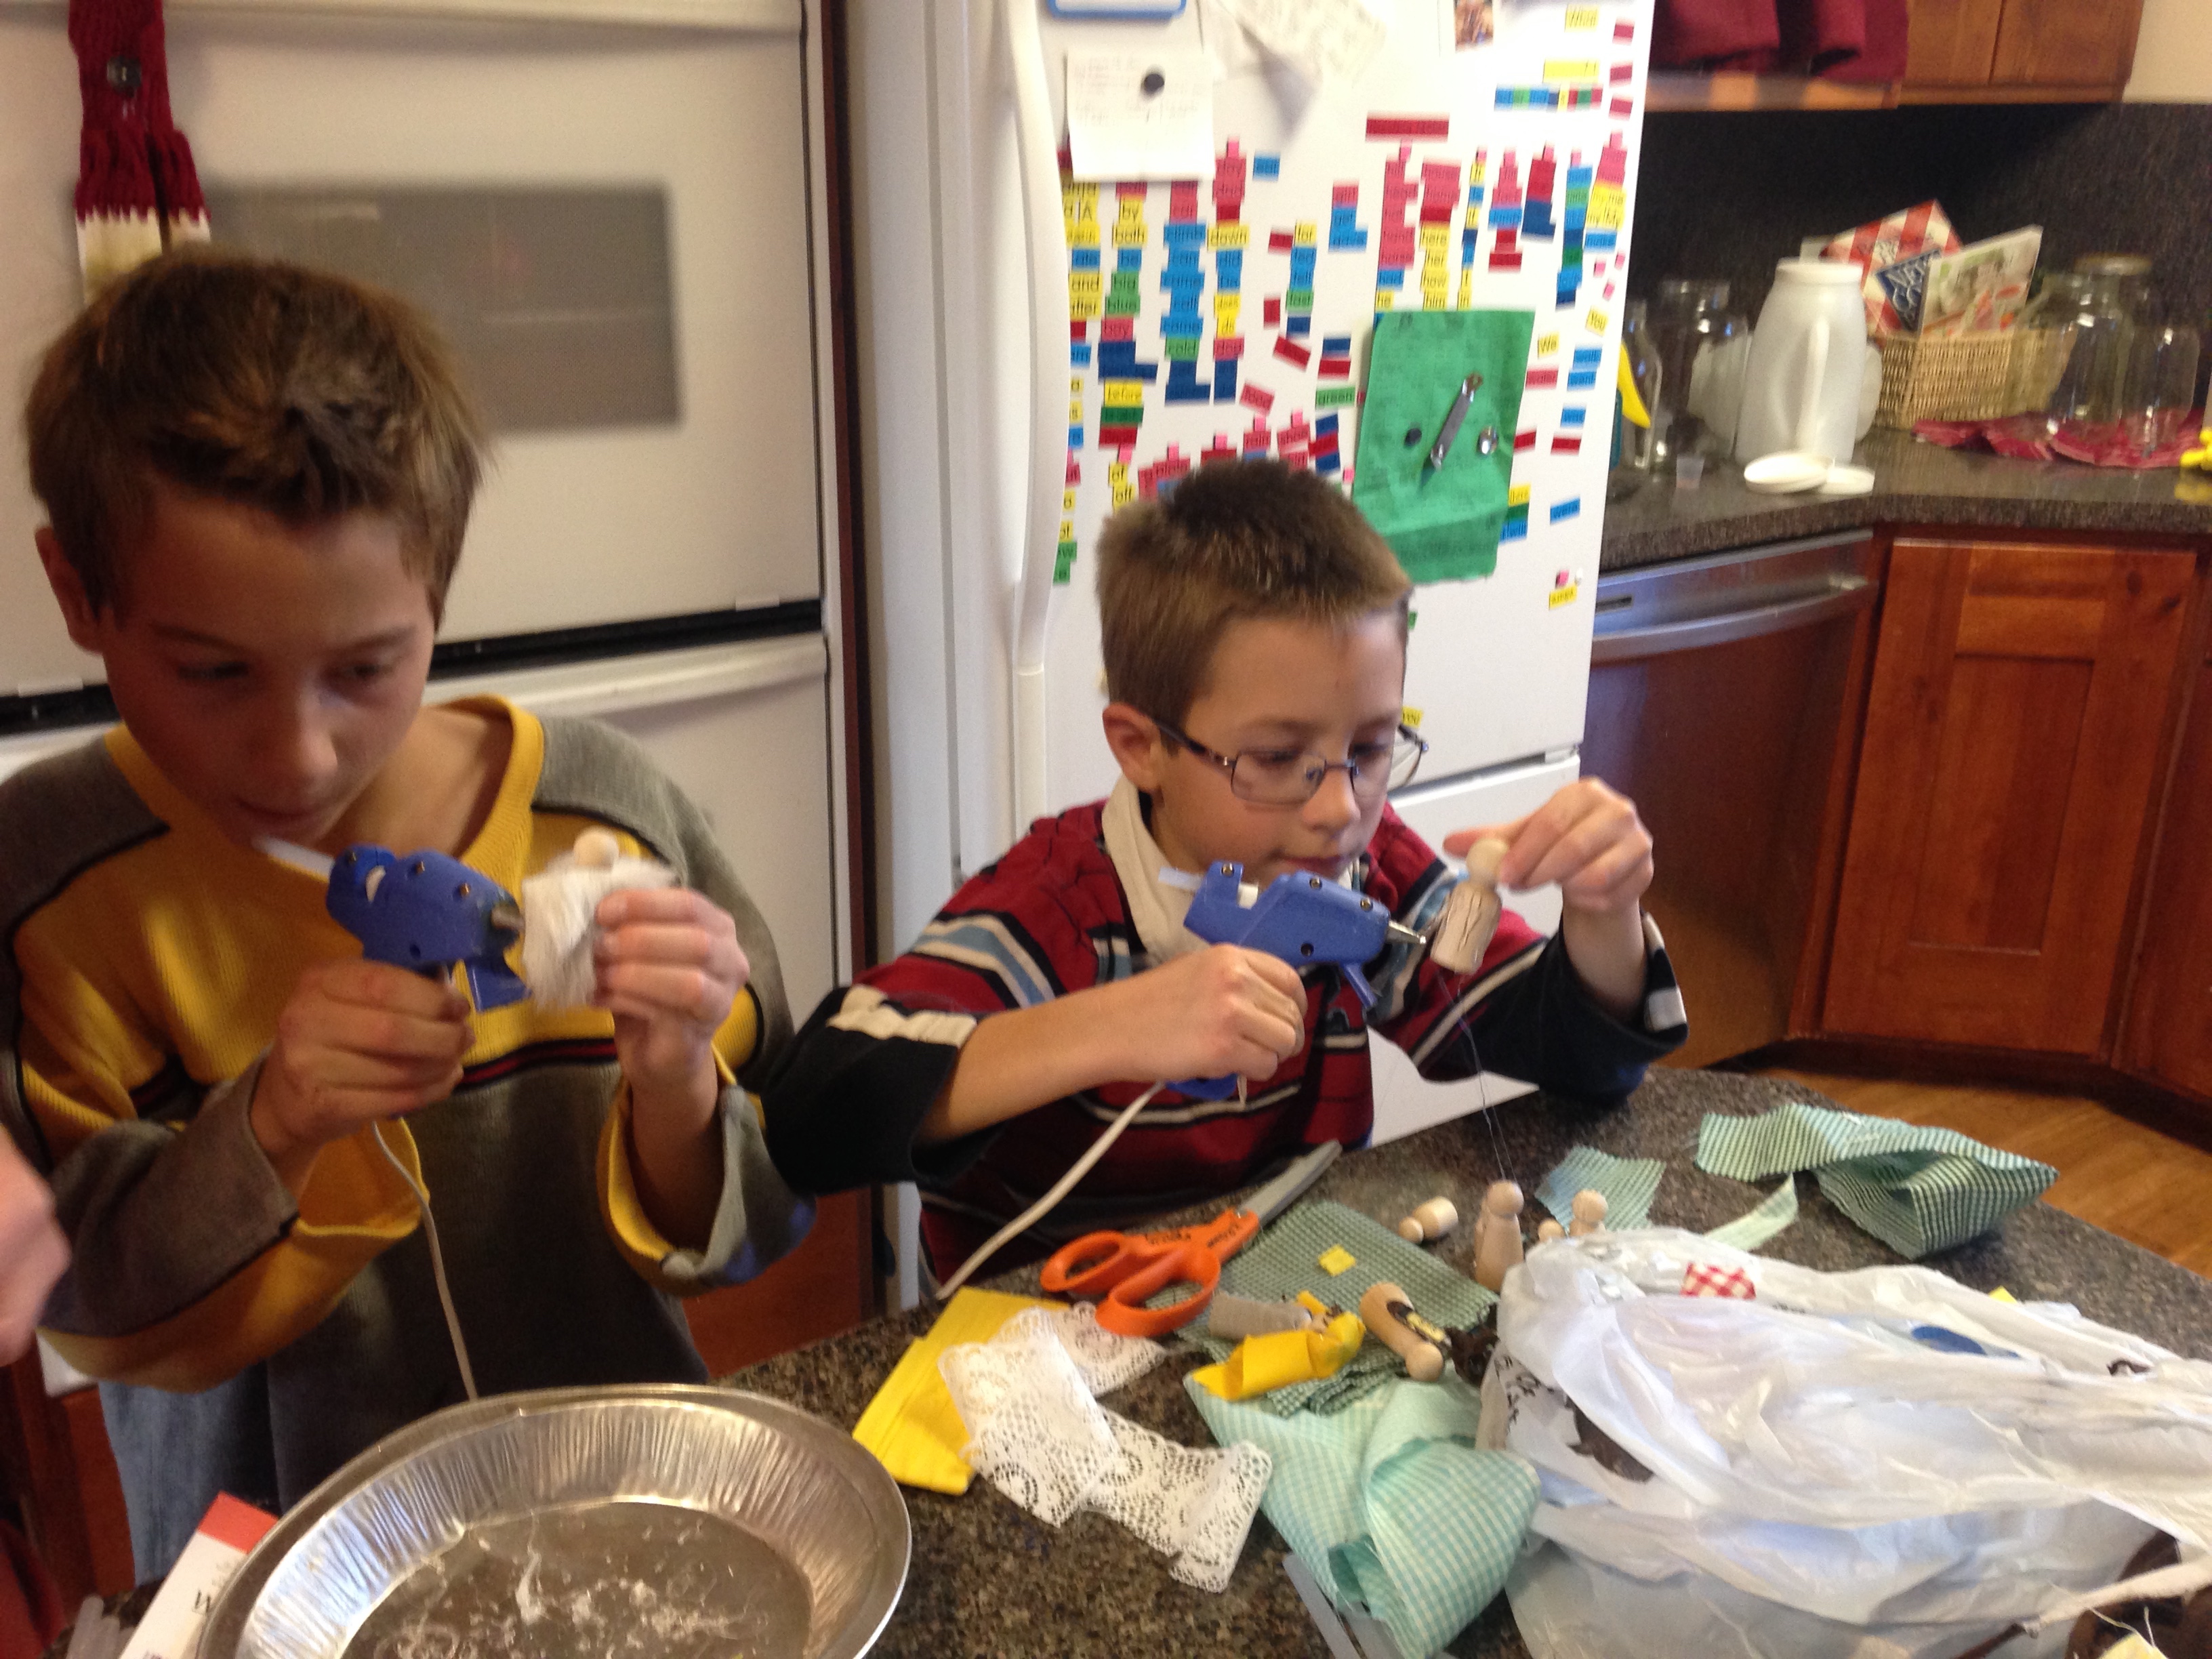
After that, I gave them the scissors and glue gun and let them go.
IMG_1675
 
IMG_1676
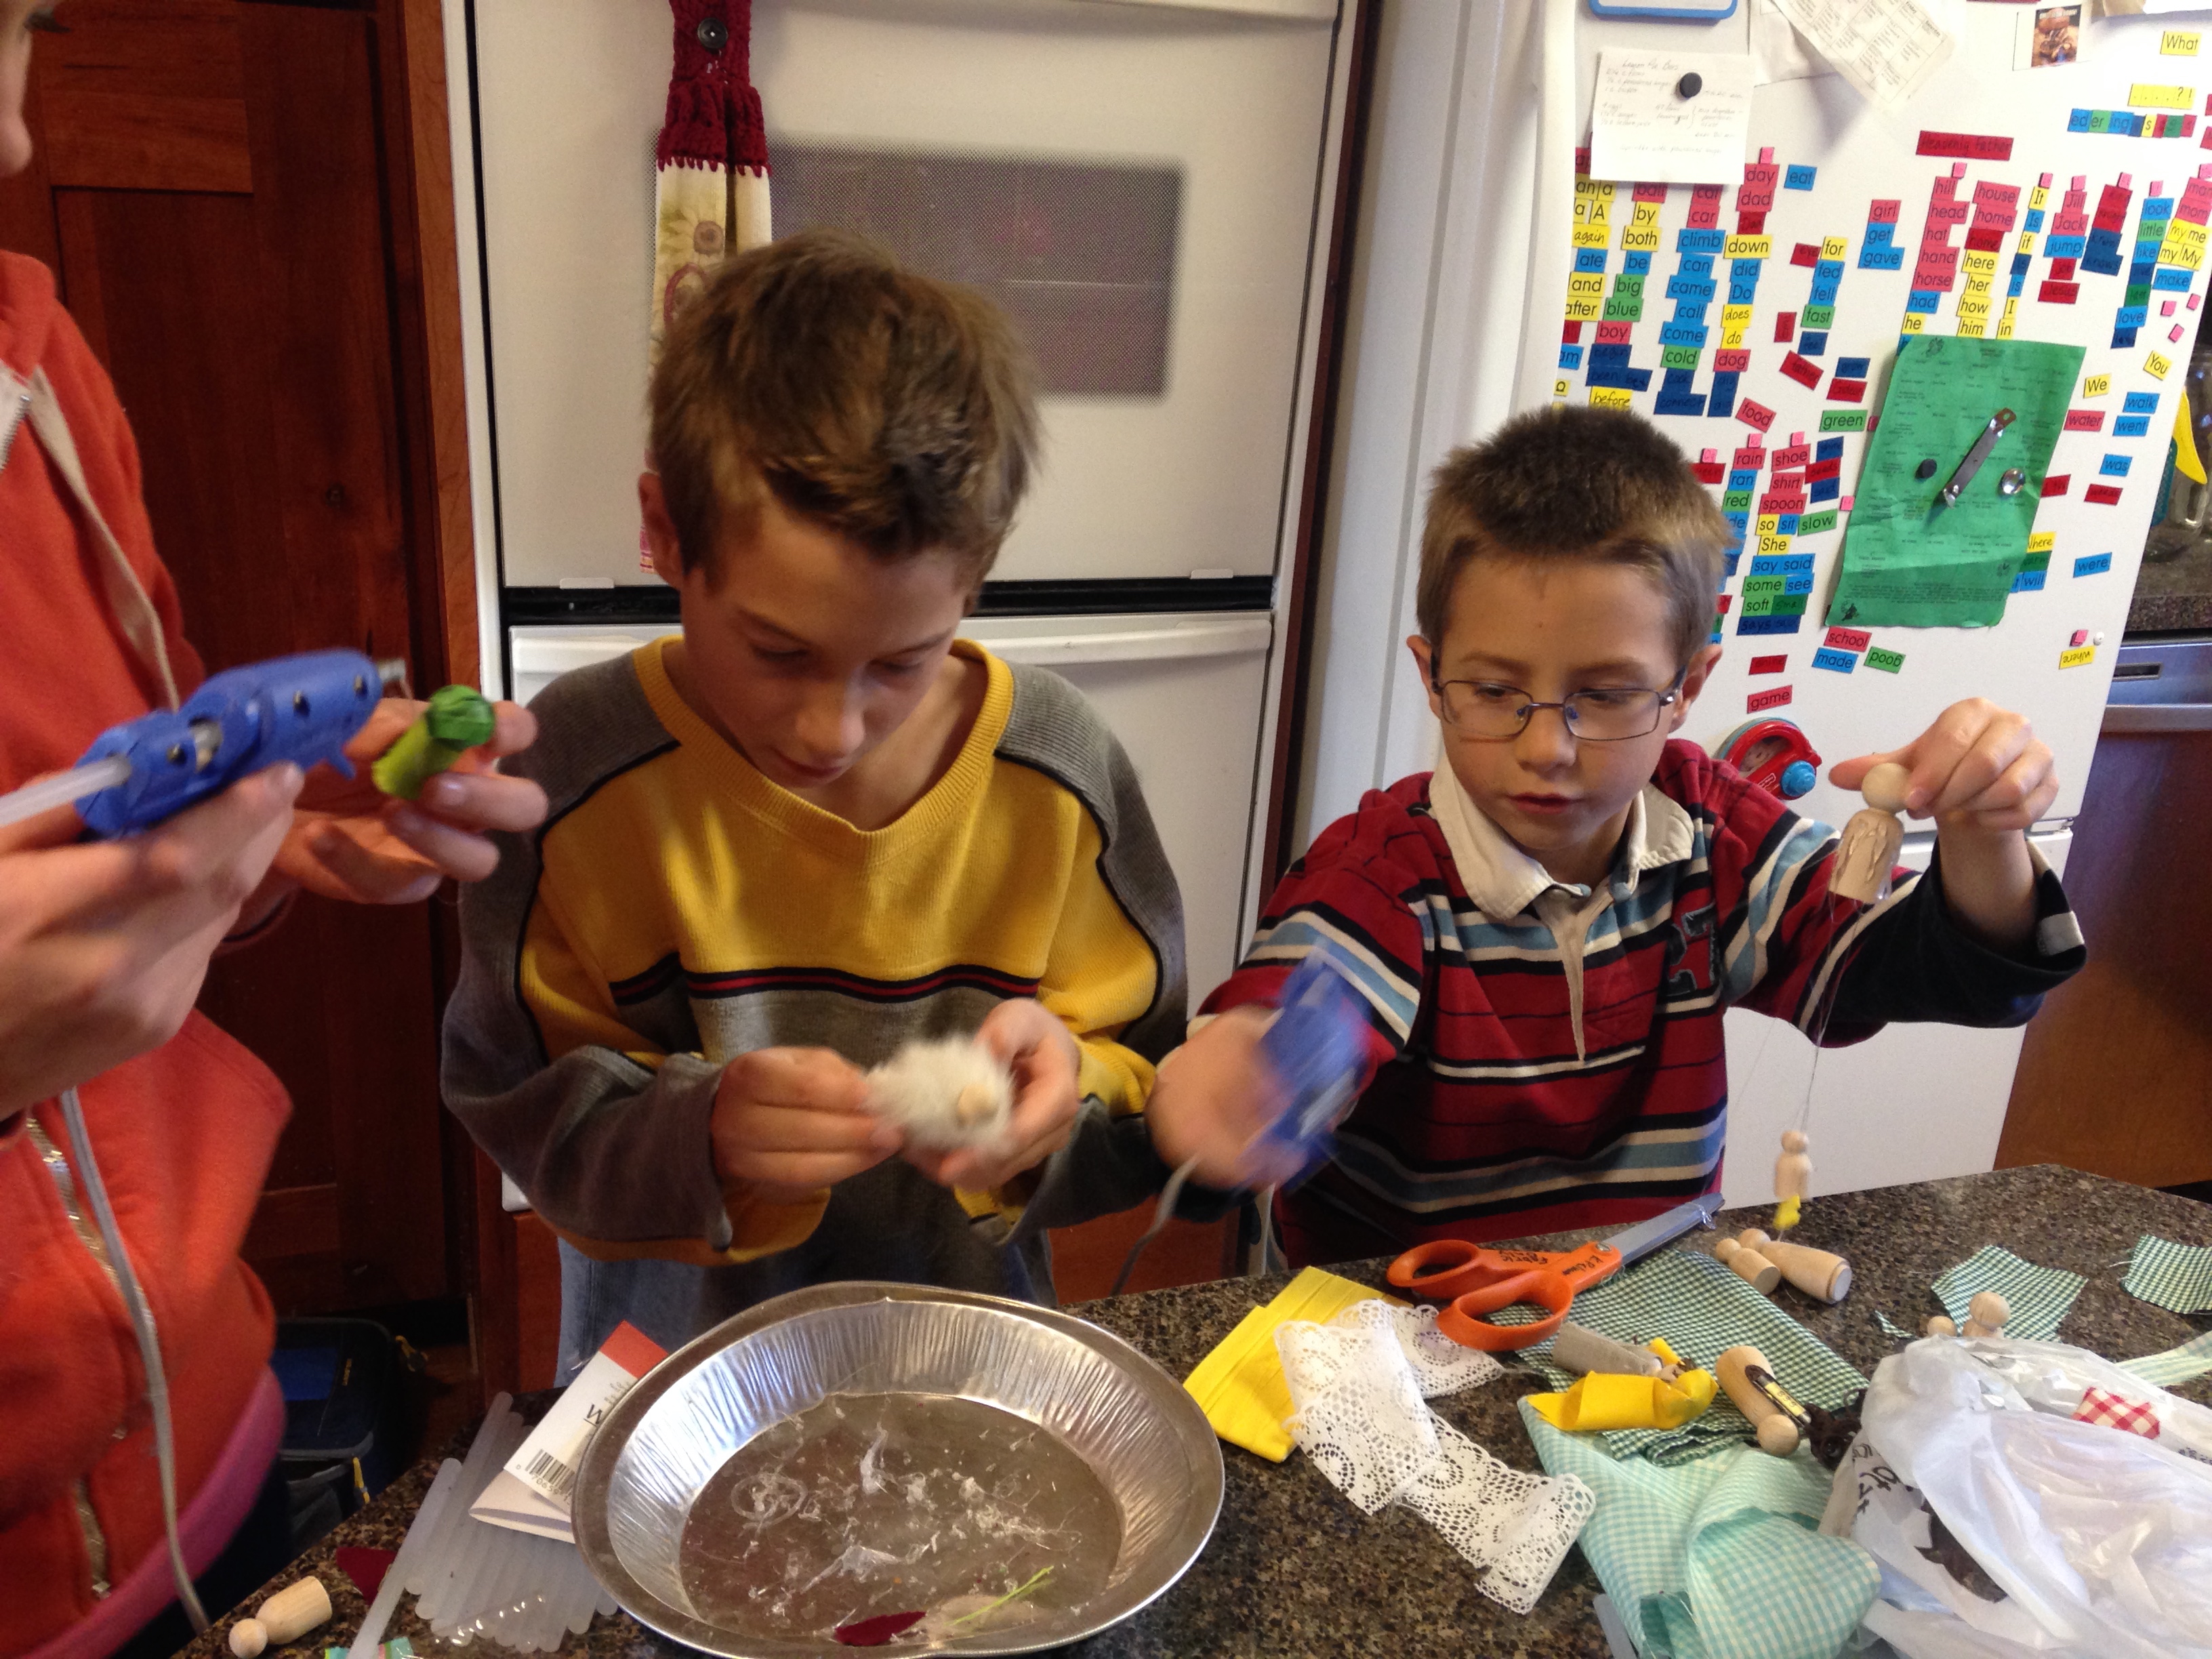
They decided we needed an angel so they each found another doll body for an angel.
IMG_1677
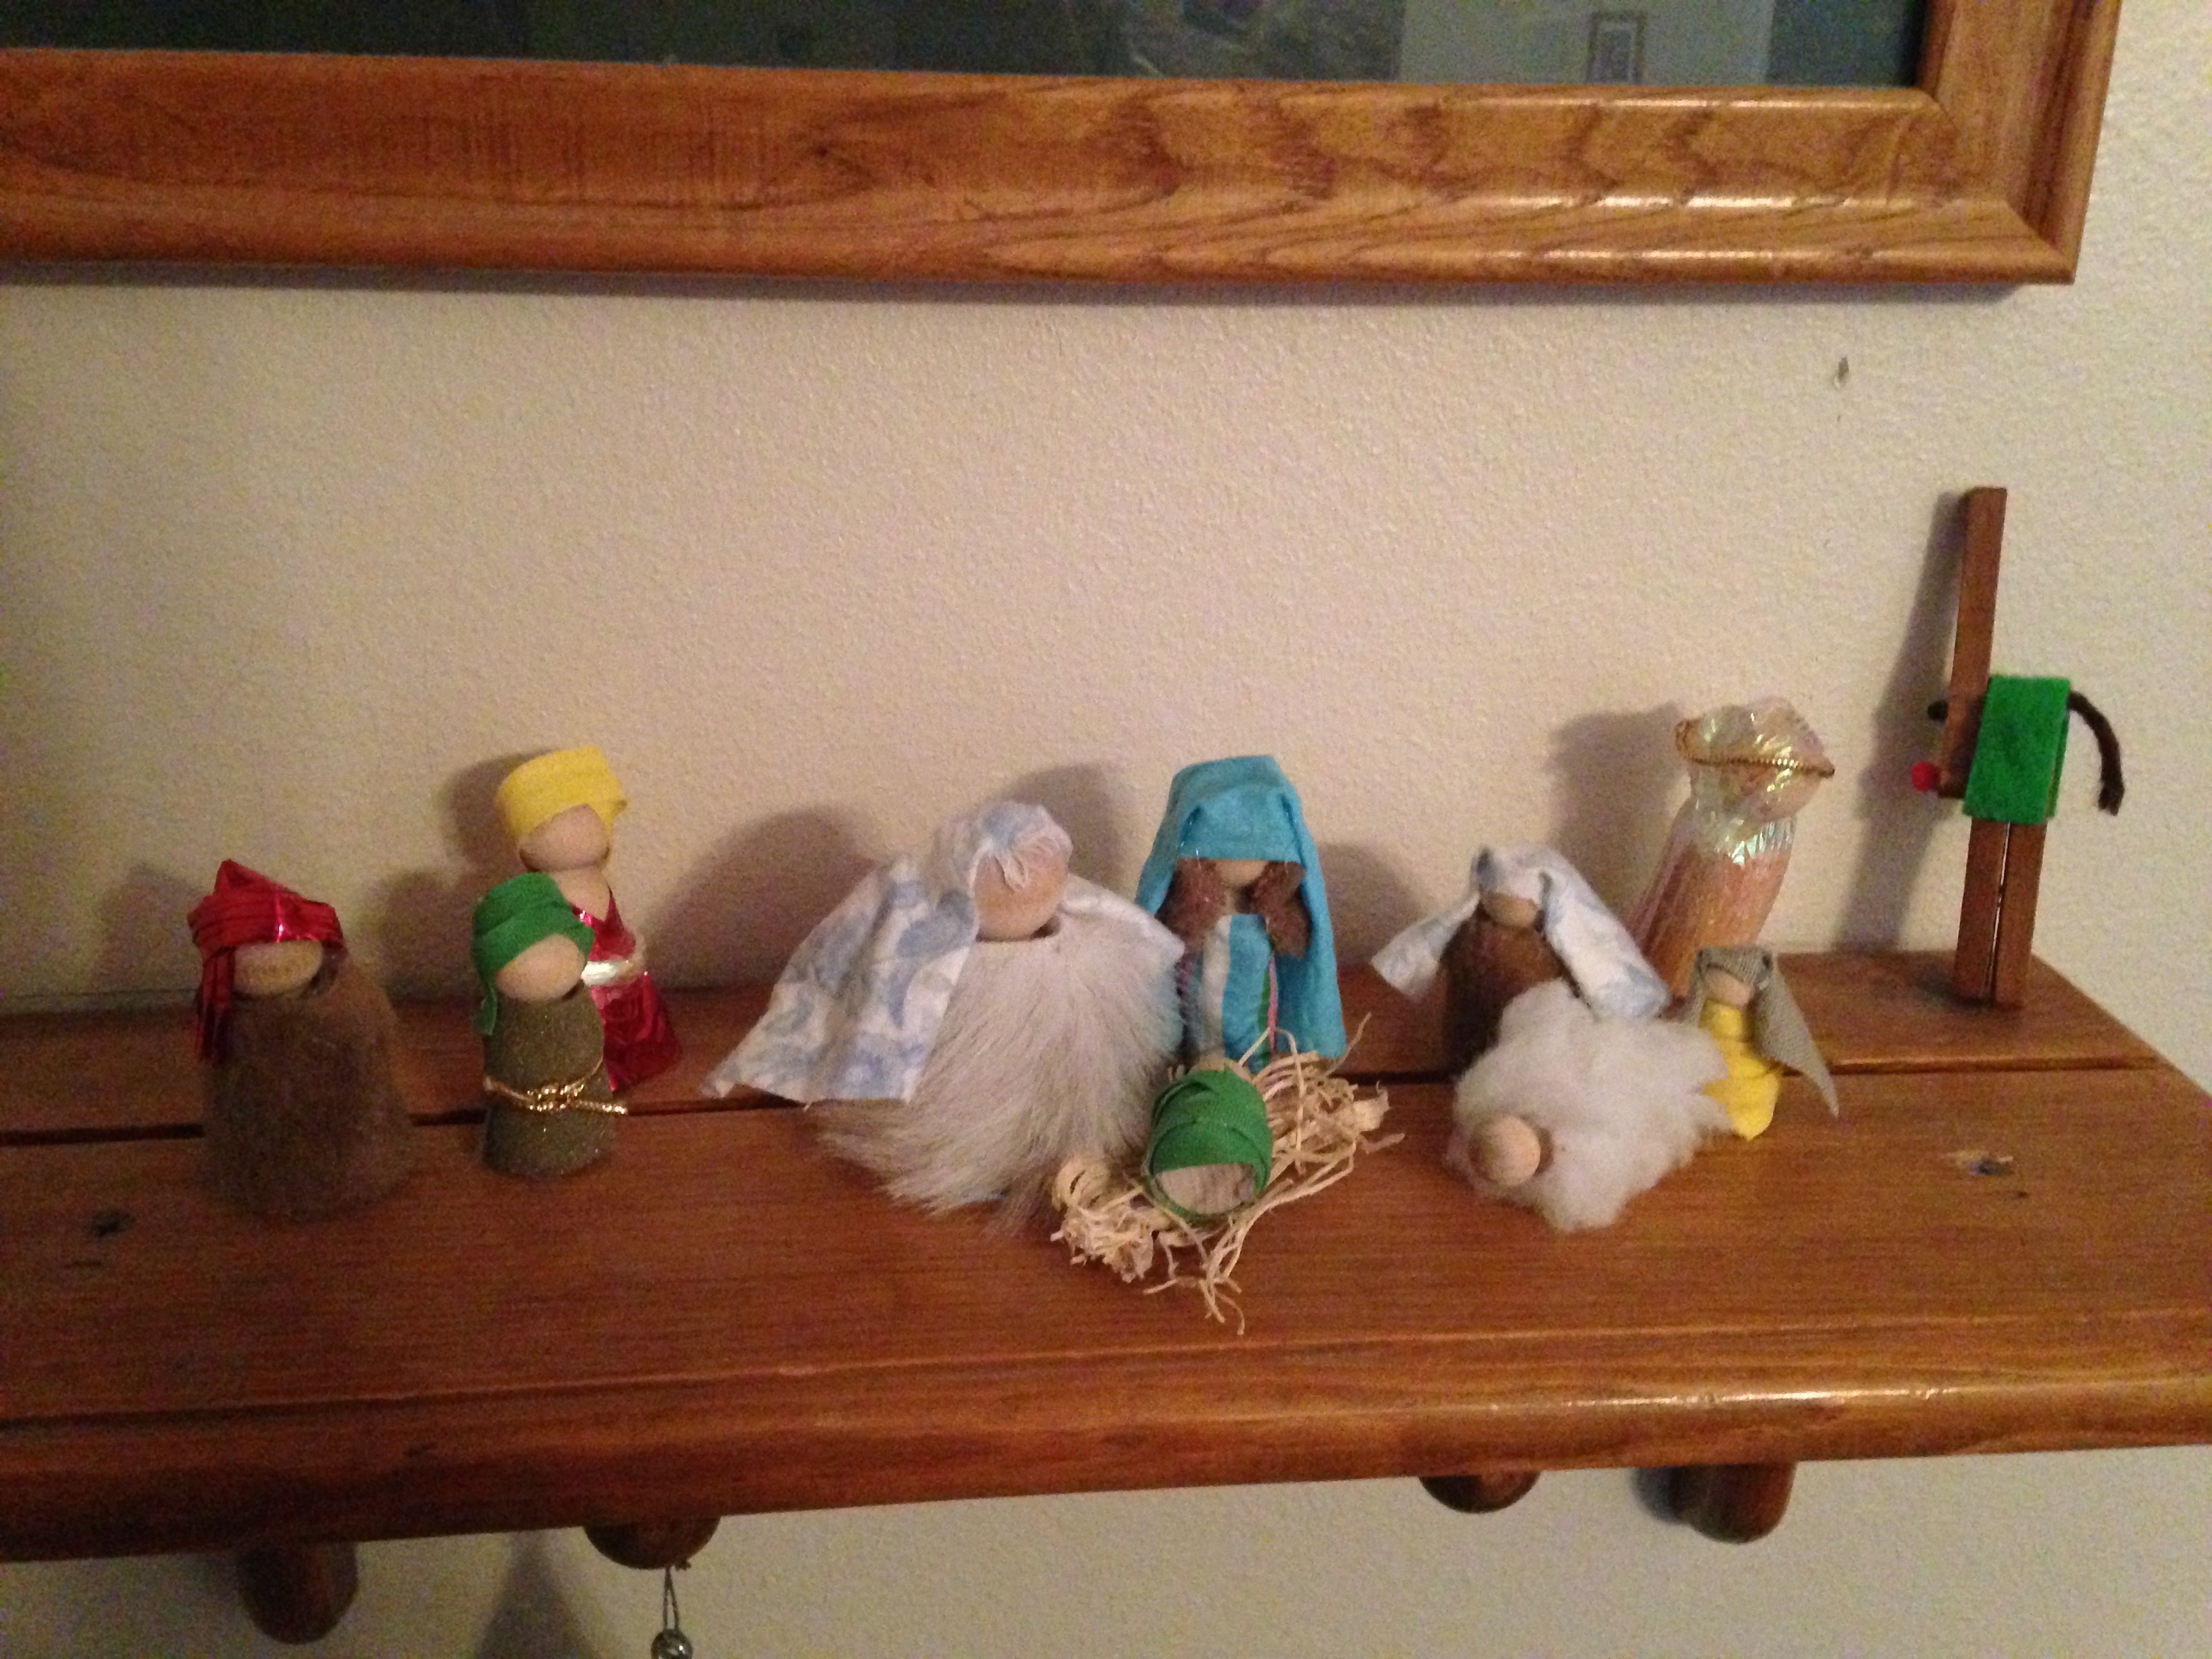
This is my four-year-old's nativity. He made all the fabric choices for his people. I helped him cut out the pieces and glue them together, but he was definitely the director.
IMG_1681
He suggested some of the most unusual combinations, and I love how it turned out.

IMG_1685
He promptly put it on the shelf by his bed.
IMG_1686
 
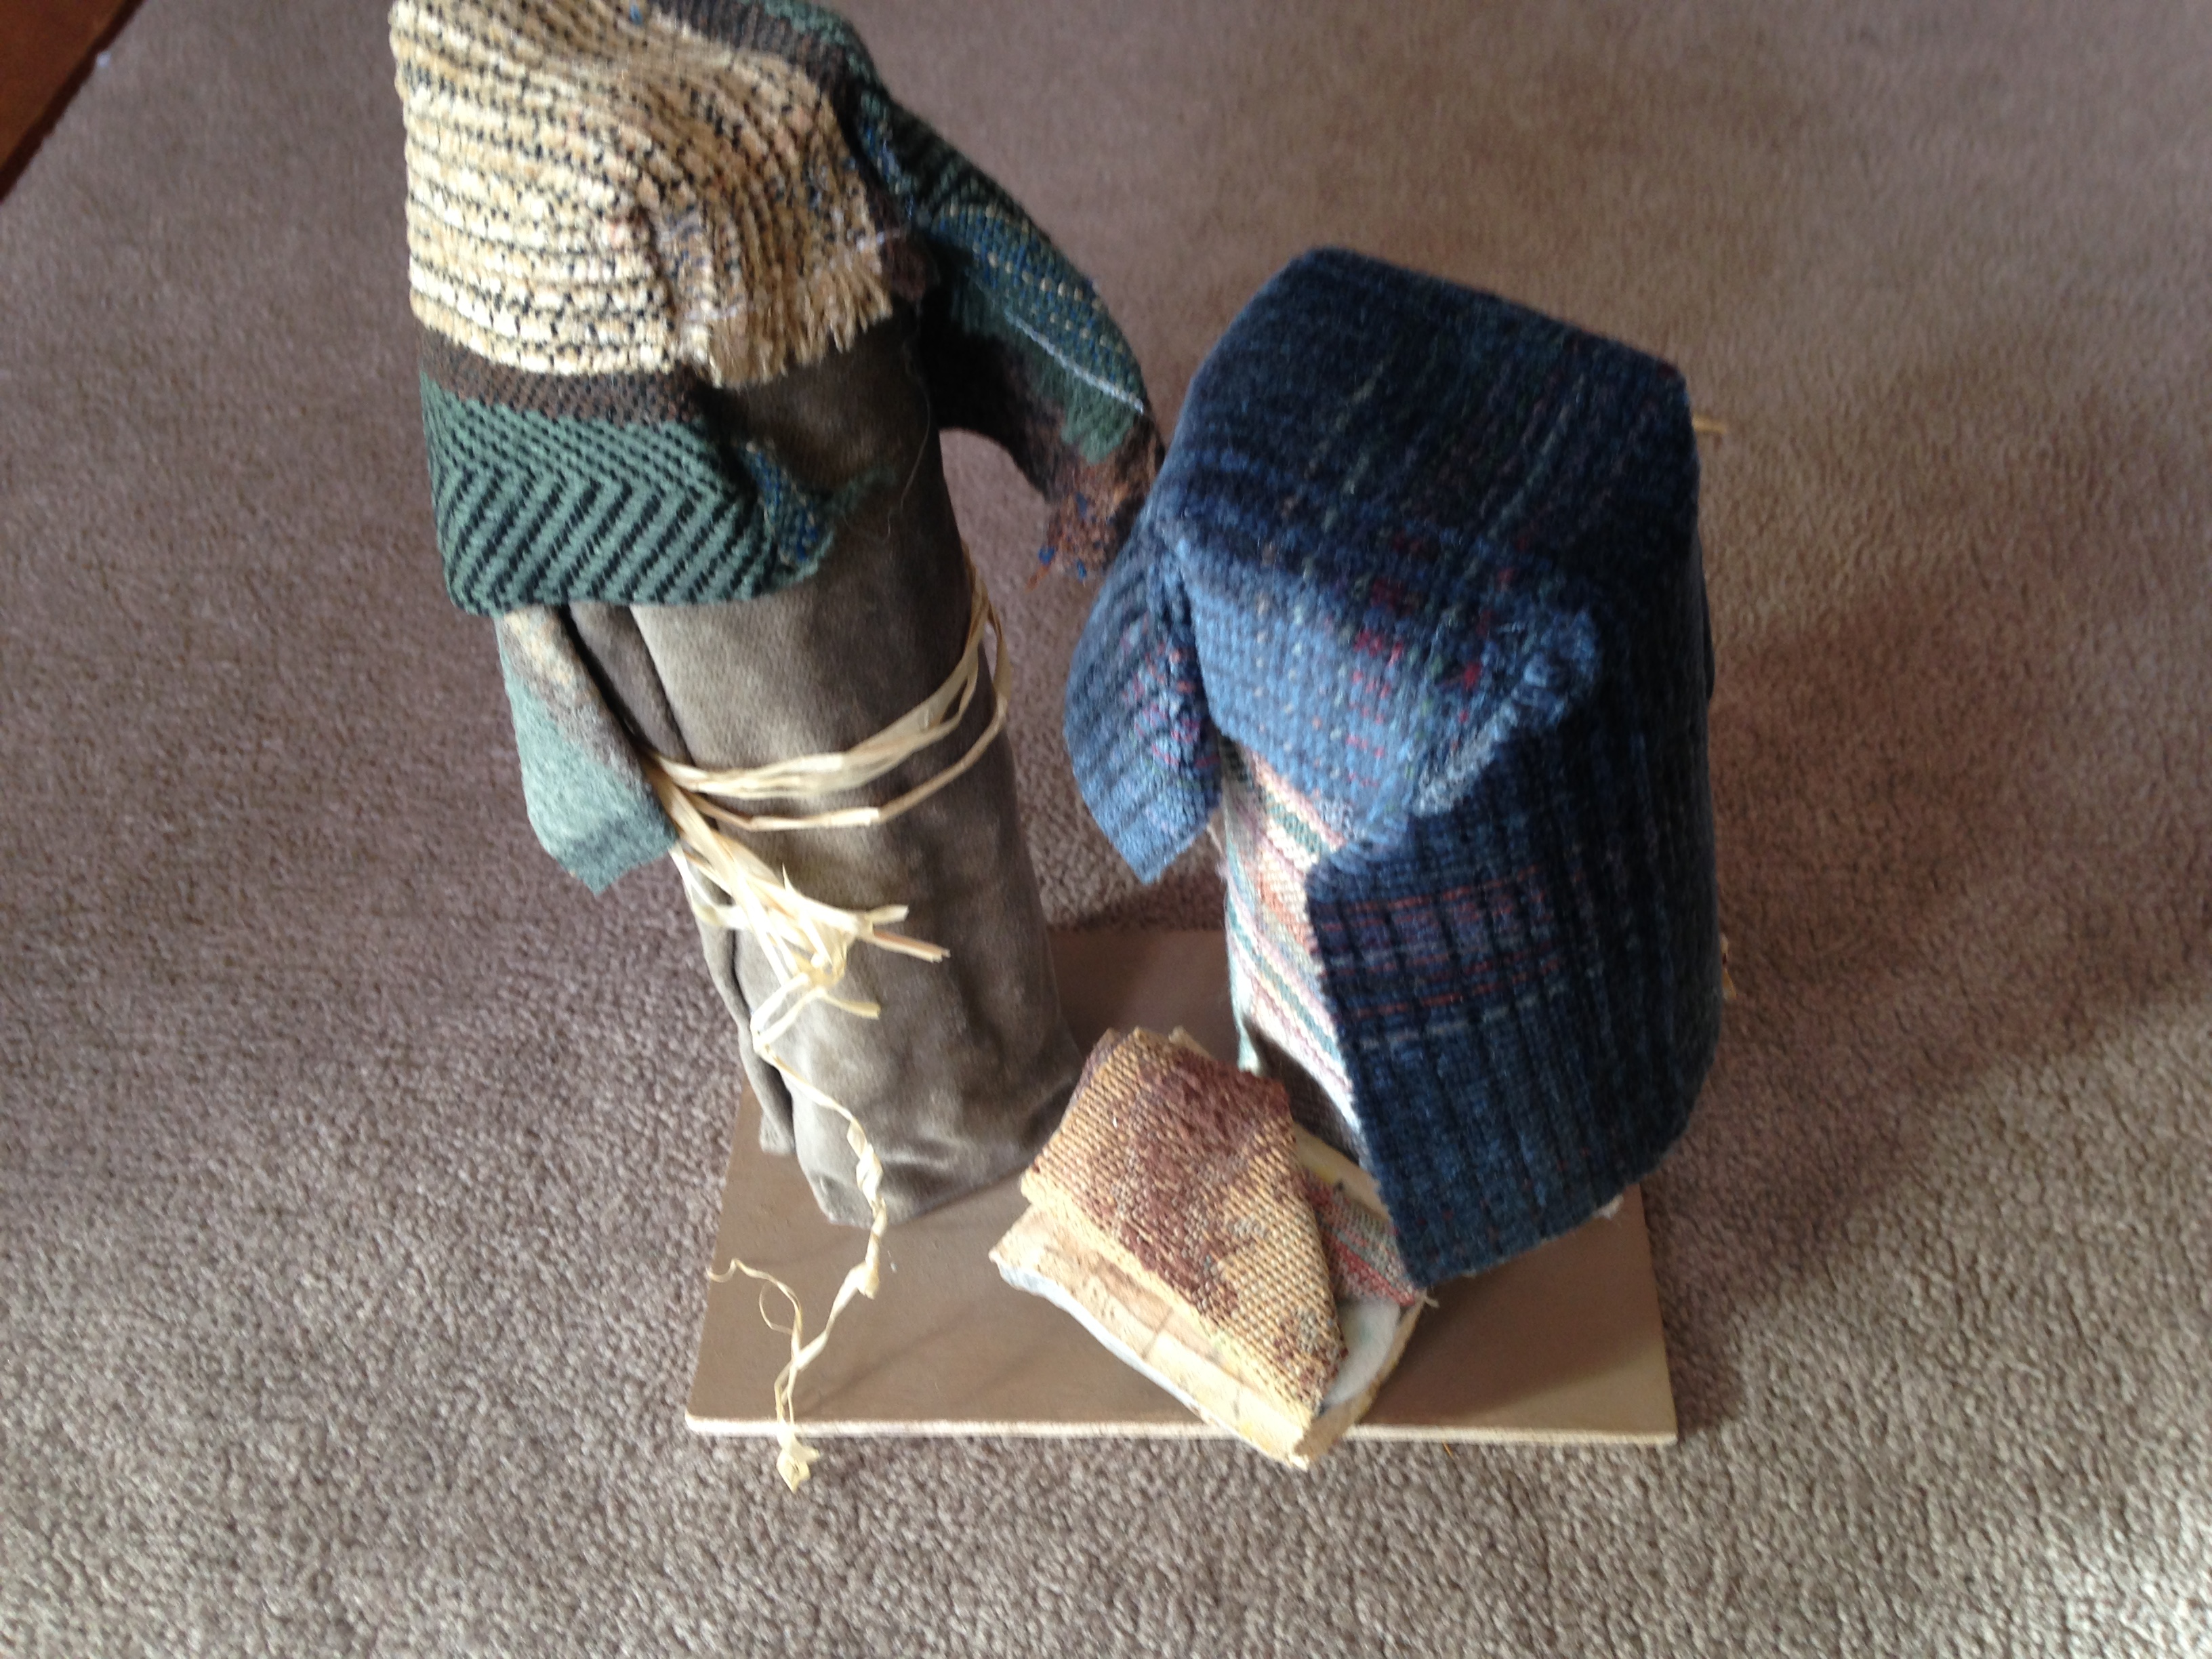
Here is my ten-year-old's on his windowsill. He said one of his wiseman took the arctic route.
Thus the fur coat and head covering.:)
IMG_1687 
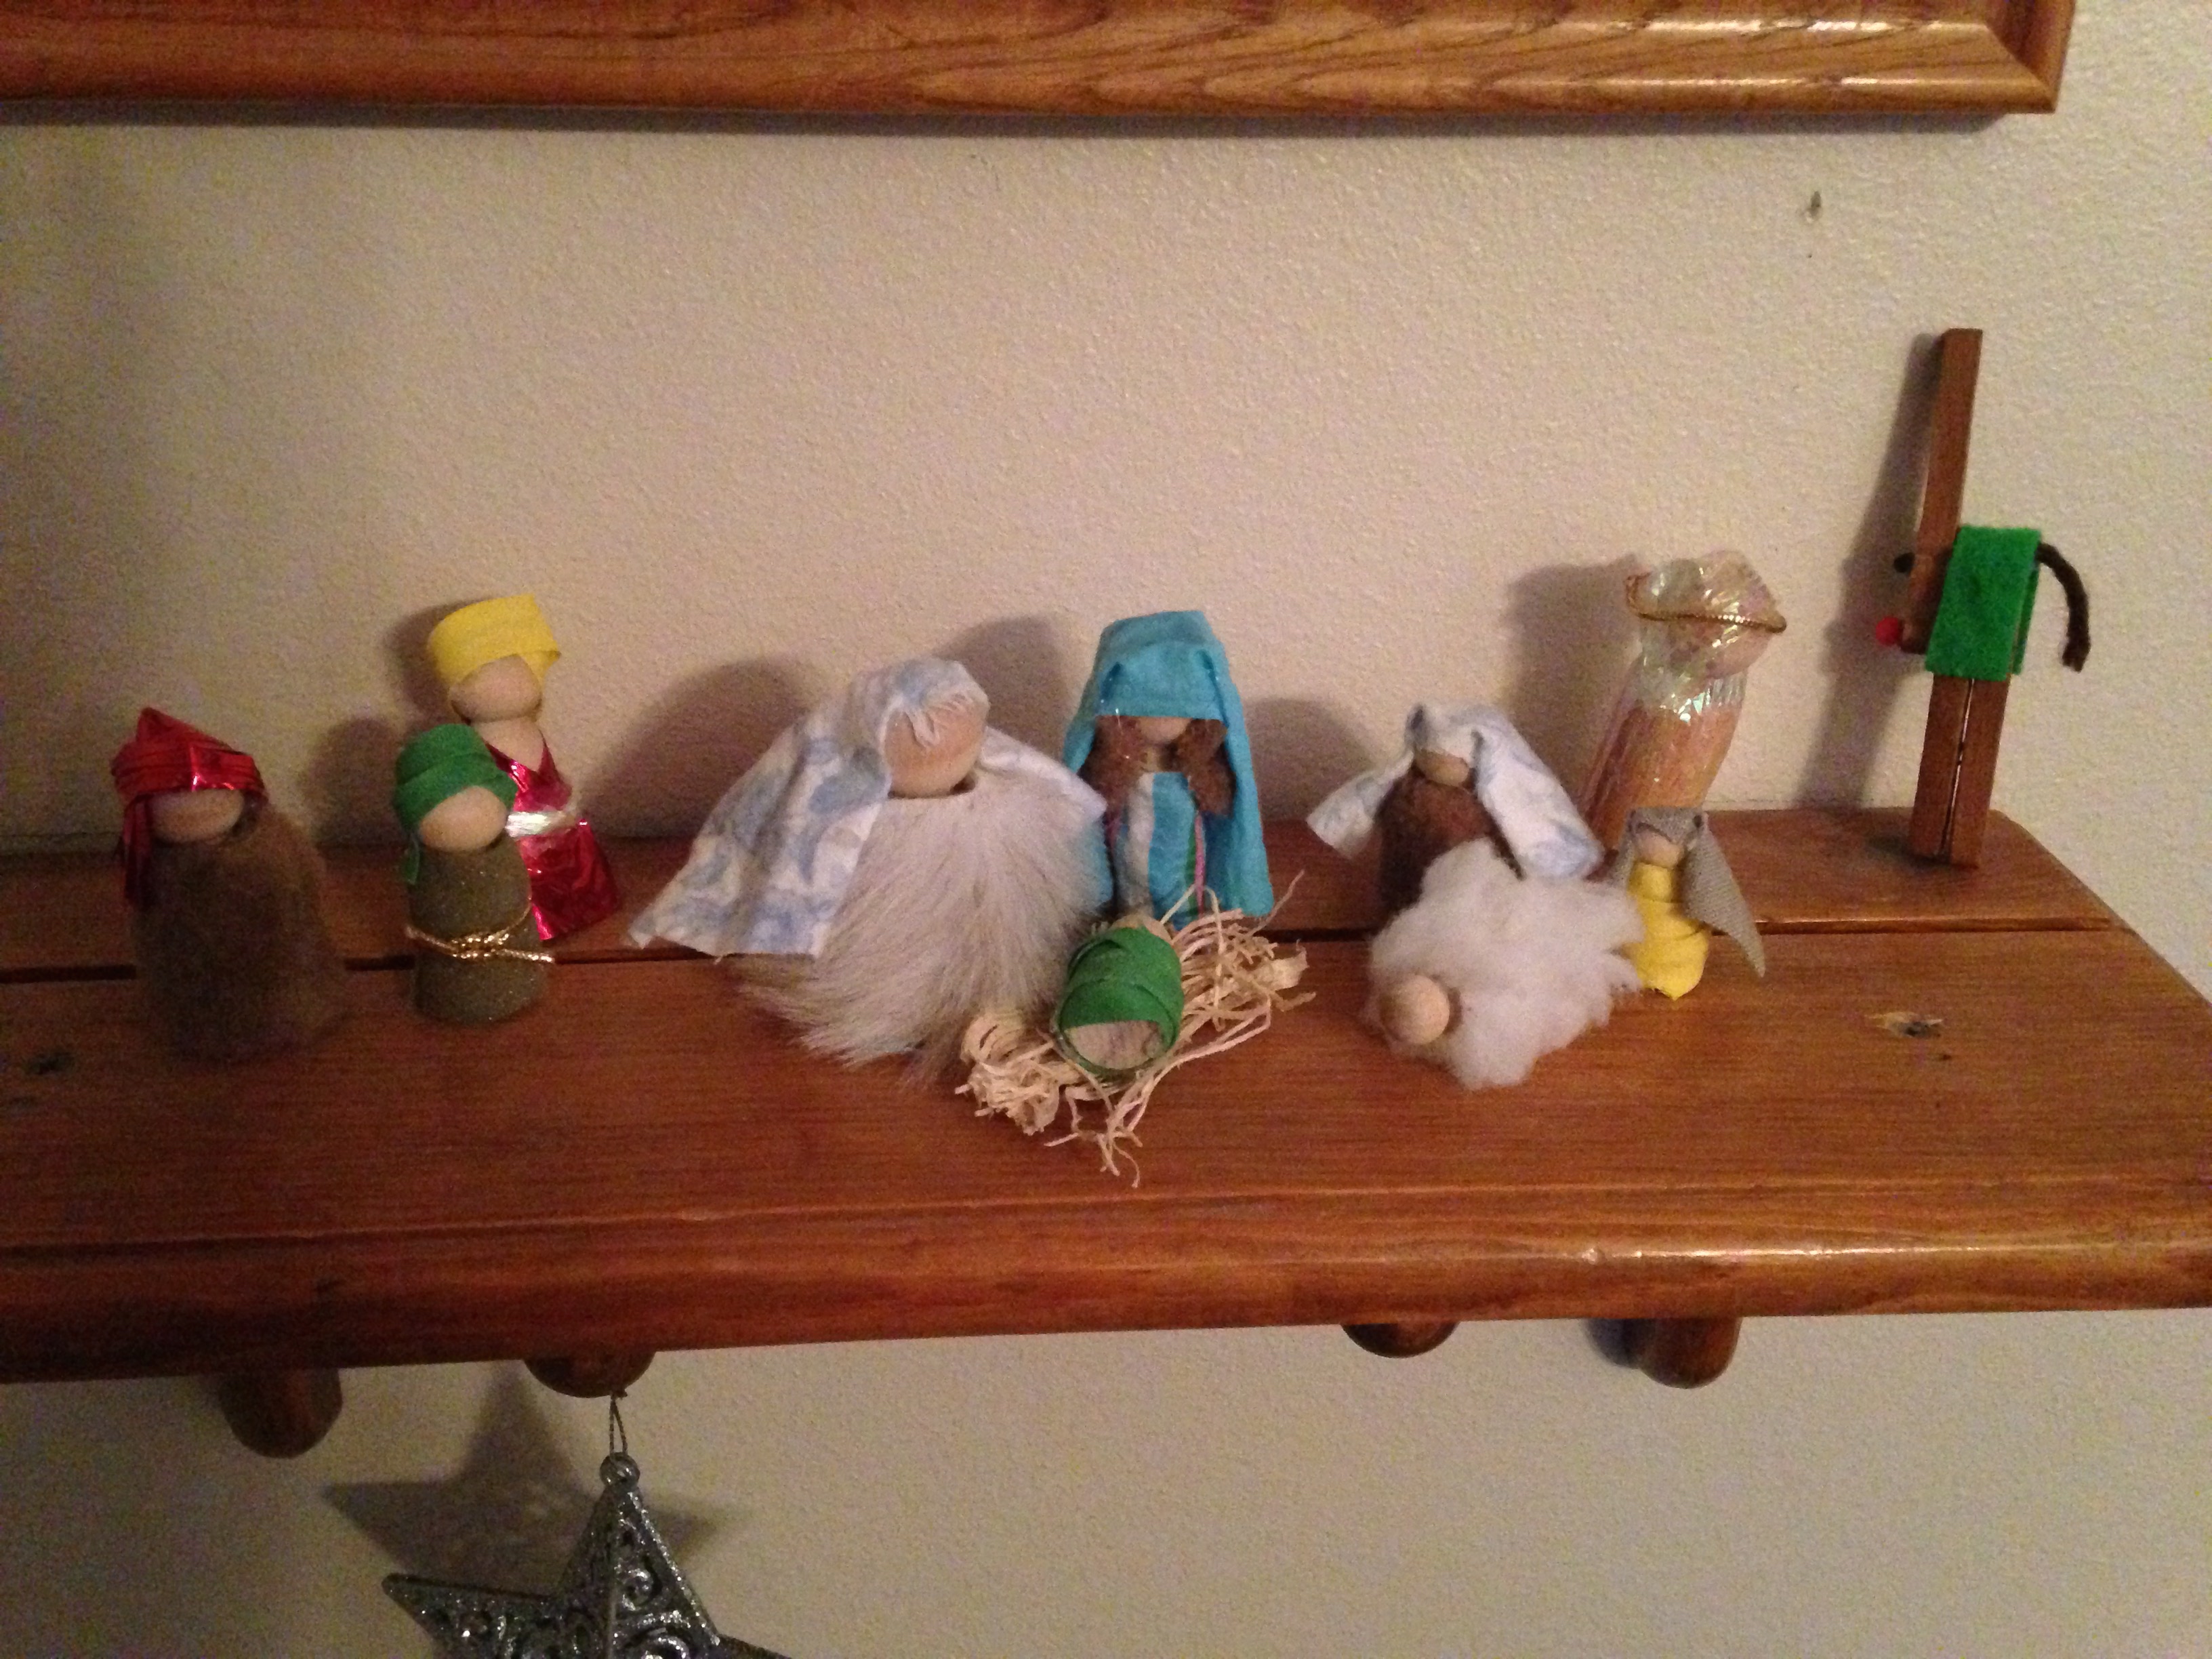
And my seven-year-old put his on this corner.
This was a super fun activity and helped refocus my children (and me!) on Christ being the reason we celebrate Christmas.

Kate is an author. Her newest release is an easy chapter book titled Lucky Midas.

Thursday, December 18, 2014

Cranberry Salad

serve
Kate's newest release is an easy chapter book for readers aged 6-8 titled Lucky Midas.
Kate here again with another recipe. Here is a fruit-filled, festive, jello salad. It can be eaten with or without the topping. Here's what you'll need:
Ingredients
The sour cream and cream cheese are for the optional topping.
jello
Mix:
6 oz. pkg. raspberry jello
1 cup boiling water
(You may have noticed a few stray walnut pieces in the 9 x 13 casserole. 
These things happen when you have little helpers.)
mix
Add, stir, and chill:
16 oz. can whole cranberry sauce
2, 8 oz. cans crushed pineapple
1 cup walnuts or pecans, chopped
3/4 cup cranberry juice 
See the whole cranberries? Make sure you get the can that says whole cranberries in sauce. Just so you know--the canned cranberry sauce without whole cranberries will work, too. I tried it once and it tasted great. But it looks so pretty with the whole cranberries, and I love all the crunch and texture in this salad.
mixed
Look how pretty that is. Cover with plastic wrap and chill in the fridge for four to five hours.
plain
It is delicious served like this, or you can make the topping.
topping
Topping:
8 oz. cream cheese, softened
1 cup sour cream
1/4 cup sugar
chopped nuts for sprinkling
Mix the softened cream cheese, sour cream, and sugar with an electric beater until smooth. (This will take at least seven minutes and likely longer if you forget to soften the cream cheese.)
spread
Spread over chilled jello salad and sprinkle with nuts. 
serve
Cut into squares, serve, and enjoy!
Cranberry Salad
Mix:
6 oz. pkg. raspberry jello
1 cup boiling water
In a 9 x 13 dish, add the following ingredients and stir:
16 oz. can whole cranberry sauce
2, 8 oz. cans crushed pineapple
1 cup walnuts or pecans, chopped
3/4 cup cranberry juice
Cover with plastic wrap and chill in the fridge for four to five hours.
Topping:
8 oz. cream cheese, softened
1 cup sour cream
1/4 cup sugar
chopped nuts for sprinkling
Mix the softened cream cheese, sour cream, and sugar with an electric beater until smooth. Spread over chilled jello salad and sprinkle with nuts.

Kate's newest release is an easy chapter book for readers aged 6-8 titled Lucky Midas.

Wednesday, December 3, 2014

Simple frame technique.

Kristie here from
I can't believe December is already here!
But it's a new month, so here I am 
with another crafty tutorial for you.
Today, I have a simple framing technique to show you.
Here's all you need
A piece of white card stock, an acrylic block and some ink.
I am using Distress Ink, because I just happen to have it close 
at hand.
Any size acrylic block will work for this technique,
I like to use the small block to make gift enclosures.
Ink up all 4 sides of the block.
Press the block onto your white card stock.
Please excuse the messy pad under my paper.
I like to use an old mouse pad to give a little cushion
when I'm stamping.  As you can see
I use this old mouse pad a lot.
When you lift up the block you will have a frame.
Depending on the type of ink you use, you will get different
looks to your frame.  I love this mottled look.
Now what to do with that frame?
As you can see I stamped a small flower in the center
of the frame with Wild Honey Distress Ink.
I measured and cut another piece of card stock
a little bigger than the frame piece.
Using a sponge applicator, I sponged the edges with
Wild Honey Distress Ink to match the flower.
I adhered the framed flower to the inked piece 
of card stock and then added them to a white
card stock base.
This will make a nice little card to go with a gift.
It's easy to give a different look to your stamped pieces
by stamping a frame for your card.
I hope you have been inspired
in some way and that you'll try this technique.
You can also reink the block with another color and
stamp over the frame again to give a multi colored look.
Or try stamping onto colored card stock.
Play with the inks you have and see what you can come 
up with.
Thanks for stopping by today,
I hope you'll stop by my blog 
and see what other things I've been up to.
You never know what you'll find on my blog.

I'd like to wish you all a very 
Merry Christmas
and a happy and healthy 
2015!

Until next month, have fun crafting!

Wednesday, November 12, 2014

Minestrone Soup

Minestrone Soup

Kate here again with another recipe. Soup is a frequent guest at our table in the fall.
serve
This is one of my family's favorites. To get started you’ll need 3 strips of bacon, chopped or …
bacongrease
if you have some bacon grease that will work just fine. The bacon grease adds the flavor we’re looking for. We don’t necessarily need the bacon.
celery
This soup requires a lot of chopping, so I do all the chopping before anything else. Dice two celery stalks.
potatoes
Peel and chop 1 potato.
carrotsncabbage
I like to send 2 carrots and 1/2 a head of cabbage through the coarse grating disc on my food processor.
sauteoniongarlic
Mince 1-2 cloves of garlic and chop 1 medium onion. Then saute in the bacon grease for 1 minute with 1/4 cup chopped fresh parsley. I’m using dried parsley today so I’ll add it later.
saute
Turn heat down to medium. Add the celery, potatoes and saute for 10 minutes. Then add carrots and cabbage and saute for another 10 minutes. (If using chopped instead of grated carrots, add with potatoes and celery.)
basil
Add 2 quarts soup stock or 2 quarts water plus 2 Tablespoons beef or chicken bouillon granules to a slow cooker. (Stovetop directions are at the end of the post.) Today I’m using bouillon cubes with water. Then add 1 teaspoon basil and 1 teaspoon salt. Here is when I add dried parsley, too.
blend
blender
Add 1 28-ounce can tomatoes. To make the tomatoes slightly blended, I use this little gadget. Next add 1 15-ounce can kidney, white, or pinto beans.
addveges
Add the vegetables to the slow cooker, stir, and cover. Cook on high for 4-5 hours or 6-8 hours on low. Add 1/2 cup noodles of your choice 1/2 hour before serving time.
bowlI love how this smells. Enjoy!
Minestrone Soup
3 slices bacon, chopped or 1-2 Tablespoons bacon grease
1-2 cloves garlic, minced
1 medium onion, chopped
1/4 cup minced parsley or 2 T. dried minced parsley
2 stalks celery, diced
2 carrots, diced or grated
1 large potato, diced
1/2 medium cabbage, finely sliced (or coarsely grated in food processor)
1 28-ounce can tomatoes, slightly blended
1 teaspoon basil
1 teaspoon salt
1 15-ounce can kidney, white, or pinto beans
2 quarts soup stock or 2 quarts water plus 2 Tablespoons beef or chicken bouillon granules
1/2 cup noodles of your choice
In a stock pot fry bacon but not until crisp. Or melt 1-2 tablespoons of bacon grease in a stock pot and add garlic, onion, parsley, celery, carrots, potato, and cabbage. Saute for 20-25 minutes, stirring often until vegetables are tender but crunchy. Add tomatoes, basil, salt, beans, and stock. Simmer for 45 minutes. Add noodles and cook for 10-12 more minutes.

Wednesday, November 5, 2014

Easy Christmas Card

Hi blog friends!
Kristie here from 
This month I have another easy Christmas card for you.
Have you started those Christmas cards yet?
If not, this is a very quick and easy card to make.
Can you guess from the supplies what it will be?
Here's what you need.
White card stock 11" x 4 1/4"
Red card stock 5 1/4" x 4"
Black card stock 5" x 1"
Silver paper 1 1/2" x 1 1/4"
White card stock 2 circles about 3/4" 
you could also use buttons rather than card stock circles.

Score your card base at 5 1/2" to form a 
5 1/2" x 4 1/4" card

Using a pencil draw a line on either side of the black
paper onto the silver paper.
This is the easiest way to know the size to cut.

Mark about 1/4" in from the each end and mark where the center of the silver piece is.
in the center, draw lines equally away from the center mark on each side as shown in the picture.

Using a craft blade and a straight edge, I like a metal ruler,
cut along the lines so you will have a piece like shown below.


Slip the black strip through the silver piece,
weaving over the center "bar"

Use tape to secure it on the back. I just used a little piece
of craft tape, you could use scotch tape or whatever is on hand.

Position the "belt" where you want it and turn the whole
piece over.

Fold the edges over to the back and secure with tape or glue.

Place the white circles (or buttons if you prefer)
 above the belt and glue them into place.
Adhere to the white card base.

You now have an adorable Santa suit Christmas card.
Now how quick and easy is that?

Thanks for stopping by today.
I hope you try making some of these quick and easy cards.
I'd love it if you'd stop over to my blog, 
 and see what I've got going on there.

See you again next month, until then
have fun crafting!