Friday, December 20, 2013

The Secrets of Gluten Free Baking and Blueberry Muffin Recipe

Today we have a fun guest post from the fabulous cookbook author, Jillayne Clements. I reviewed her marvelous new gluten-free cookbook here.  ENJOY!
 
Hi! I’m so excited to be a guest blogger on Rachelle’s website. My name is Jillayne Clements and a little over two years ago, my doctor told me that because of antibodies to gluten, I would never be able to eat gluten containing foods again. I felt heartbroken and discouraged! But because I’m a big believer in whole foods and had been eating a whole foods diet for years, I knew right off that I wouldn’t be eating the typical refined gluten-free foods made of white rice flour, tapioca and potato starches, and xanthan gum. Instinctively I felt there had to be a way to prepare gluten-free whole foods and get them to trap air bubbles and bind together like gluten containing foods. 

So taking in part what I already knew about the need for properly preparing grains before eating them—a form of pre-digestion that has existed for centuries but relatively forgotten in our day; souring and germinating—and applying it to the gluten-free world, I was determined to accomplish my goal of creating whole food gluten-free baked goods.  After many tries, I almost gave up on my goal, but I practiced around with different flour blend combinations and eventually came up with some whole food recipes that look and taste like their wheat counterparts. Plus, I discovered how to make a whole food alternative to gums that can be made at home; something I call glue flour. In a nut shell, I persisted and found a way to make gluten-free whole foods and grains bind together and trap air bubbles much like gluten, without using any refined starches or gums. And I’m SO excited to share what I have learned with others who, like me, are frustrated with the lack of fiber, nutrients, flavor, and heartiness of typical gluten-free foods and are looking for whole food gluten-free alternatives. 

Blueberry Muffins (Makes 12)
Inline image 1
Ingredients:
2 cups white beans
(sprouted and cooked)
4 eggs
¾ cup dehydrated cane sugar
1 tsp. sea salt
1 tsp. baking soda
1 tsp. vanilla
½ cup butter (melted)
2 cups oat flour
1 ½ cups frozen blueberries

In a food processor or blender, blend beans
and eggs until smooth. Add dehydrated cane
sugar, salt, soda, vanilla, and melted butter.
Pour in oat flour and mix well. Stir in frozen
blueberries until mixed together. Scoop into 24
oiled muffin tins and bake for 25 minutes at 400ºF.

Wednesday, December 18, 2013

Faux tin ornaments

Diana, Mom to the Wayward Girls, here! When the girls were young, we wanted to make December a magical and fun month for them. I collected children's Christmas stories, activities, recipes, and crafts all year long. I made a notebook for all my ideas and consulted it often. Each year, I got a big calendar on which we tracked and planned our activities. I tried to have a craft or activity plus a Christmas story each night. We kept some of our treats and crafts we made; others we gave away as service to others.

Here's one of our favorites: Faux Tin Ornaments.

Supplies-
  • Aluminum trays or pans.
  • Note: I bought a very inexpensive one that was really too thin. Try to get one trays that are heavier than heavy duty aluminum foil. Because my tray was so thin, the ornaments bent too easily when handled. This doesn't happen so easily with heavier foil. We still have many of the ornaments the girls made more than 10 years ago.
  • Cookie cutters or Christmas object shaped stencils.
  • Ball point pens, scissors, pen or nail
  • Ribbon

Find a pattern shape. You can use cookie cutters, print out shapes or freehand.


Trace shapes on the tray with a ball point pen. The ink will not show up. You can burnish out creases you may find in the tray, as I'm doing with the scissor handles here.


Cut out the shape. Lay the shape on a magazine, stack of paper, or corrugated cardboard. Use the ball point pen to draw embellishments on the ornament. (This makes the lines softer and broader.) You can draw on both sides to add texture. This will make the ornaments look embossed.

Embellishment ideas: The lines on the angel's wings, and the dots were drawn on one side of the angel, and the heart was drawn on the back.

The star has designs on both sides as well as small holes that will allow light to shine through.

If desired, an adult or older child can carefully punch holes through the ornament for a new look. You could also use permanent markers to add color to the ornament.

Finally, punch a hole for a ribbon or ornament hanger.

Wednesday, December 4, 2013

Stamping is not just for cardmaking

Hello blog fans!
Kristie here today from
I love to stamp and I wanted to tell you that
stamping isn't just for cardmaking.
Today I'm going to show you a different way to use stamps.
Stamping on fabrics is a lot of fun and easier than you might think.
There are only a few things you need
a stamp
an ink pad
something to stamp on
paints and brushes
and you are good to go.
Depending on what you are painting will determine what kind of
ink and paint you will use.
Today I'm stamping on a place mat
I am using VersaFine Ink and a mix of acrylic and fabric paints.
Just be sure if you are making something that will be going through the laundry, that you use products that are safe to wash.

First step I inked up the stamp.

Next I stamped the image onto the place mat.

Try to get as clear and crisp an image as possible.
The center of this image could have been a bit better,
but no worries, it will be just fine.

Next, using fabric and acrylic paints that I had in my crafting stash,
I began to paint the image.
You can find small bottles of acrylic paint at most general craft stores.
They are not very expensive and can be used for lots of different projects.

Here you can see that I have the leaves painted,
the black ink of the stamp still shows through,
as I have not used a great deal of paint.
You want to put the paint on with a light hand,
making sure not to put it on too thick.
You want the "outline" from the stamp to show.
Check your paint, but most paints can be thinned
 a bit with water if needed,
just be sure not to make them too thin.
Test this all on a scrap of fabric. 
The place mats I use are very inexpensive
and I bought one that I use just for testing paints and inks.
 
Here you can see that I have been working on the red areas.
I will be adding more red and silver to the ornament
to finish it.
I haven't finished this particular place mat yet,
but here is another to see what the finished one might look like.
The stamps I used for this place mat are
"Christmas Ball with Ribbon" (#12702) and
"Merry Christmas Script (#3206) both from
Eureka! Stamps and
"Icicle Ornament" (#83406) and
"Round Ornament" (#83405) both from


Thanks for stopping by today. 
Leave a comment if you will.
I hope I have inspired you in some way
 and that you will try using your stamps on some fabric projects.
Why not pop on over to my blog
and see what else I've been creating.
If you have any questions, there is an e-mail link on my blog.
Feel free to e-mail me and I'll get back to you as soon as I can.
 
Until next month, have fun creating.
 

Wednesday, November 20, 2013

High chair makeover & tips for sewing with oil cloth

Brave Brooke from Wayward Girls' Crafts here! A friend of ours gave us a high chair. I didn't love the cushion so of course what did I do? I recovered it! I chose orange with white polka dots oil cloth. I used the same techniques that I did on this tutorial. Here are some pictures.

Before


My husband said it looked like a sour patch kid. 

After- it looks a little wonky because of how she slouches when she eats


Also I wanted to add a couple tips for sewing with oil cloth:

  • Use a heavier duty needle. Size 16.
  • If you're having problems with the oilcloth sticking to your presser foot use clear tape on the underside. This can also help with sewing vinyl. 
  • Make sure you're sewing the right thing. When you make mistakes and have to pick it out it leaves holes.
  • If your oilcloth is creased I saw some suggestions to leave it in a warm room. My husband was kind enough to use my blow dryer and to warm up the pieces and convince them to flatten out.
  • Oilcloth cannot be washed so make sure you avoid leaving the backside open to get dirty from little hands. 
Here she is enjoying it (please excuse the quality of the phone picture!).


Wednesday, November 13, 2013

BBQ Meatballs

Kate here again with another recipe. This is an old standby for a quick meal at my house. The prep is very easy and it cooks fairly quickly. My second daughter always requests BBQ Meatballs for her birthday dinner. So lets get started:
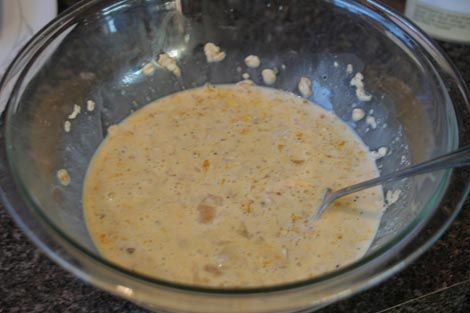
Crack 2 eggs into a bowl and add 3/4 cup oatmeal and 1 cup canned milk. Stir together and add 1 tsp. salt, 1/4 tsp. pepper, and 1 1/2 lb. hamburger.
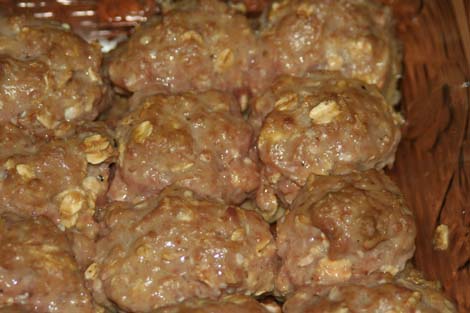
Mix altogether and form into walnut-sized balls. Place in a 9x13 casserole dish. Put in 400° oven for 10 minutes or until brown.
While the meatballs are browning mix up the sauce ingredients.
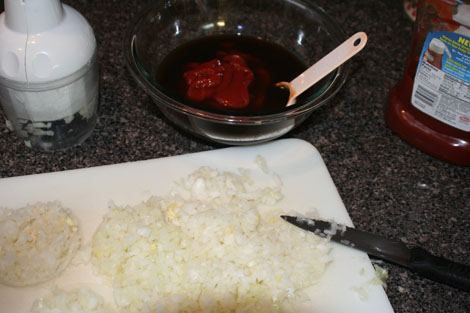
Measure 4 T. Worcestershire sauce, 2 T. sugar, 1/4 cup water, 3 T. vinegar, 1 cup catsup. Then coarsely chop an onion and green pepper.
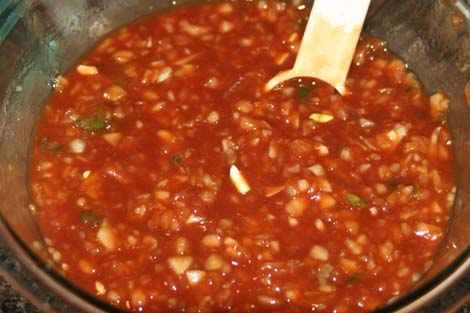
Stir altogether. I love the colors in this sauce. Yum. Pour the sauce over the browned meatballs. Turn the oven down to 350°. (If you forget like I sometimes do, and leave your oven at 400°, your meatballs won't be as tender as they should be.) So turn your oven down to 350°. Cook for 20 -30 minutes or until red disappears.
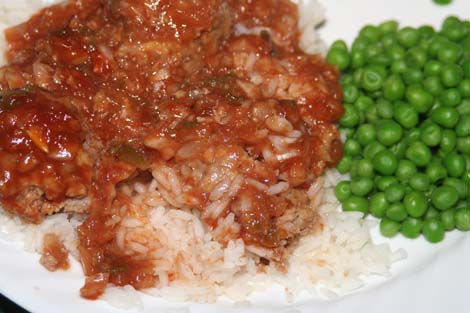
Here they are just out of the oven. Their tangy aroma makes me hungry!
Enjoy! I like to serve these over rice. My husband, not a rice lover, prefers them served over a baked potato. I hope you enjoy this quick and simple meal. If you've never bought frozen, petite peas, you must give them a try. They are the next best thing to frozen garden peas. We never have enough frozen garden peas so I have to resort to the grocery store freezer section. These are Western Family brand petite peas and are nice and sweet. My children gobble them up.

BBQ Meatballs
Meat Mixture
1 1/2 lb. hamburger
2 eggs
3/4 cup oatmeal
1 cup  canned milk (evaporated)
1 tsp. salt
1/4 tsp. pepper
Sauce:
4 T. Worcestershire sauce
2 T. sugar
1/4 cup water
3 T. vinegar
1 cup catsup
1 onion, coarsely chopped
1 green pepper, coarsely chopped (optional)
Mix meat mixture altogether.  Make into walnut-sized balls and place in casserole dish (9x13). Put in 400° oven for 10 minutes or until brown. Mix sauce and pour over meatballs. Reduce oven to 350° and cook for 20 -30 minutes or until red disappears.

Kate is the author of The Guy Next Door (LDS Romantic Suspense).

Friday, November 8, 2013

Banana Squash, Easy & Delicious


 Banana Squash--One hour to enjoy


Here's what you'll need:
2-3 Tbsp Olive oil
sea salt
Optional:
1 Tbsp real maple syrup
6 slices of bacon uncooked

Instructions:
First take your banana squash and wash the outside.

Cut in half lengthwise and scoop out seeds. (Here's where I would take my squash innards and toss them out to my chickens!) Don't remove the skin! You'll store and bake this baby with the skin on!
Use plastic wrap and securely wrap one half of the squash and put it in your fridge. You'll use this other half next week in another recipe.

Now for the half sitting on your counter. Get a large cutting board and slice up the squash just like you see in the above picture. You should have several slices about 3/4 inch thick that resemble slices of watermelon. Place this on your baking sheet. I have a Silpat that I like to use but you can cook this without. Drizzle about 2-3 Tablespoons of olive oil over the squash. Now sprinkle with a bit of sea salt. Optional is to drizzle with 1 Tbsp real maple syrup.
You can also take 6 slices of raw bacon, arrange them over the squash and cook--that's a favorite for bacon lovers!

Bake for one hour in a 350 degree oven. Serve and eat just like a slice of watermelon. Absolutely delicious, healthy, and heart-warming.
Enjoy your squash!

Wednesday, November 6, 2013

Glue Resist Background

Hello all!
Kristie from Kristie Kreates here today.
I recently learned a new technique for creating a background
and I thought I'd share it with y'all.
The "glue resist" technique is pretty easy
and a little different than any I've seen before.
Pick out a stamp that you'd like for a background and
rub a glue stick over the image.
Stamp it onto card stock.  I chose to use white.

Once it is stamped, heat it with a heating tool
or let it set for a good long time to be sure the glue is dried.

Now using a blending tool and ink,
I use Tim Holtz Distress Ink,
rub ink over the entire surface.
 
Using a baby wipe or a damp cloth rub the glue off.

Now you have a nice background to use on a card
or other project.
Be sure to clean that stamp with some
stamp cleaner or a mild soap and water.
 
If you'd like to see how I used this background,
pop over to my blog and check it out at
Thanks for stopping by today. 
 I hope you'll try this technique, it's fun and
a great way to create something a little different
for your cards and projects.
 
Until next month, have fun creating!


Tuesday, November 5, 2013

Banana Squash Hide and Seek and Squash Recipes

Do you see that sneaky squash hiding in my garden? No?
Now do you see it?
My husband had to help me get it out of the garden and I decided to get my old bathroom scale and see how much this baby weighed!


It weighed about 27 pounds! A monster banana squash!

It's a good thing that we love squash and that there are tons of yummy recipes for this tasty fall vegetable. *Remember that squash will store will for several months in a cool, dry, dark place--kind of how you store potatoes. I keep mine out in the garage with an old rug wrapped around them.
Here's part of our bountiful harvest. Now how about some recipes?
I'll be posting the very simplest way to eat banana squash next. For now, here's a link to one of my favorite soups. http://www.mashedpotatoesandcrafts.com/2012/10/sweet-meat-squash.html The nice thing with squashes is that many of them are interchangeable. Most of the large meaty squashes can be used in different recipes without affecting the taste much. I like to use banana squash if I don't have a butternut squash handy.
Considering the size of this giant, I'll be making quite a few lovely squash recipes. Can't wait to share them with you!  
Happy Fall!

Wednesday, October 16, 2013

Pumpkin carving ideas

Wayward Girls' Crafts here! The Wayward girls have a strong tradition of carving pumpkins. After lining the dining room table with newspaper, we'd all get to work gutting and carving! We've shared some of our pumpkin designs and thought we'd give you a few ideas since it's that time again!

Jasmine, Brooke and her husband carved these bad boys as an homage to Harry Potter.

 
A dementor and patronus, the three brothers, and a witch.  

Jaime and her husband are also HP fans. Here's what her husband carved. 
Photobucket
Voldy!

Jordan's son (5 at the time) designed and husband cut this cutie!


Brooke's little girl could be found playing around:


Have fun carving!