Wednesday, November 20, 2013

High chair makeover & tips for sewing with oil cloth

Brave Brooke from Wayward Girls' Crafts here! A friend of ours gave us a high chair. I didn't love the cushion so of course what did I do? I recovered it! I chose orange with white polka dots oil cloth. I used the same techniques that I did on this tutorial. Here are some pictures.

Before


My husband said it looked like a sour patch kid. 

After- it looks a little wonky because of how she slouches when she eats


Also I wanted to add a couple tips for sewing with oil cloth:

  • Use a heavier duty needle. Size 16.
  • If you're having problems with the oilcloth sticking to your presser foot use clear tape on the underside. This can also help with sewing vinyl. 
  • Make sure you're sewing the right thing. When you make mistakes and have to pick it out it leaves holes.
  • If your oilcloth is creased I saw some suggestions to leave it in a warm room. My husband was kind enough to use my blow dryer and to warm up the pieces and convince them to flatten out.
  • Oilcloth cannot be washed so make sure you avoid leaving the backside open to get dirty from little hands. 
Here she is enjoying it (please excuse the quality of the phone picture!).


Wednesday, November 13, 2013

BBQ Meatballs

Kate here again with another recipe. This is an old standby for a quick meal at my house. The prep is very easy and it cooks fairly quickly. My second daughter always requests BBQ Meatballs for her birthday dinner. So lets get started:
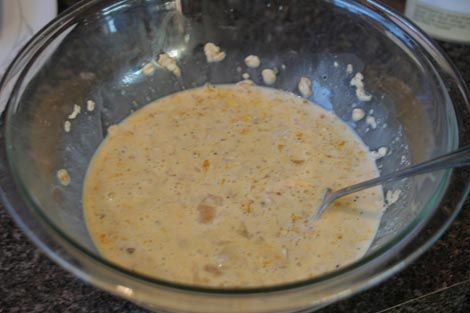
Crack 2 eggs into a bowl and add 3/4 cup oatmeal and 1 cup canned milk. Stir together and add 1 tsp. salt, 1/4 tsp. pepper, and 1 1/2 lb. hamburger.
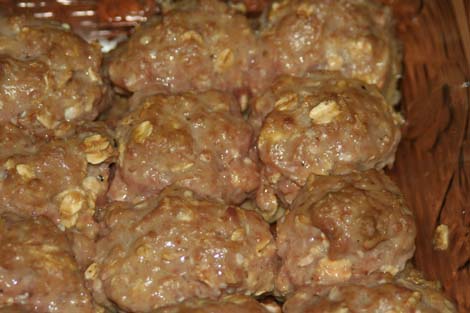
Mix altogether and form into walnut-sized balls. Place in a 9x13 casserole dish. Put in 400° oven for 10 minutes or until brown.
While the meatballs are browning mix up the sauce ingredients.
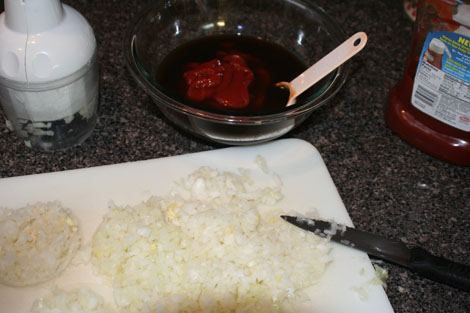
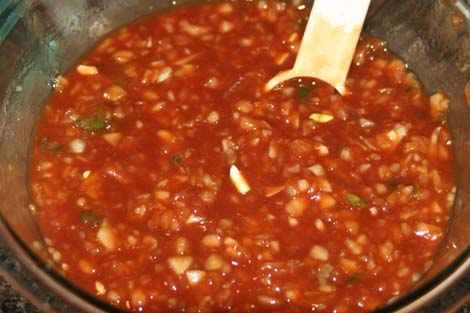
Measure 4 T. Worcestershire sauce, 2 T. sugar, 1/4 cup water, 3 T. vinegar, 1 cup catsup. Then coarsely chop an onion and green pepper.
Stir altogether. I love the colors in this sauce. Yum. Pour the sauce over the browned meatballs. Turn the oven down to 350°. (If you forget like I sometimes do, and leave your oven at 400°, your meatballs won't be as tender as they should be.) So turn your oven down to 350°. Cook for 20 -30 minutes or until red disappears.
Here they are just out of the oven. Their tangy aroma makes me hungry!
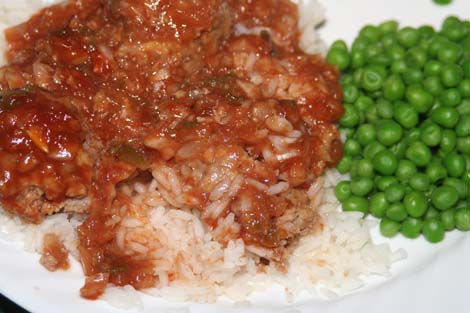
Enjoy! I like to serve these over rice. My husband, not a rice lover, prefers them served over a baked potato. I hope you enjoy this quick and simple meal. If you've never bought frozen, petite peas, you must give them a try. They are the next best thing to frozen garden peas. We never have enough frozen garden peas so I have to resort to the grocery store freezer section. These are Western Family brand petite peas and are nice and sweet. My children gobble them up.

BBQ Meatballs
Meat Mixture
1 1/2 lb. hamburger
2 eggs
3/4 cup oatmeal
1 cup  canned milk (evaporated)
1 tsp. salt
1/4 tsp. pepper
Sauce:
4 T. Worcestershire sauce
2 T. sugar
1/4 cup water
3 T. vinegar
1 cup catsup
1 onion, coarsely chopped
1 green pepper, coarsely chopped (optional)
Mix meat mixture altogether.  Make into walnut-sized balls and place in casserole dish (9x13). Put in 400° oven for 10 minutes or until brown. Mix sauce and pour over meatballs. Reduce oven to 350° and cook for 20 -30 minutes or until red disappears.

Kate is the author of The Guy Next Door (LDS Romantic Suspense).

Friday, November 8, 2013

Banana Squash, Easy & Delicious


 Banana Squash--One hour to enjoy


Here's what you'll need:
2-3 Tbsp Olive oil
sea salt
Optional:
1 Tbsp real maple syrup
6 slices of bacon uncooked

Instructions:
First take your banana squash and wash the outside.

Cut in half lengthwise and scoop out seeds. (Here's where I would take my squash innards and toss them out to my chickens!) Don't remove the skin! You'll store and bake this baby with the skin on!
Use plastic wrap and securely wrap one half of the squash and put it in your fridge. You'll use this other half next week in another recipe.

Now for the half sitting on your counter. Get a large cutting board and slice up the squash just like you see in the above picture. You should have several slices about 3/4 inch thick that resemble slices of watermelon. Place this on your baking sheet. I have a Silpat that I like to use but you can cook this without. Drizzle about 2-3 Tablespoons of olive oil over the squash. Now sprinkle with a bit of sea salt. Optional is to drizzle with 1 Tbsp real maple syrup.
You can also take 6 slices of raw bacon, arrange them over the squash and cook--that's a favorite for bacon lovers!

Bake for one hour in a 350 degree oven. Serve and eat just like a slice of watermelon. Absolutely delicious, healthy, and heart-warming.
Enjoy your squash!

Wednesday, November 6, 2013

Glue Resist Background

Hello all!
Kristie from Kristie Kreates here today.
I recently learned a new technique for creating a background
and I thought I'd share it with y'all.
The "glue resist" technique is pretty easy
and a little different than any I've seen before.
Pick out a stamp that you'd like for a background and
rub a glue stick over the image.
Stamp it onto card stock.  I chose to use white.

Once it is stamped, heat it with a heating tool
or let it set for a good long time to be sure the glue is dried.

Now using a blending tool and ink,
I use Tim Holtz Distress Ink,
rub ink over the entire surface.
 
Using a baby wipe or a damp cloth rub the glue off.

Now you have a nice background to use on a card
or other project.
Be sure to clean that stamp with some
stamp cleaner or a mild soap and water.
 
If you'd like to see how I used this background,
pop over to my blog and check it out at
Thanks for stopping by today. 
 I hope you'll try this technique, it's fun and
a great way to create something a little different
for your cards and projects.
 
Until next month, have fun creating!


Tuesday, November 5, 2013

Banana Squash Hide and Seek and Squash Recipes

Do you see that sneaky squash hiding in my garden? No?
Now do you see it?
My husband had to help me get it out of the garden and I decided to get my old bathroom scale and see how much this baby weighed!


It weighed about 27 pounds! A monster banana squash!

It's a good thing that we love squash and that there are tons of yummy recipes for this tasty fall vegetable. *Remember that squash will store will for several months in a cool, dry, dark place--kind of how you store potatoes. I keep mine out in the garage with an old rug wrapped around them.
Here's part of our bountiful harvest. Now how about some recipes?
I'll be posting the very simplest way to eat banana squash next. For now, here's a link to one of my favorite soups. http://www.mashedpotatoesandcrafts.com/2012/10/sweet-meat-squash.html The nice thing with squashes is that many of them are interchangeable. Most of the large meaty squashes can be used in different recipes without affecting the taste much. I like to use banana squash if I don't have a butternut squash handy.
Considering the size of this giant, I'll be making quite a few lovely squash recipes. Can't wait to share them with you!  
Happy Fall!